keyboard
Infinity Keyboard: Building My Own Mechanical Keyboard
I’ve written a lot about mechanical keyboards in the past, but beyond user experience, I’ve never really had any other type of interaction with a keyboard. When I saw the Infinity Keyboard Kit for sale on Massdrop, I was enticed by the prospect of a keyboard with aspects that I could customize, but more importantly, the opportunity to build my own keyboard.
When I first purchased the kit, it was somewhat intimidating. As a software developer, any task remotely related to electrical engineering is a strange and scary one, but I figured I’d give it a shot anyways.
Choosing the Keyboard
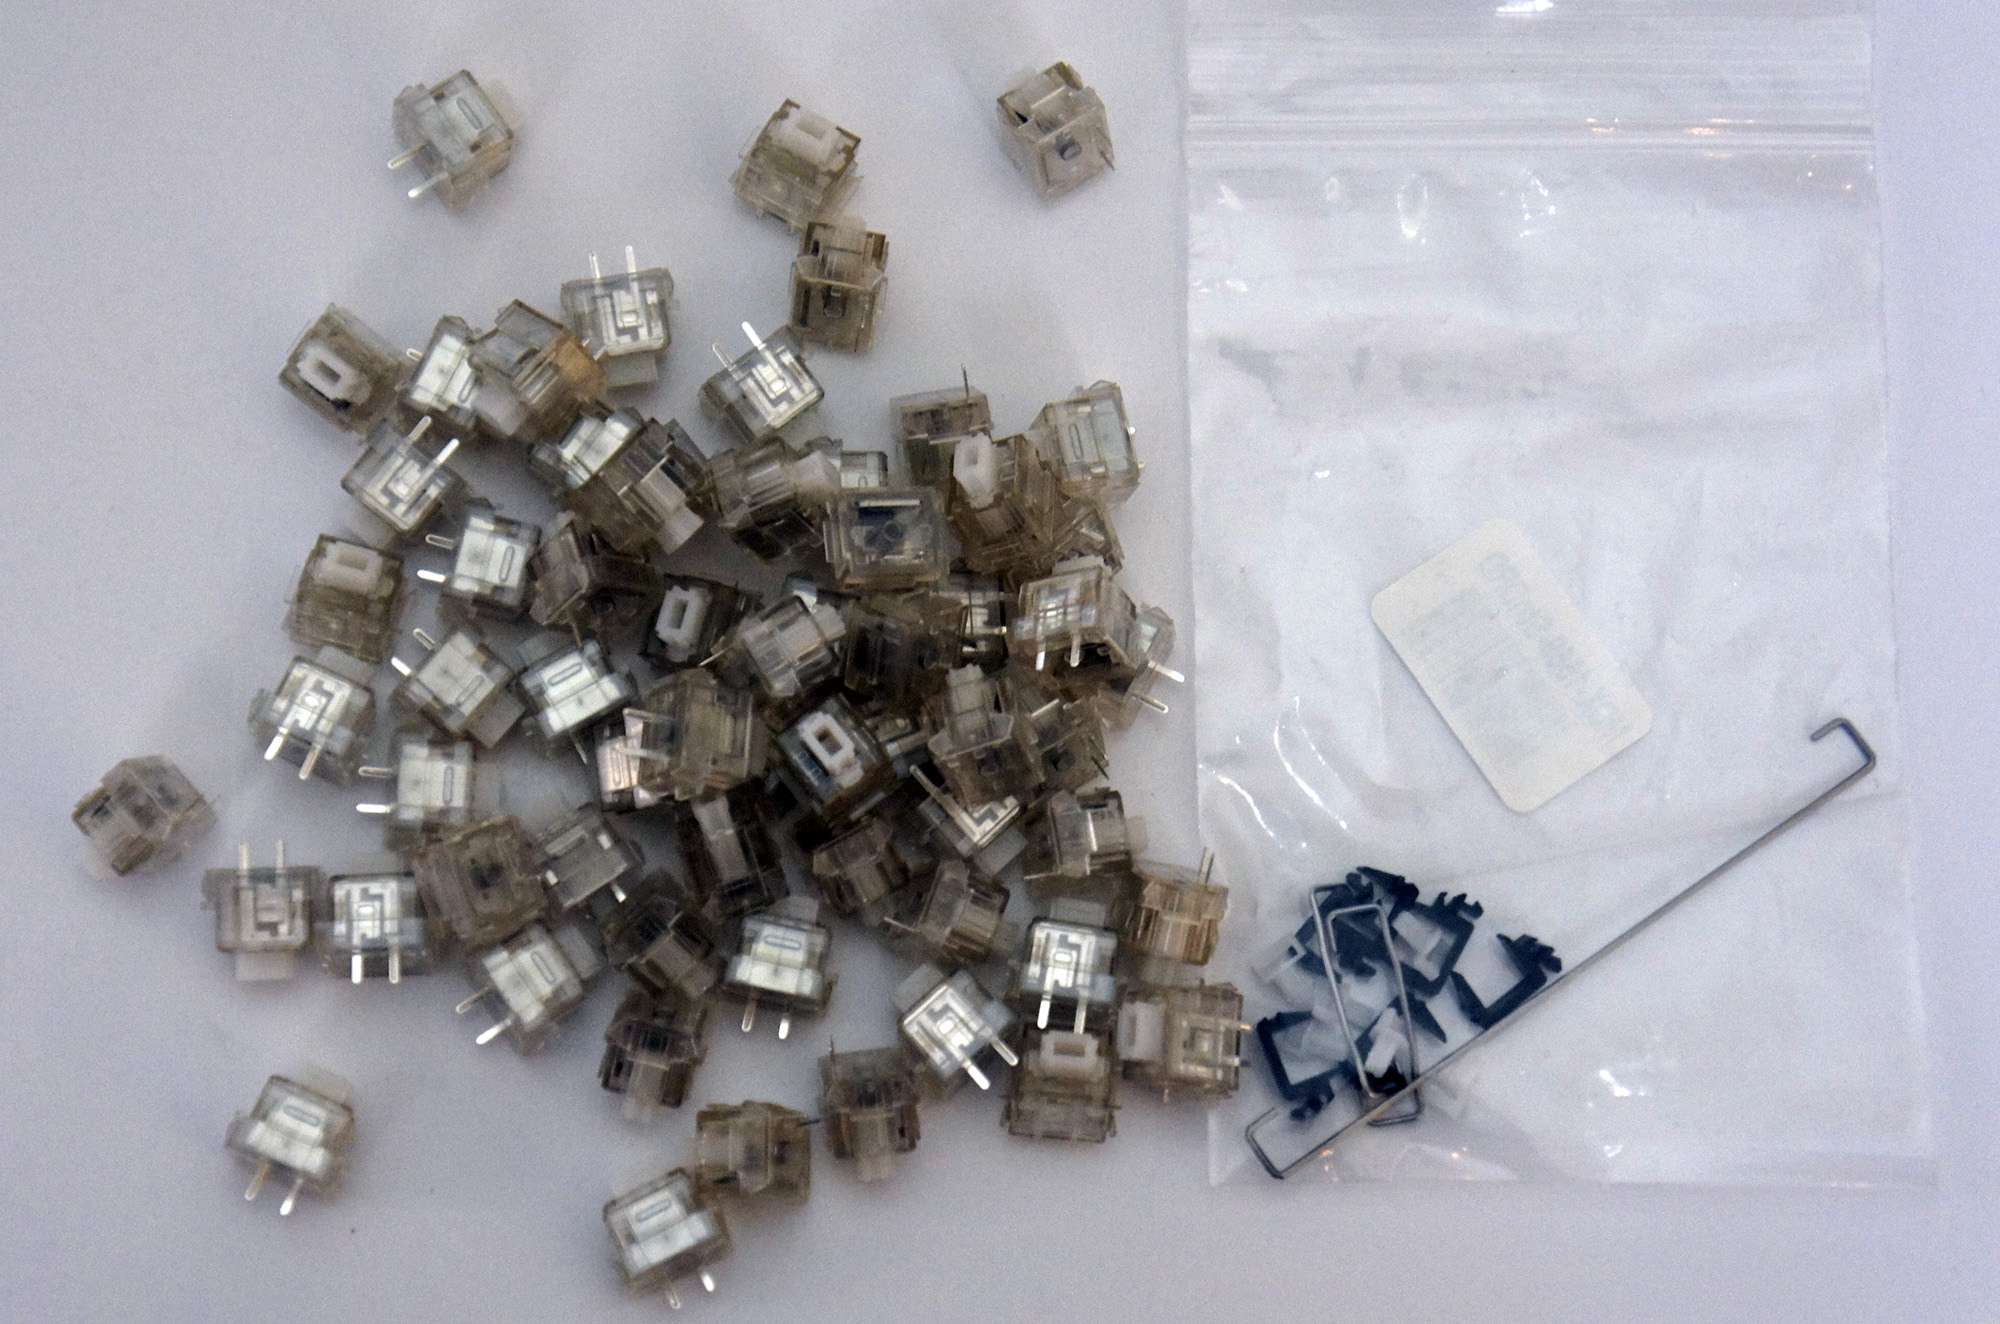
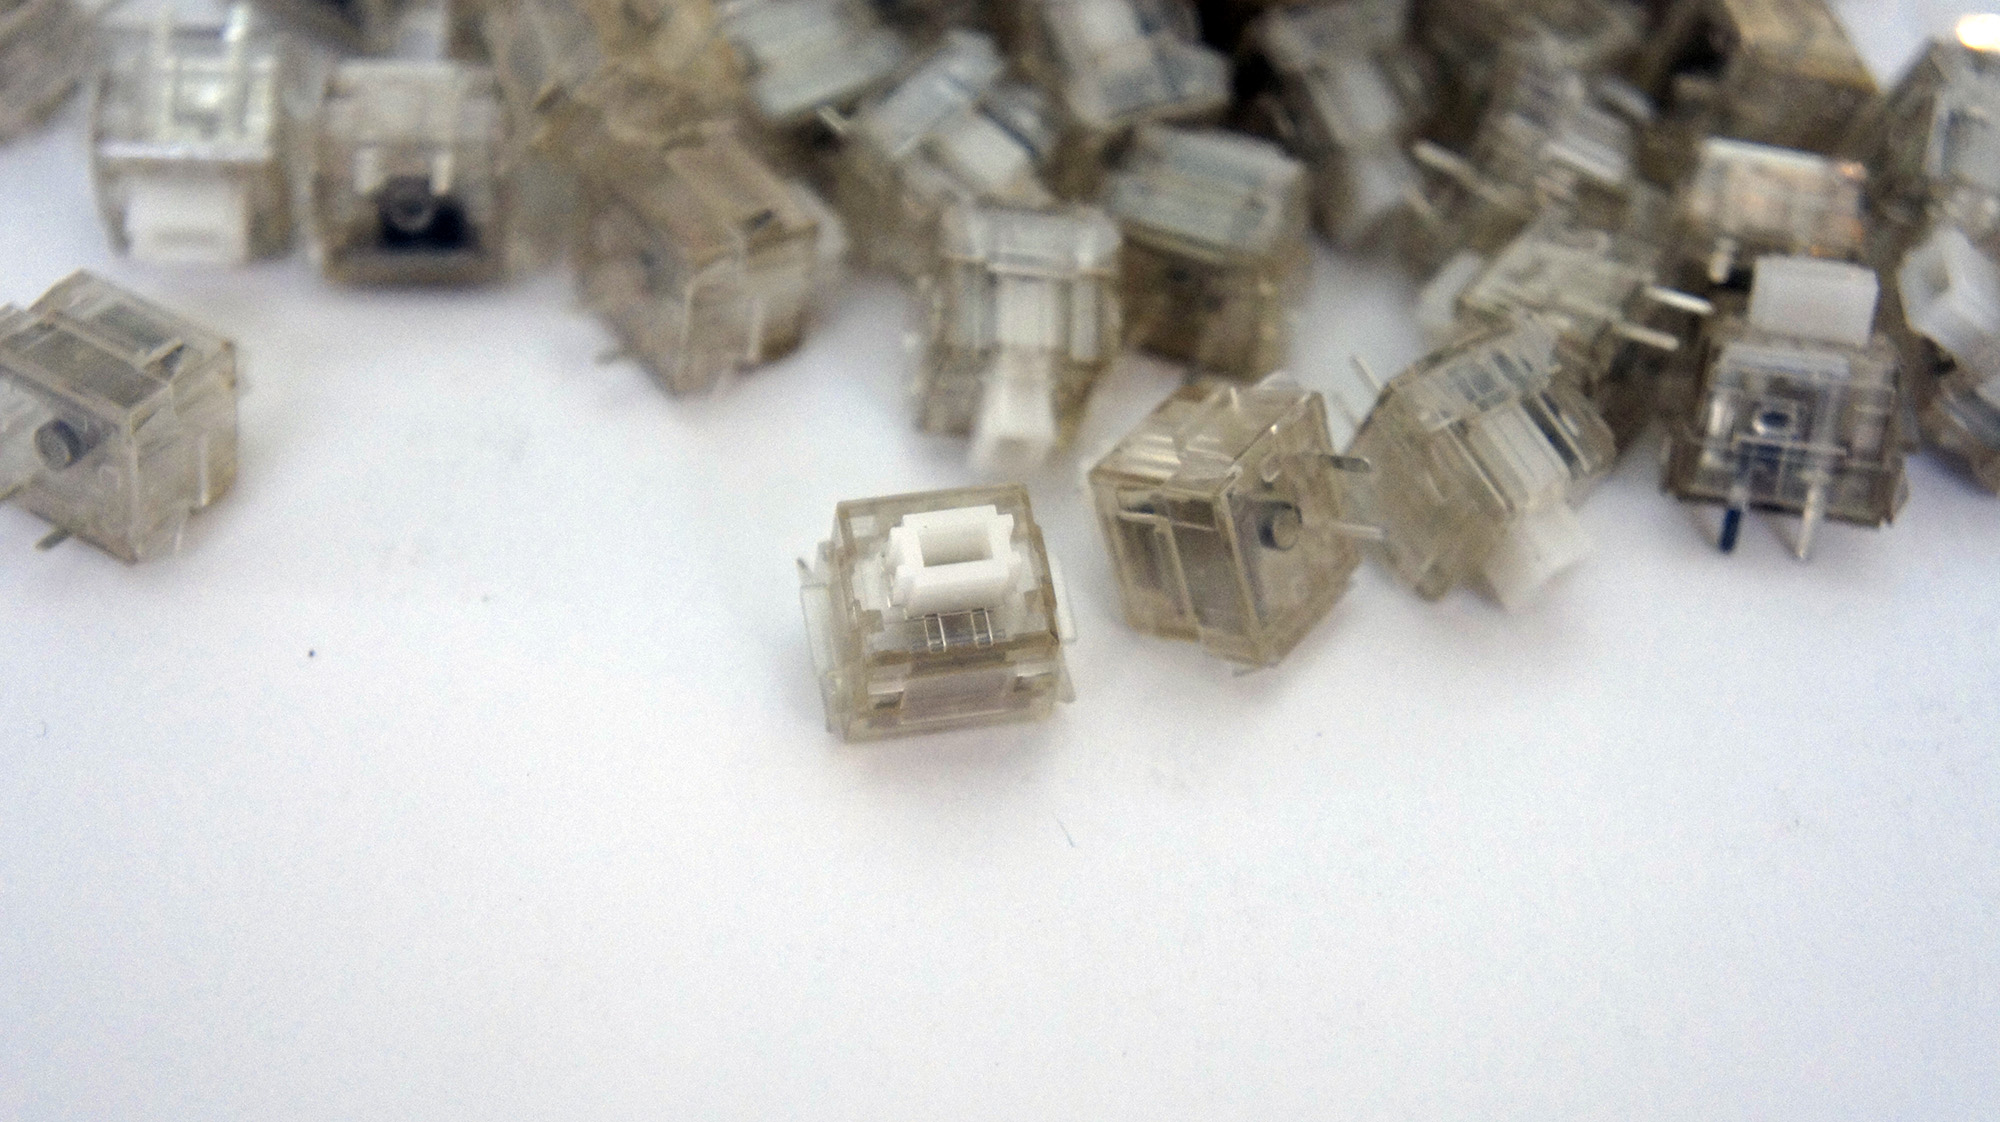
I ordered the kit with Matias Alps Clicky key switches, as I’m a huge fan of Cherry MX Green switches and thought the Alps switches might provide a similar but new experience.
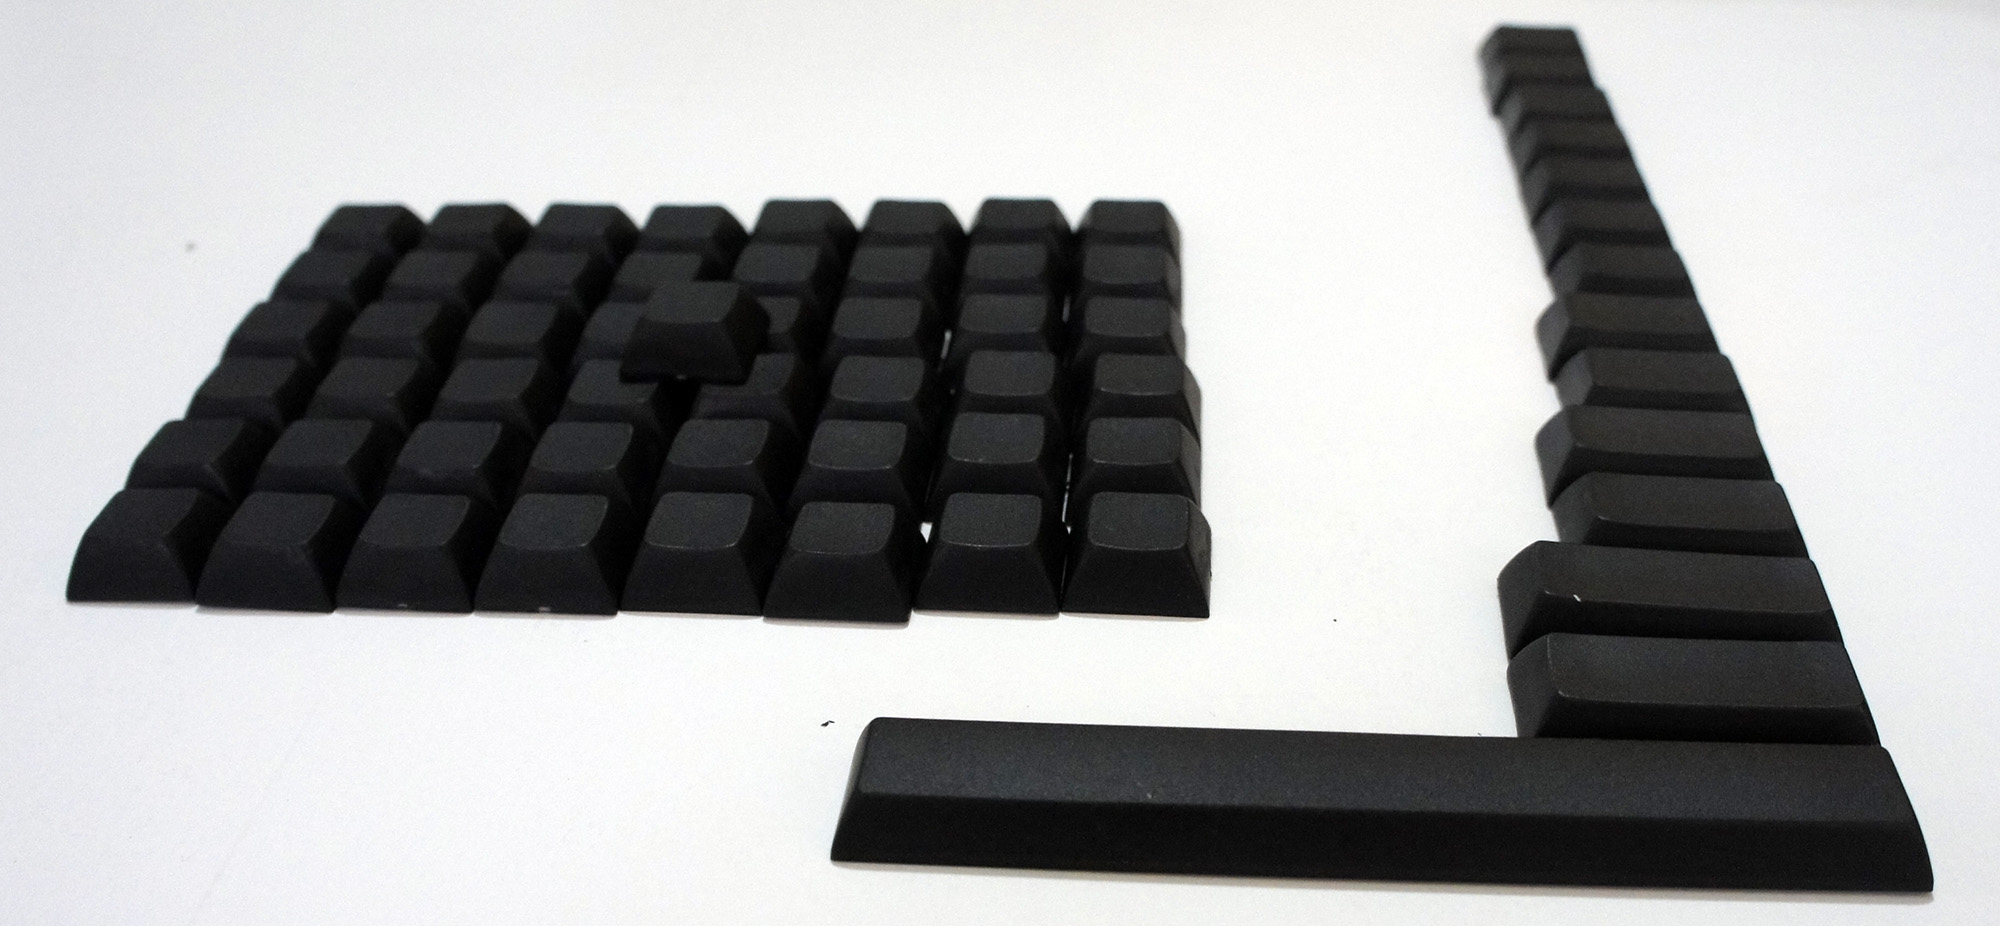
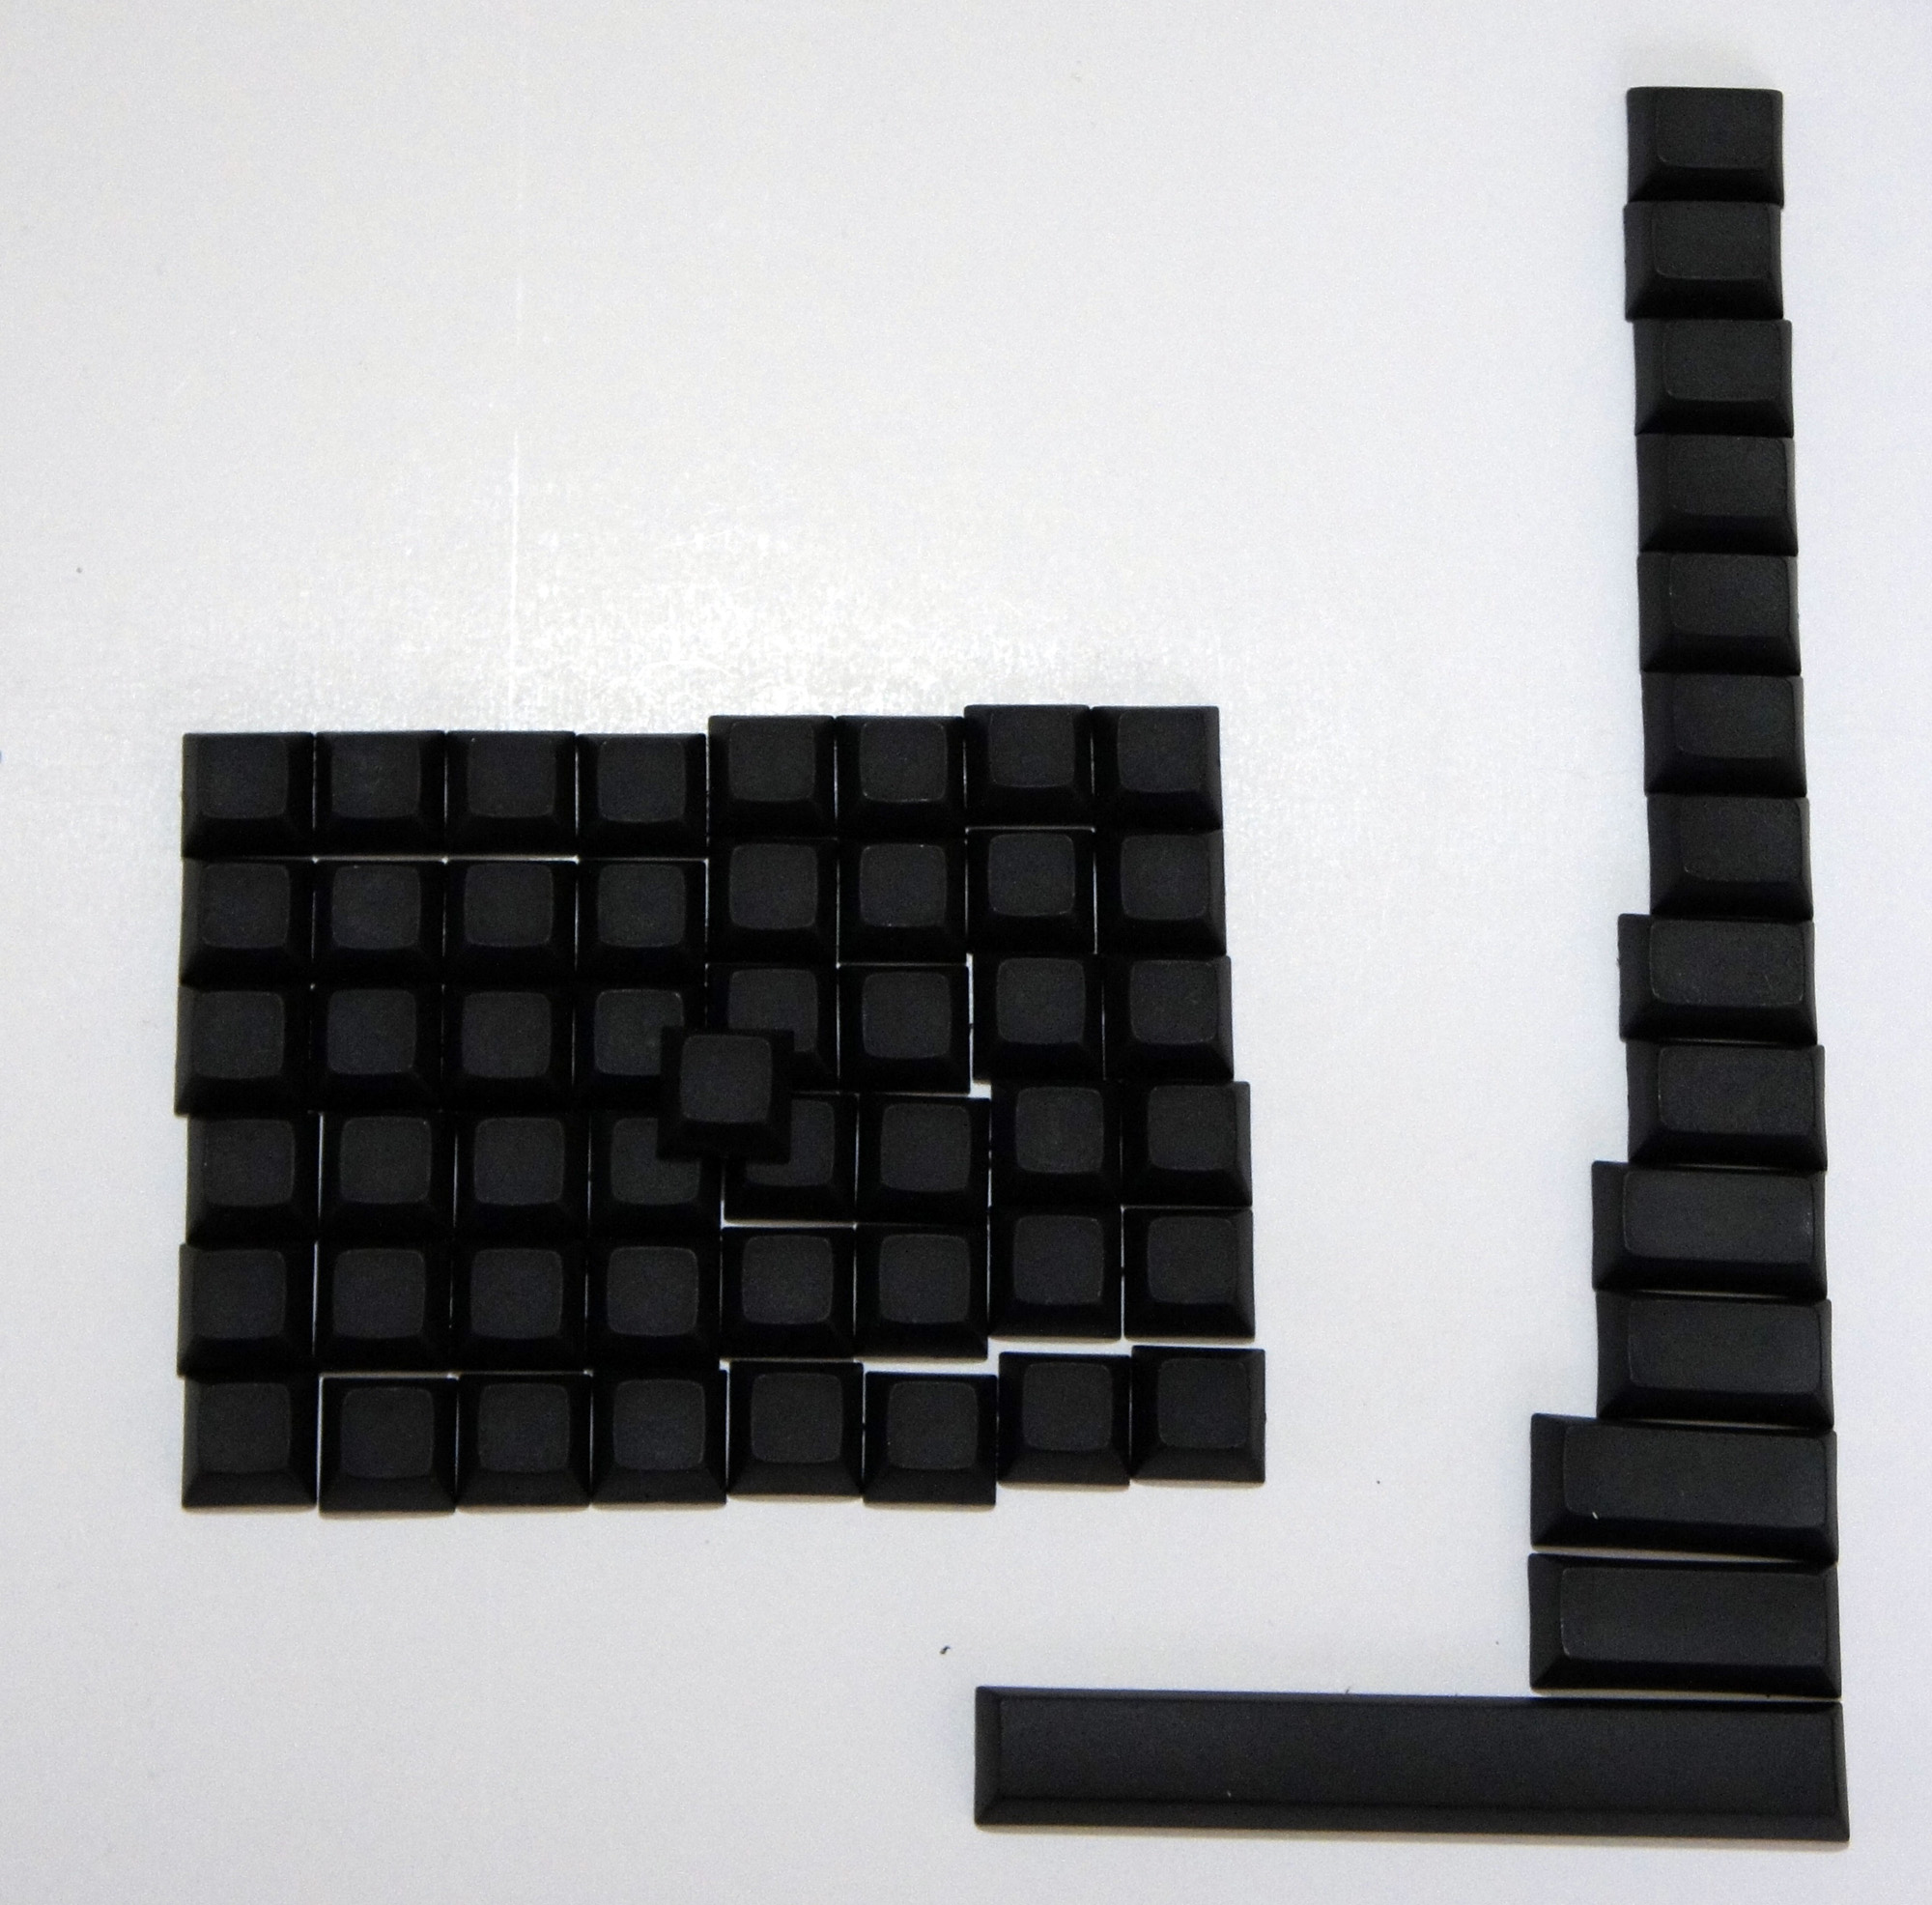
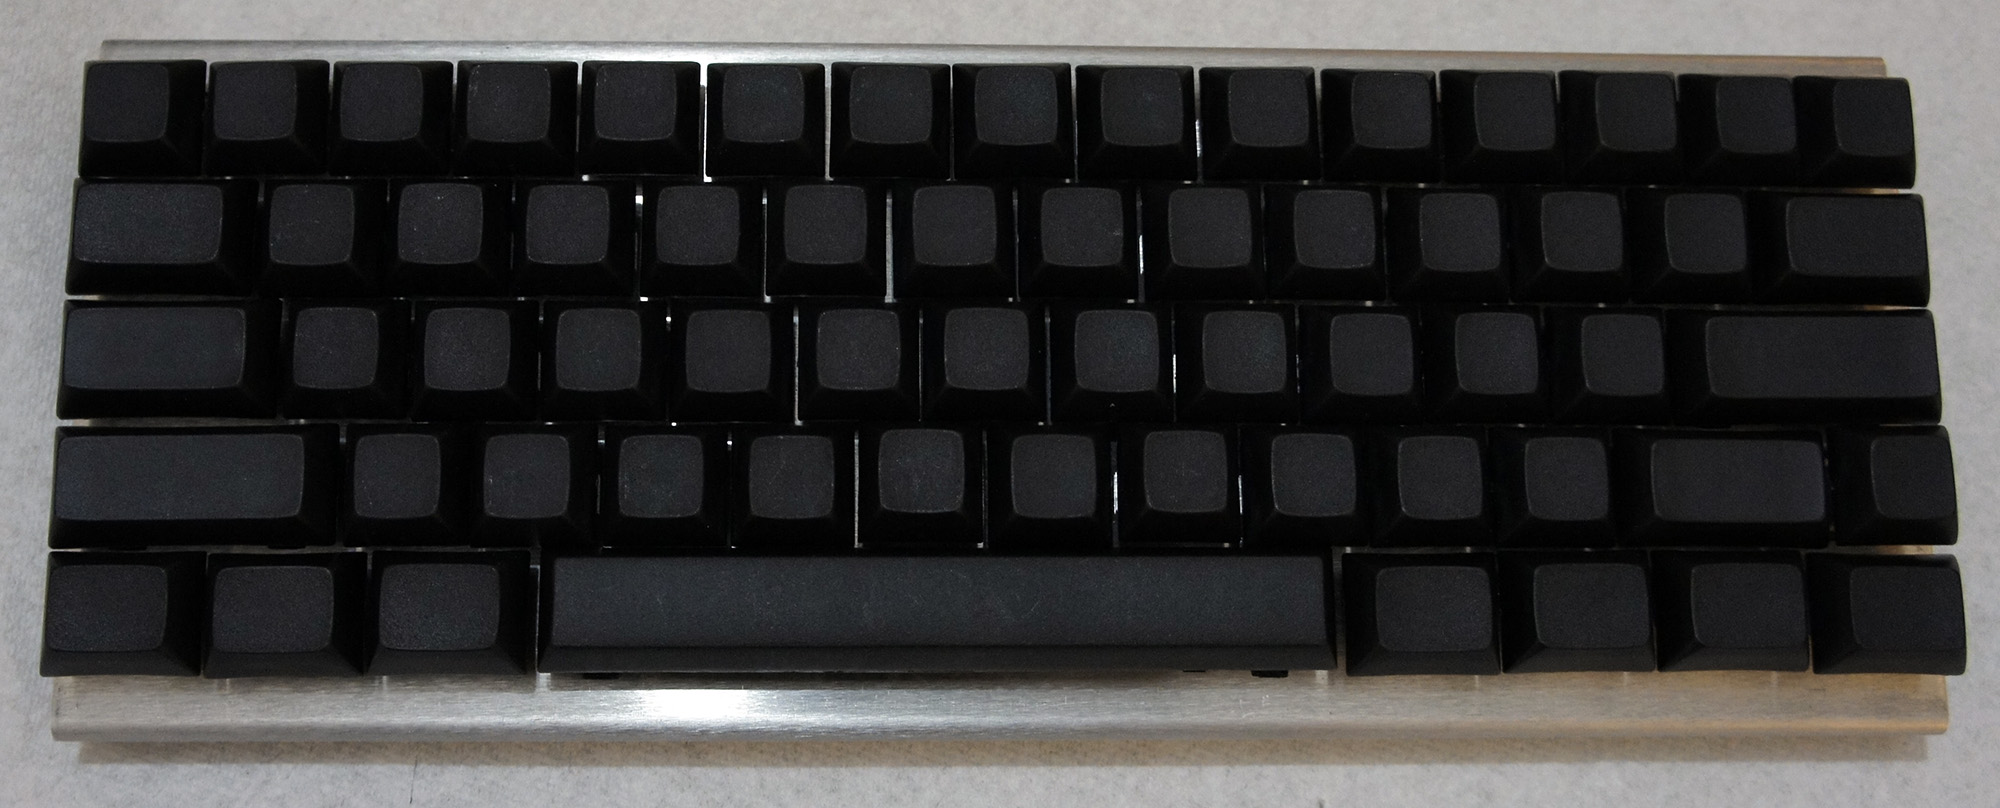
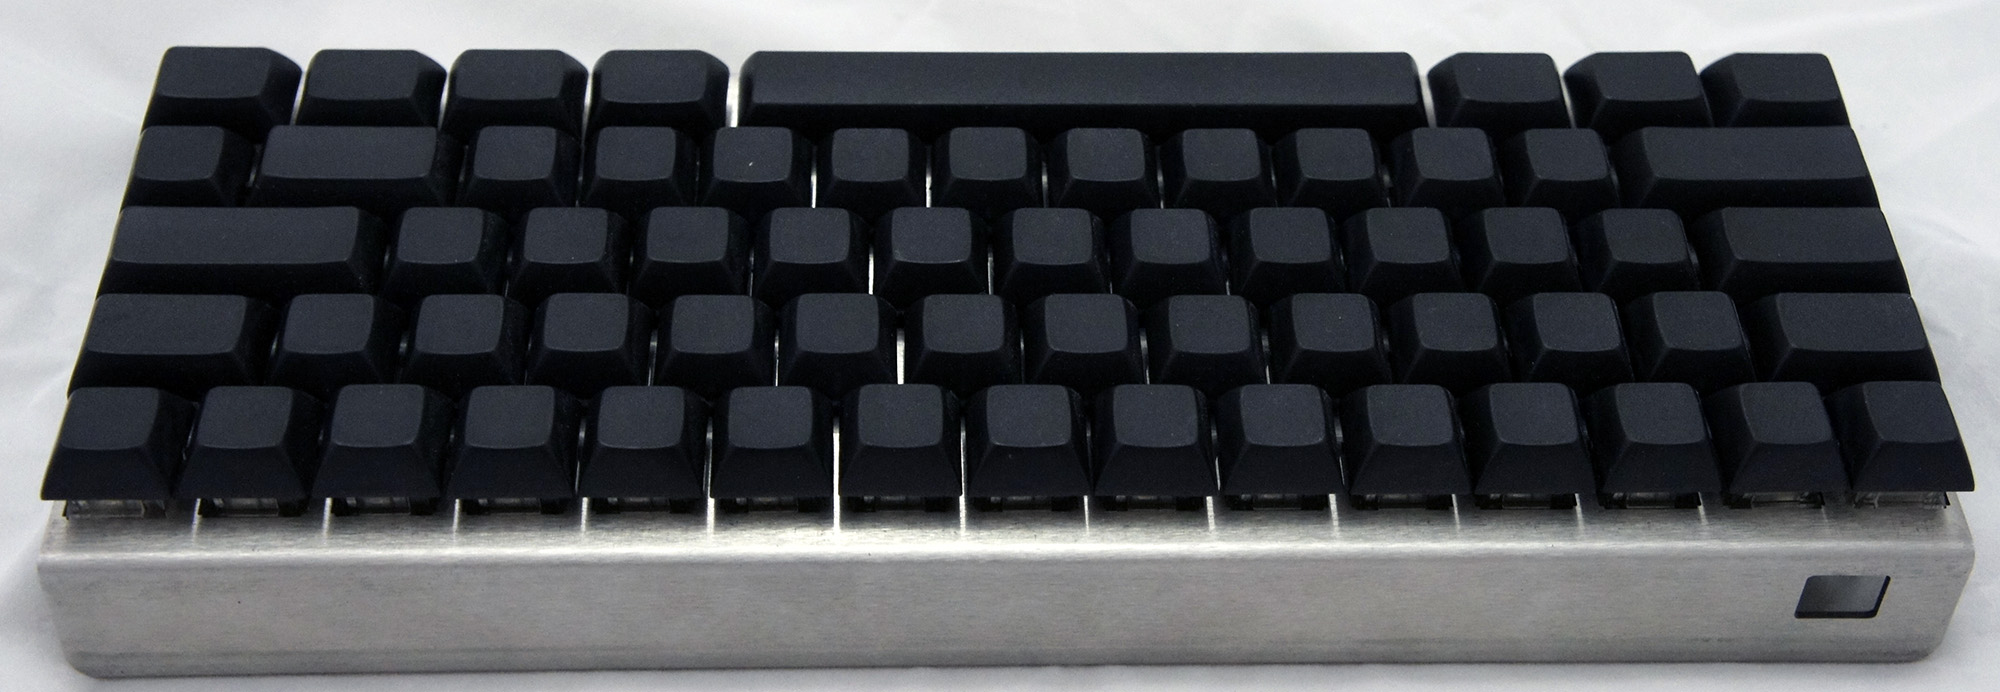
Next, I picked the blank Signature Plastics PBT keycaps available as an option on the Massdrop purchase, as finding Matias-compatible keycaps is not an easy task. Plus, the blank keycaps would come in handy when I started messing around with the keyboard configurations.
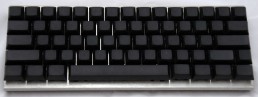
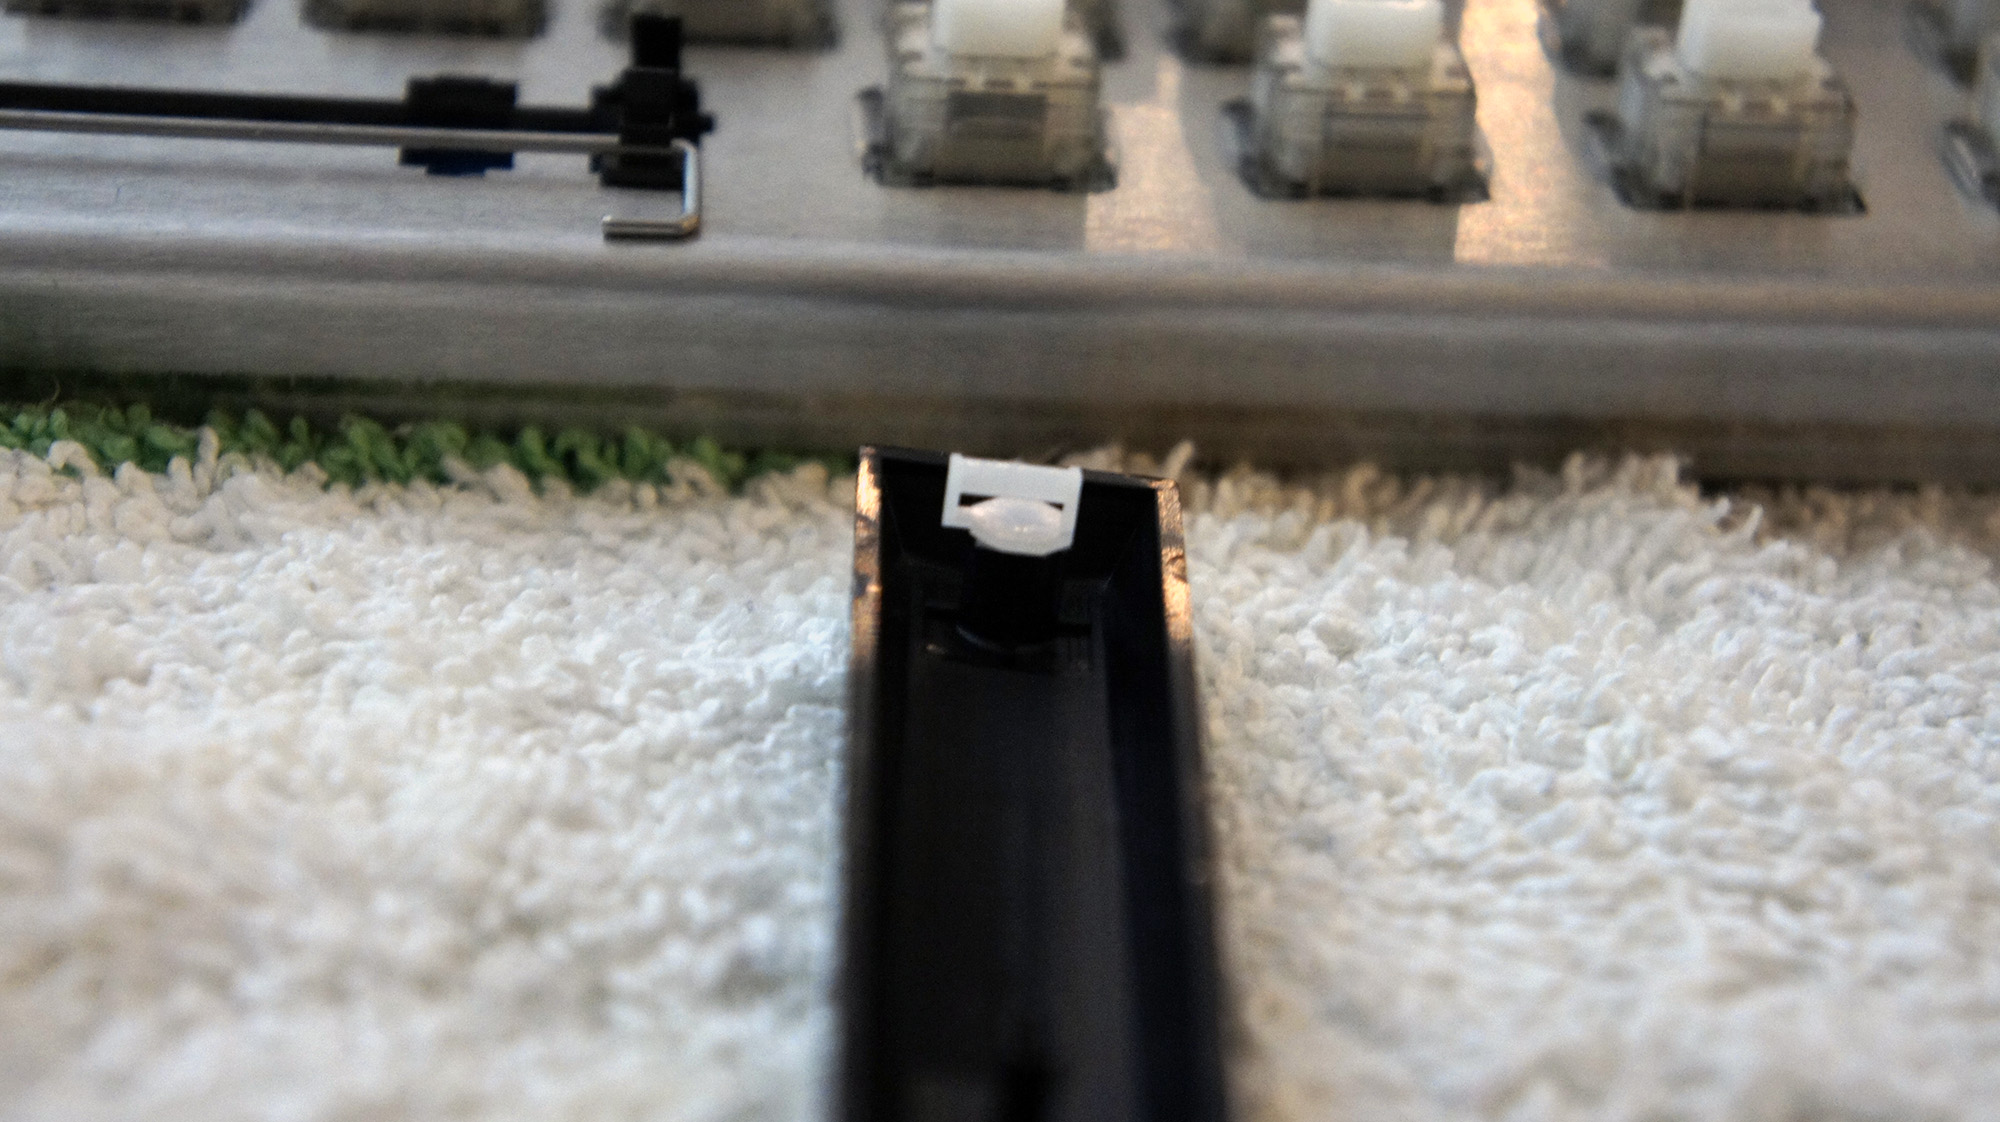
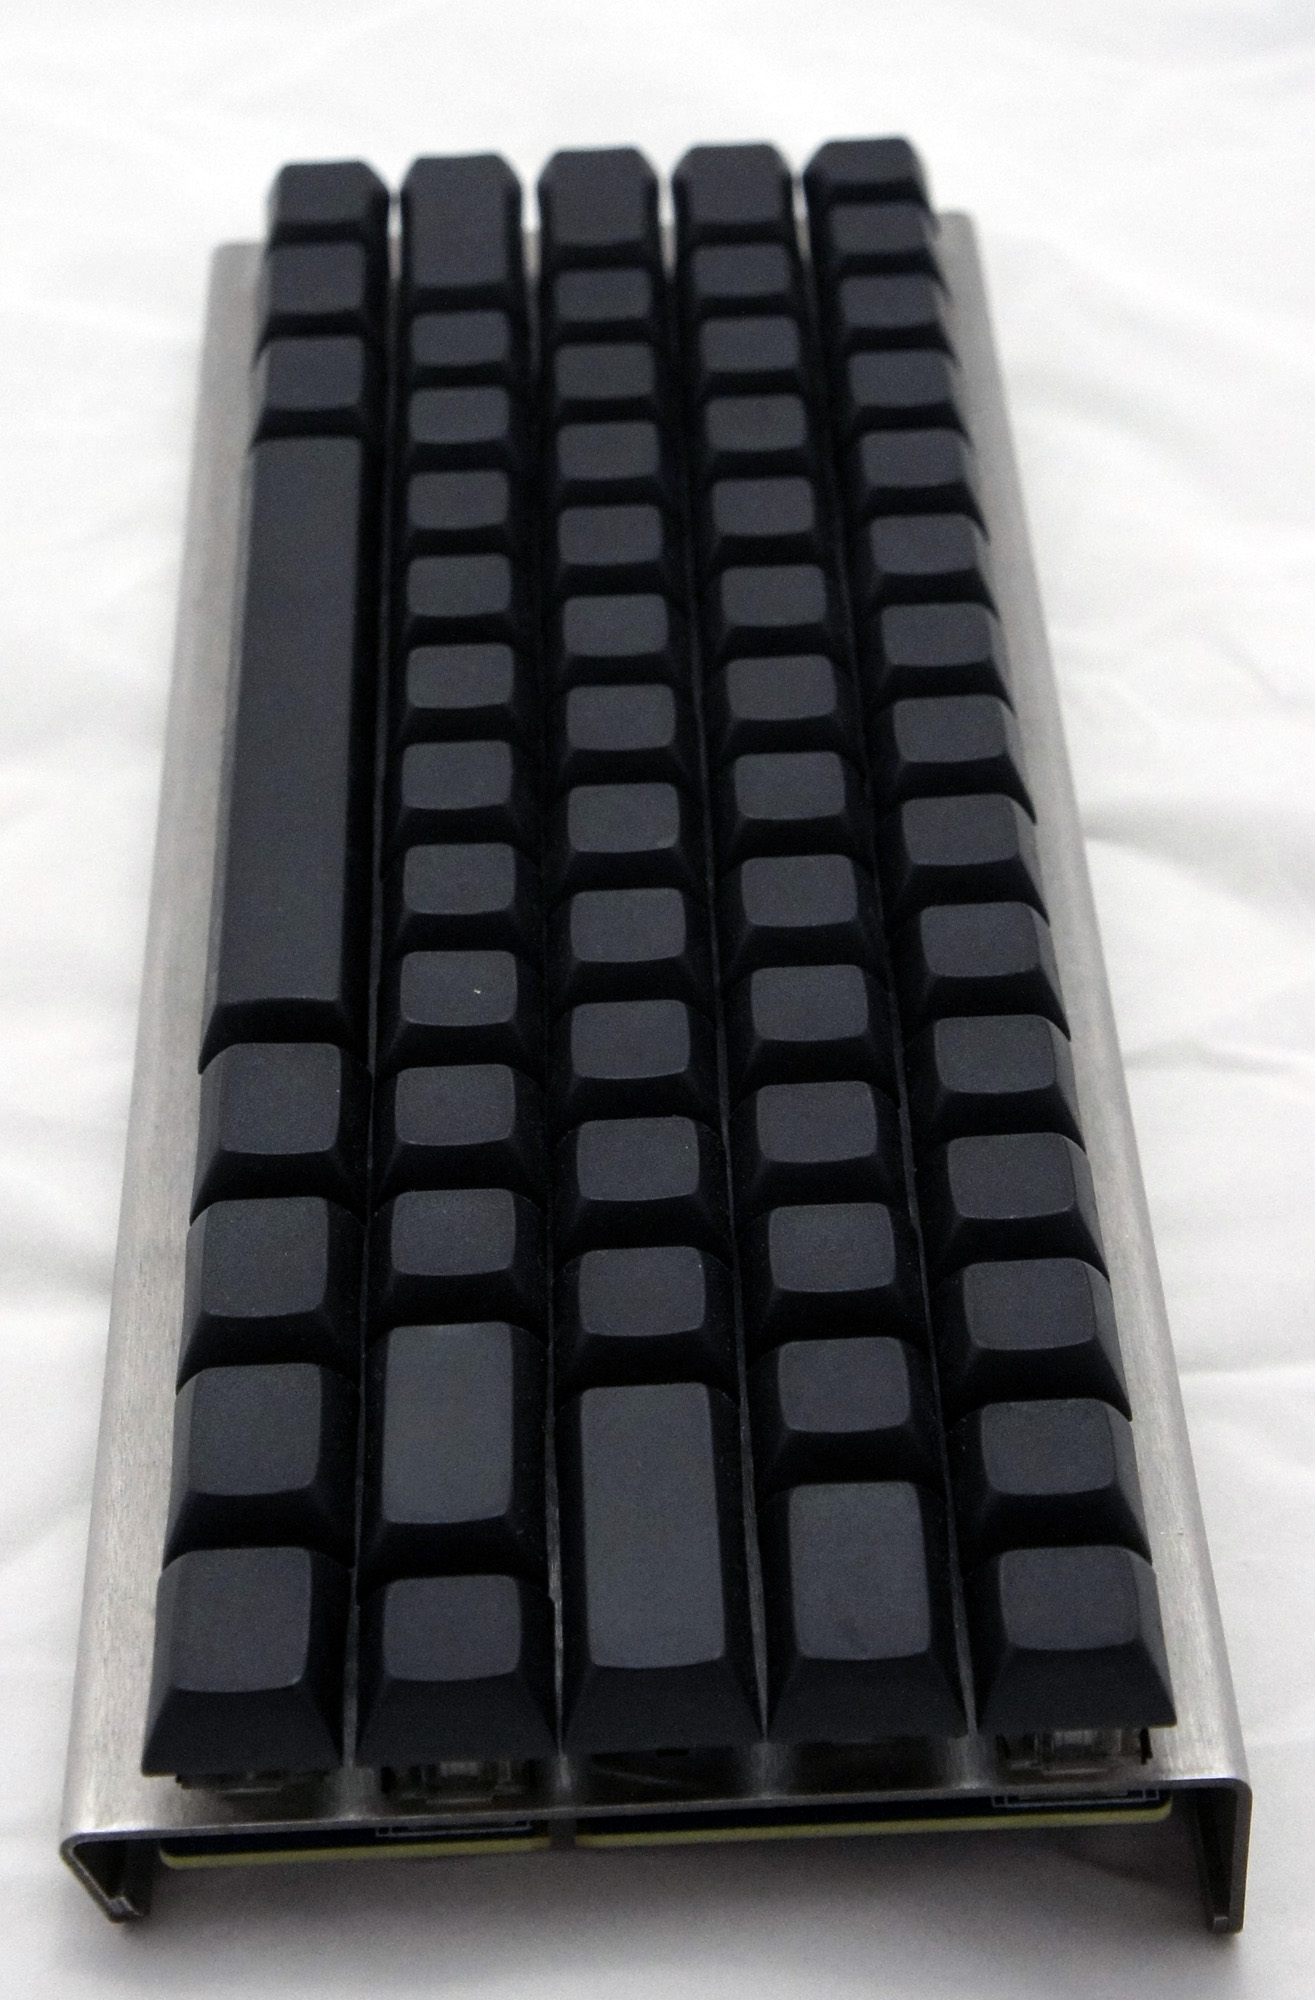
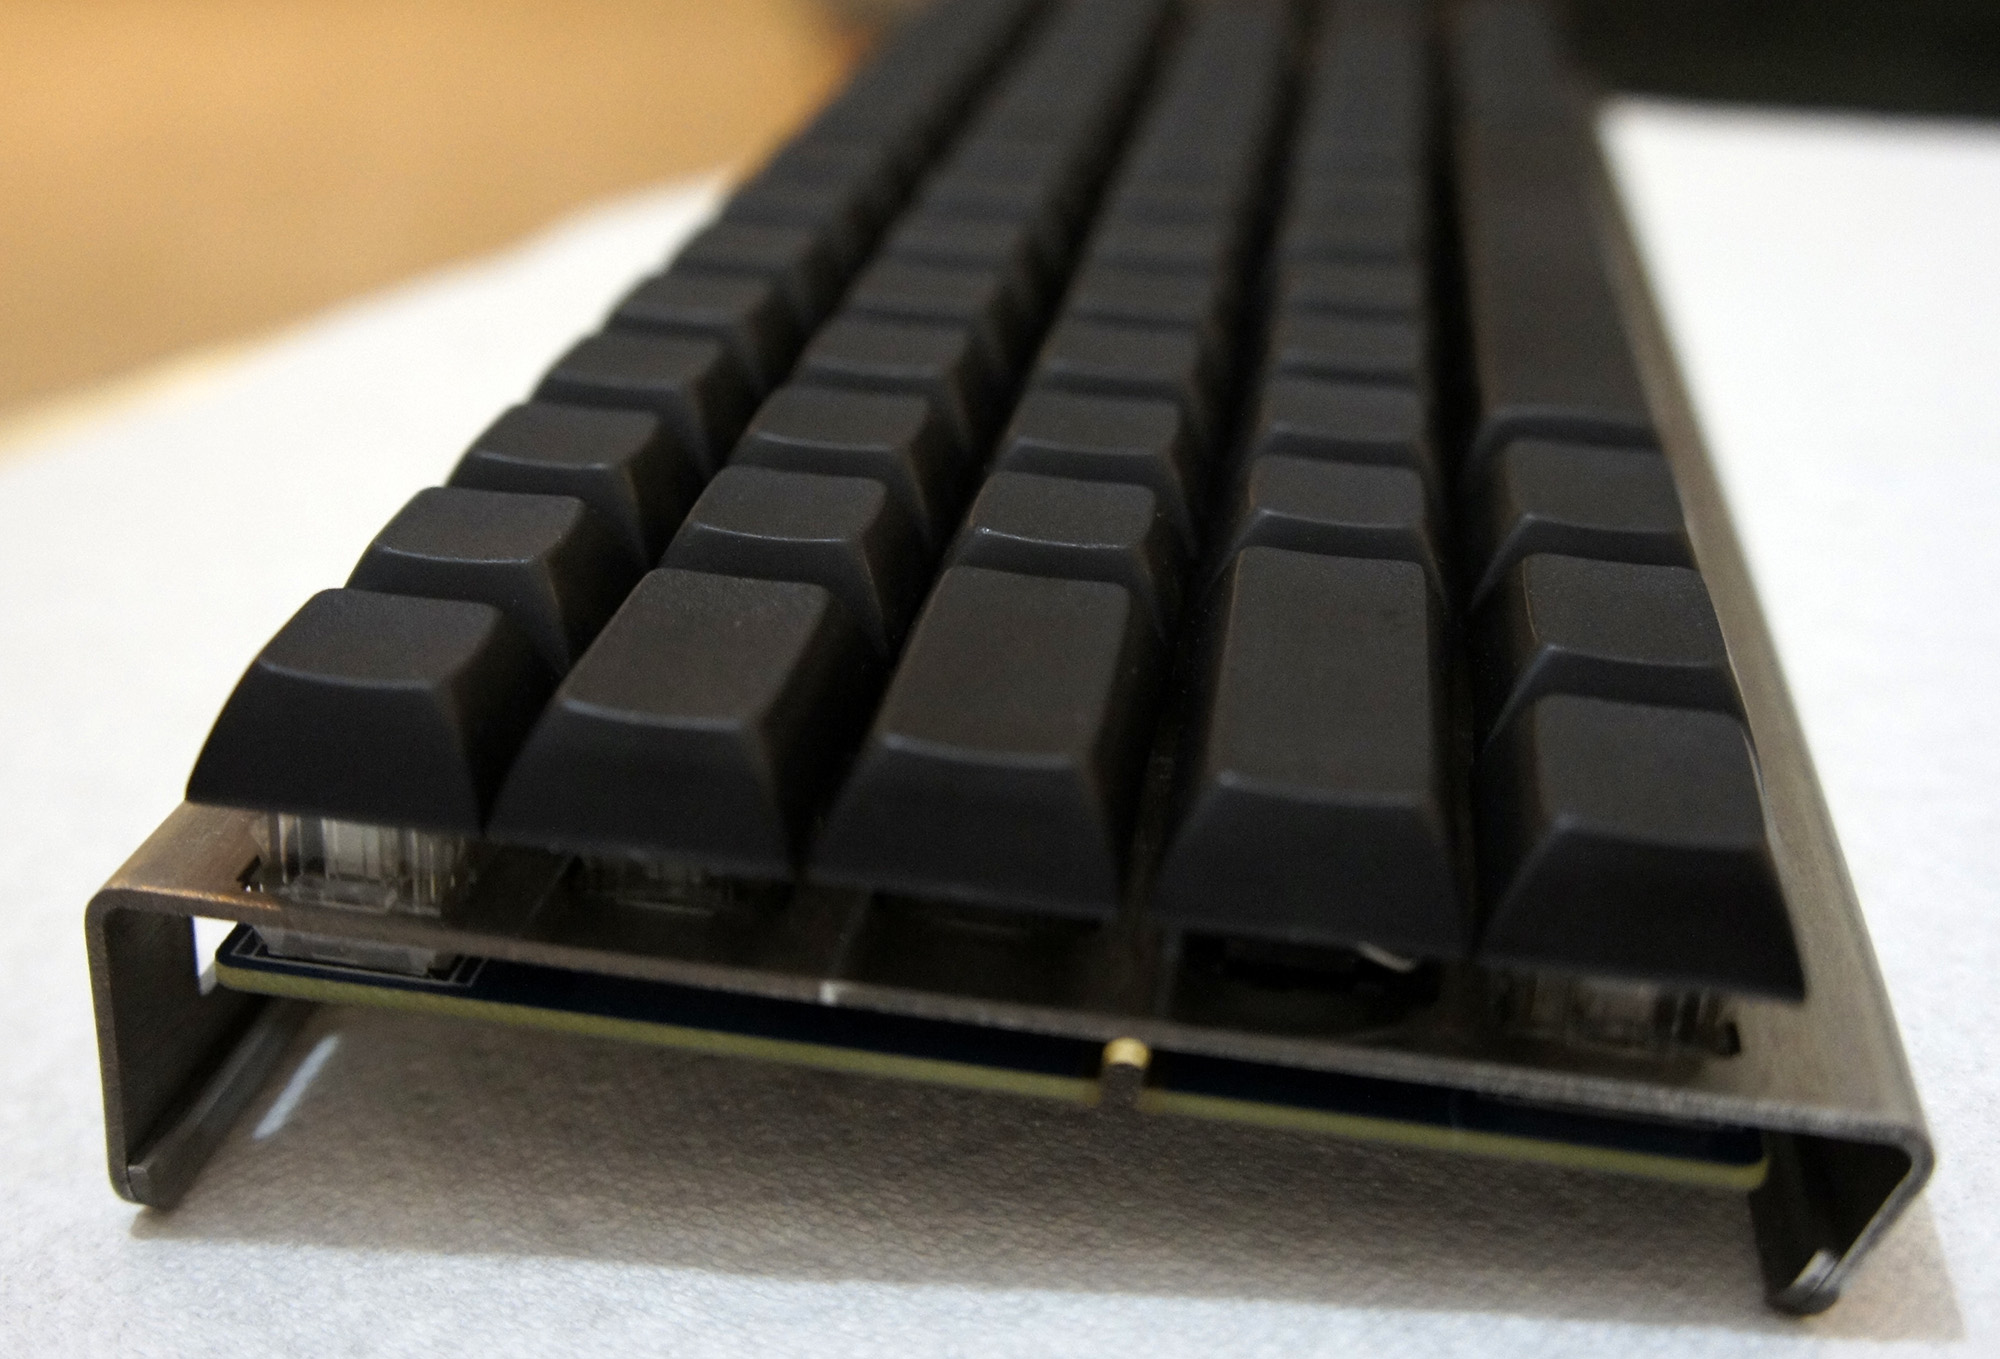
As for the chassis, I stuck with the purpose-built bent metal chassis, since it was designed for the Infinity Keyboard and has a nice industrial look to it.
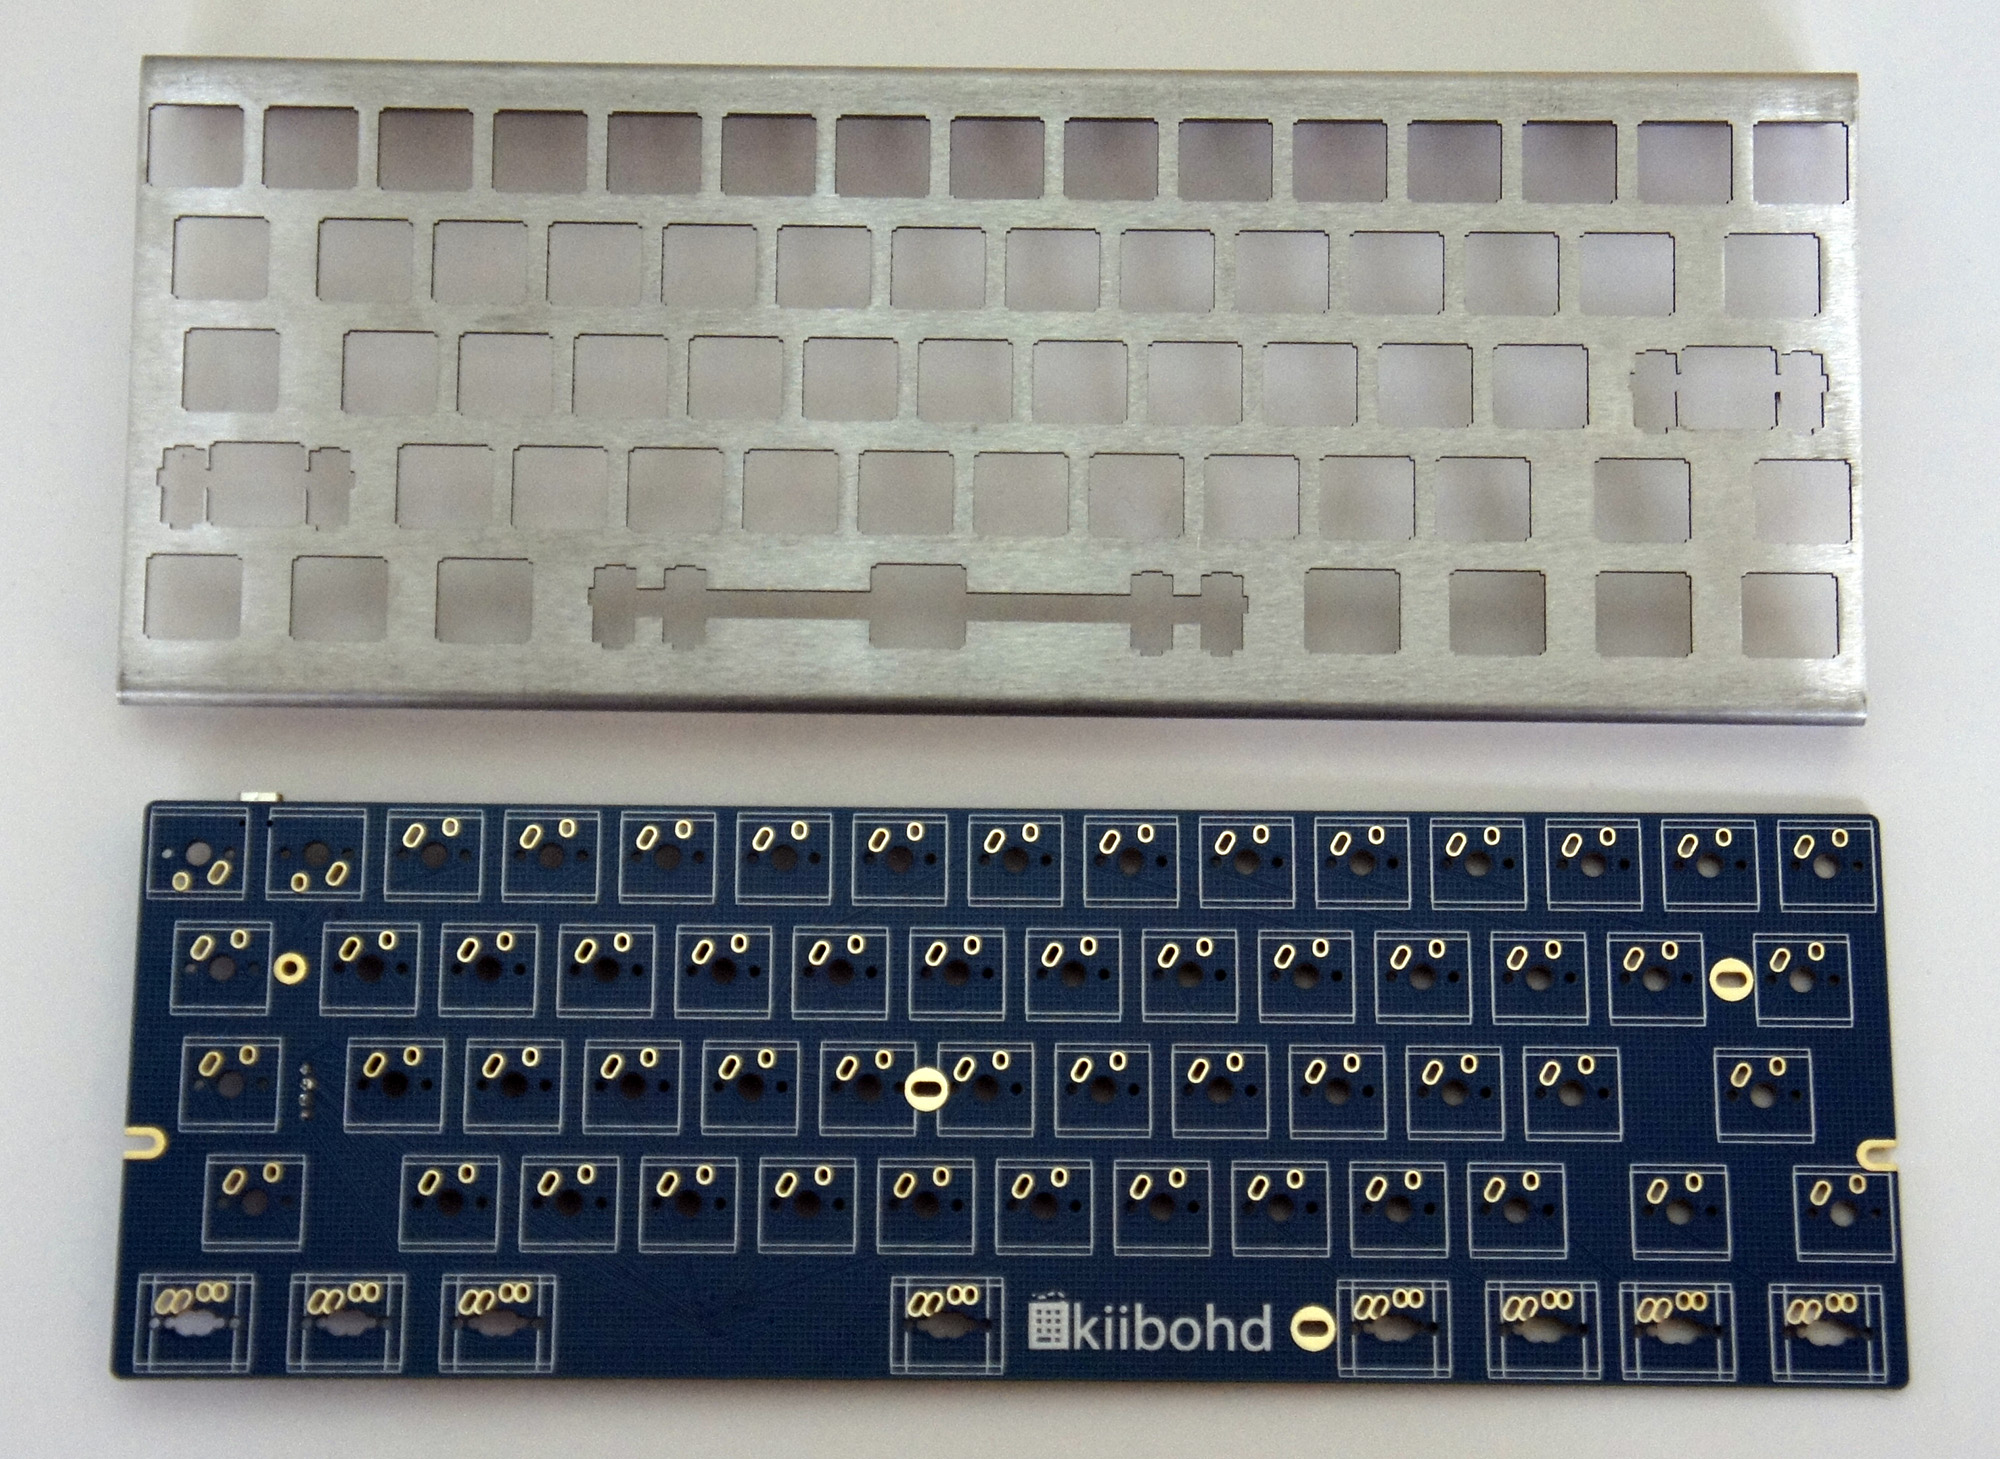
Finally, the logic board used is a custom ‘kiibohd’ (get it? ‘kiibohd’ sounds like a British person saying ‘keyboard’, hilarious), designed to fit both Cherry and Matias Alps switches.
Getting Started
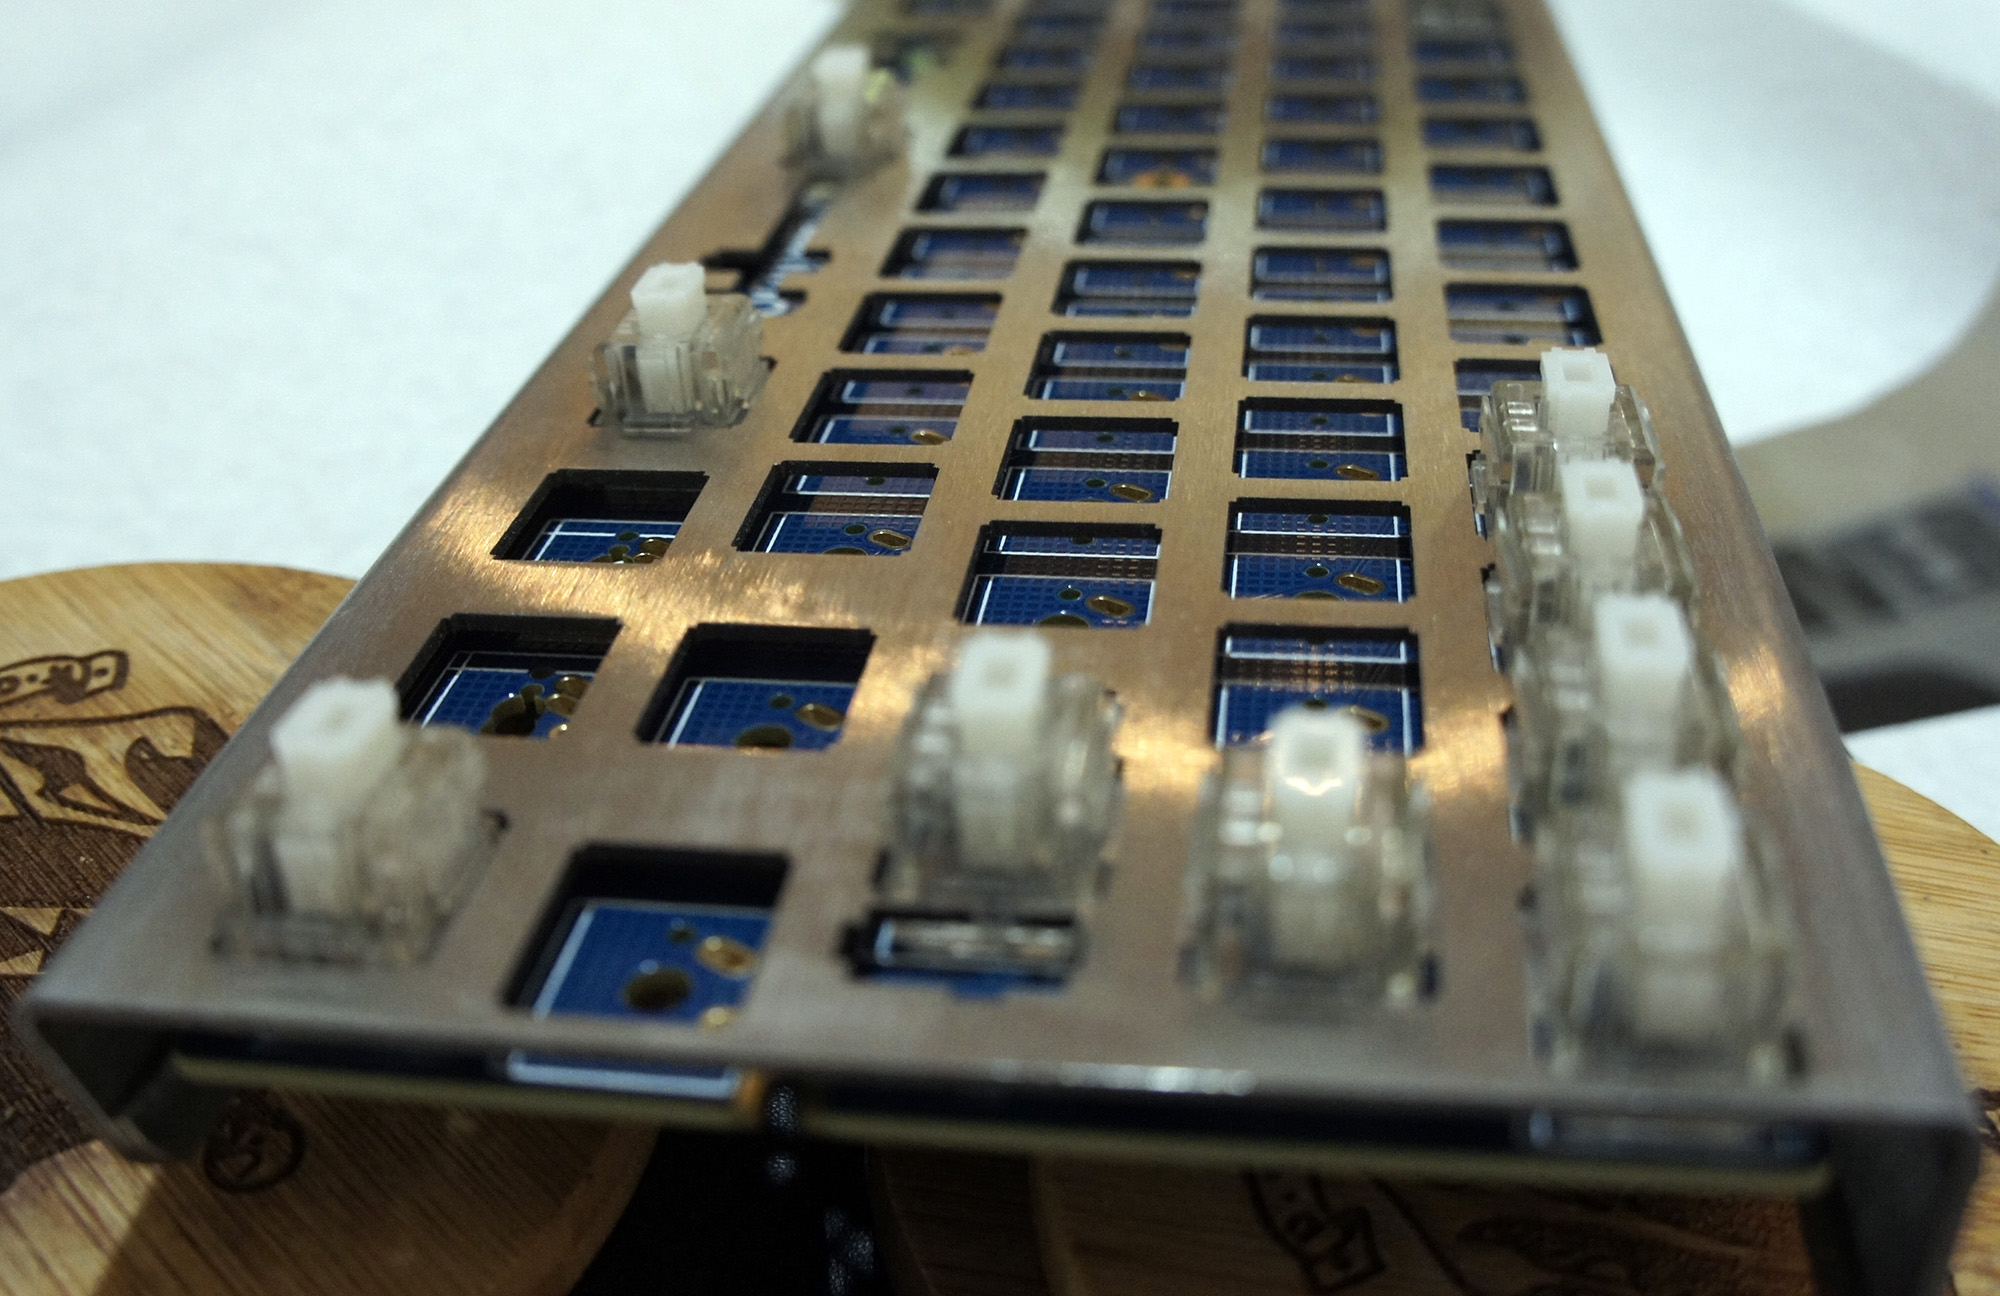
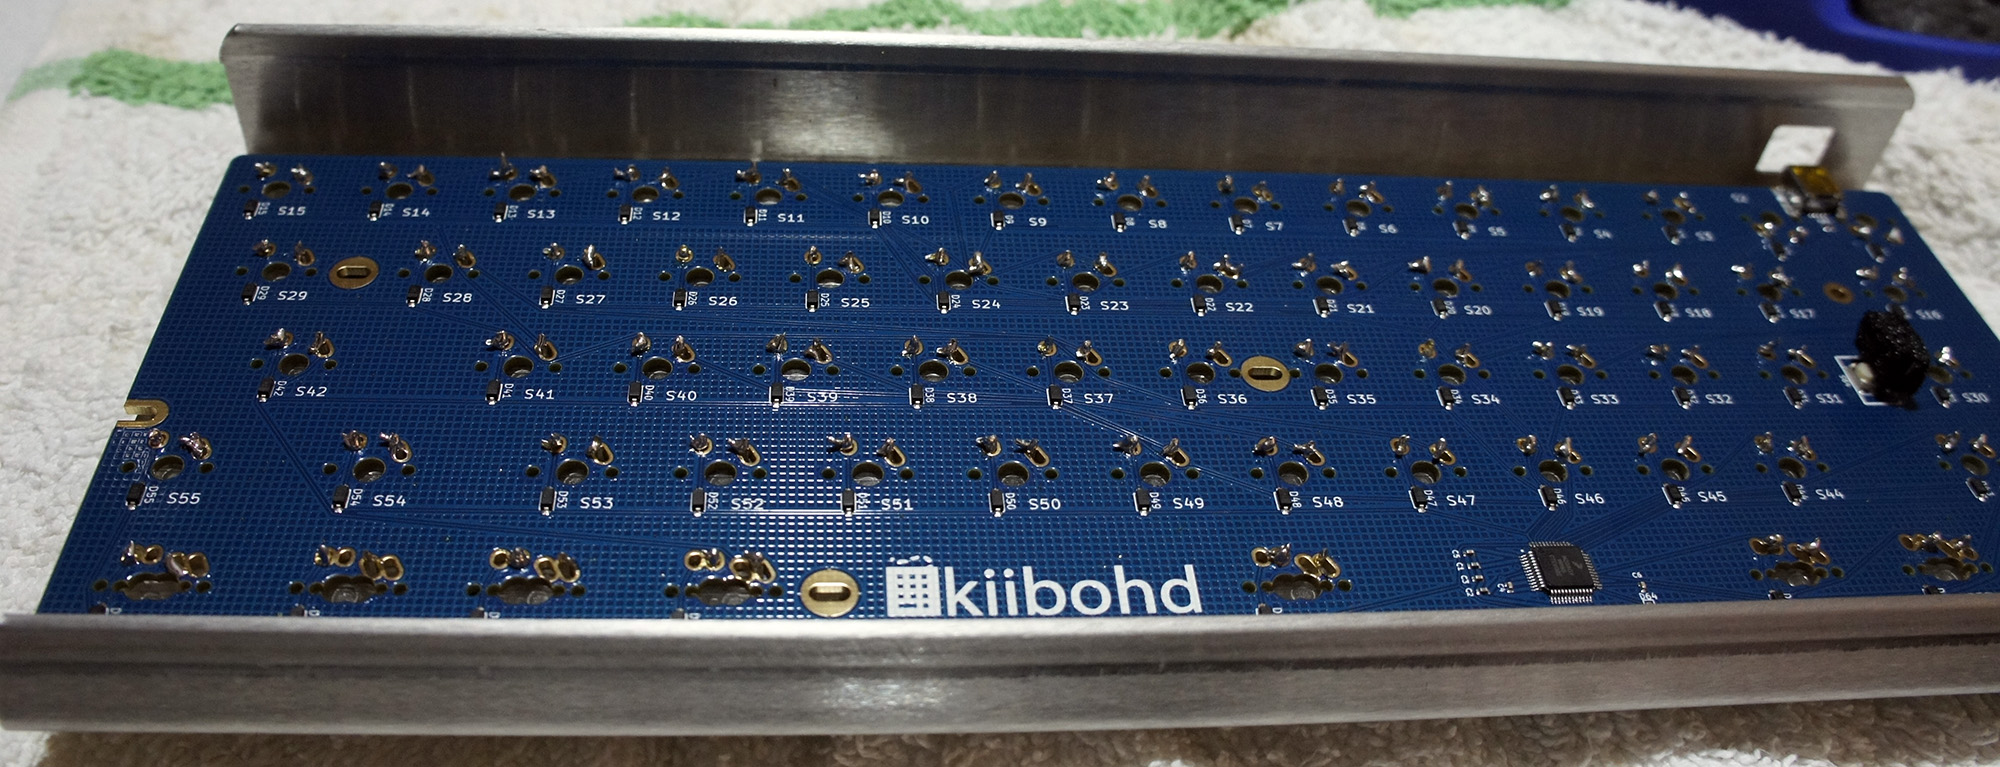
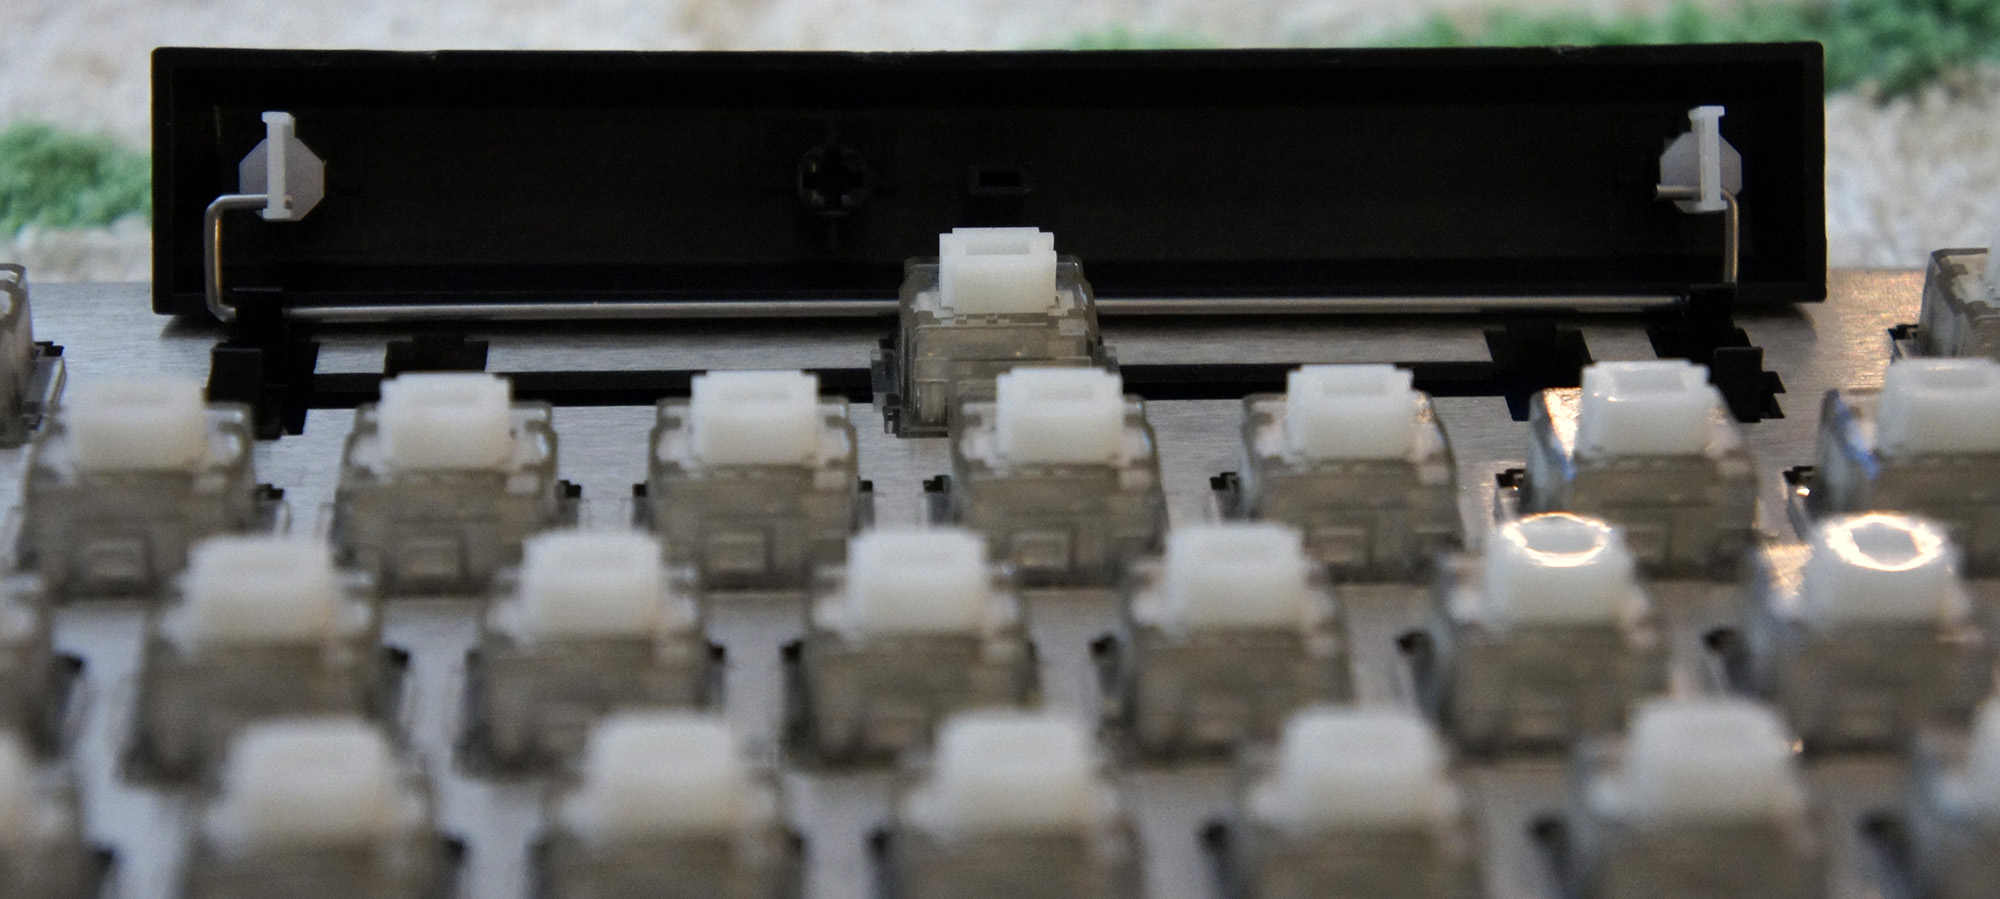
The process began with me putting the switches into the chassis. They went in from the top side of the keyboard, and the switches had to be pushed in until the little wings on the sides of the switches popped out on the bottom side of the keyboard. I could tell when they were in place because the plastic stoppers were flush against the metal of the chassis.
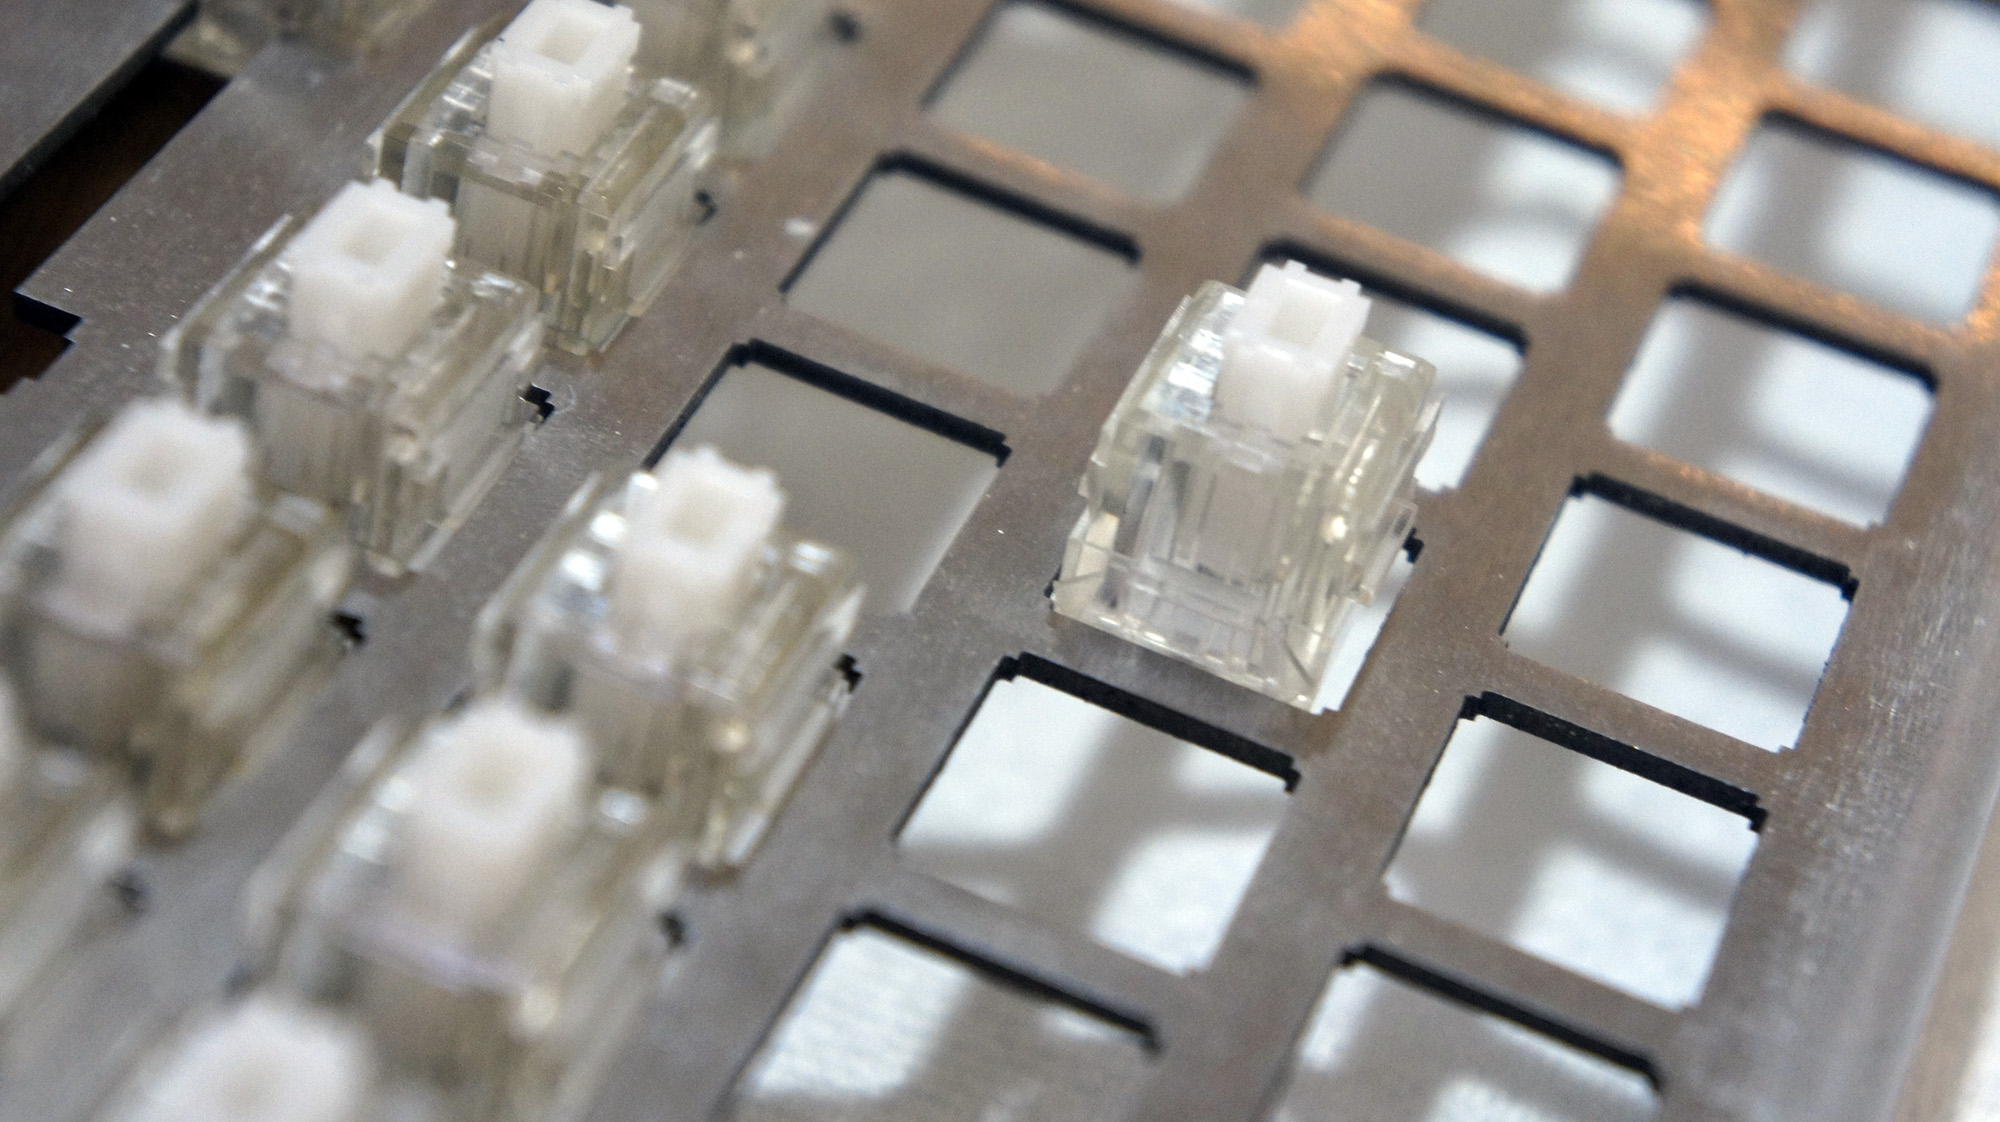
I made the silly mistake of putting in all the switches prior to sticking the logic board on. Unfortunately, this meant that lining up all the holes would be impossible, so I took the advice of someone on the Massdrop discussion and popped out all the key switches until I only had a couple in each corner. This made it easy to line up and stick on the board.
Once the board was in place, I began the process of sticking in the rest of the switches anew.

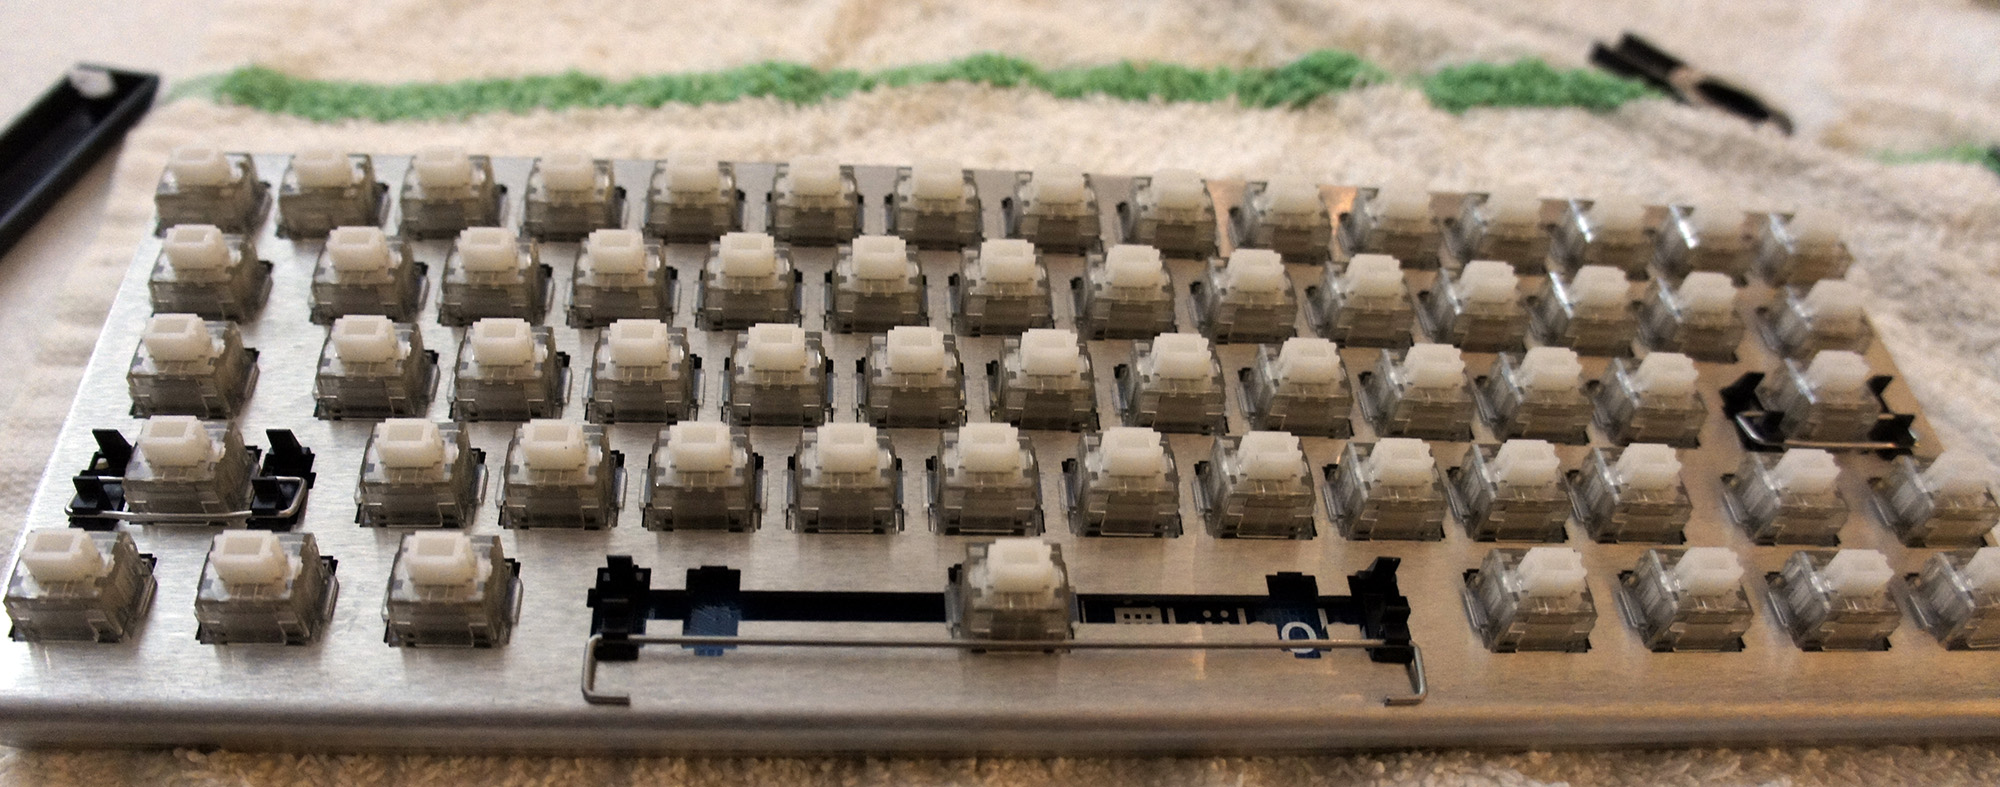
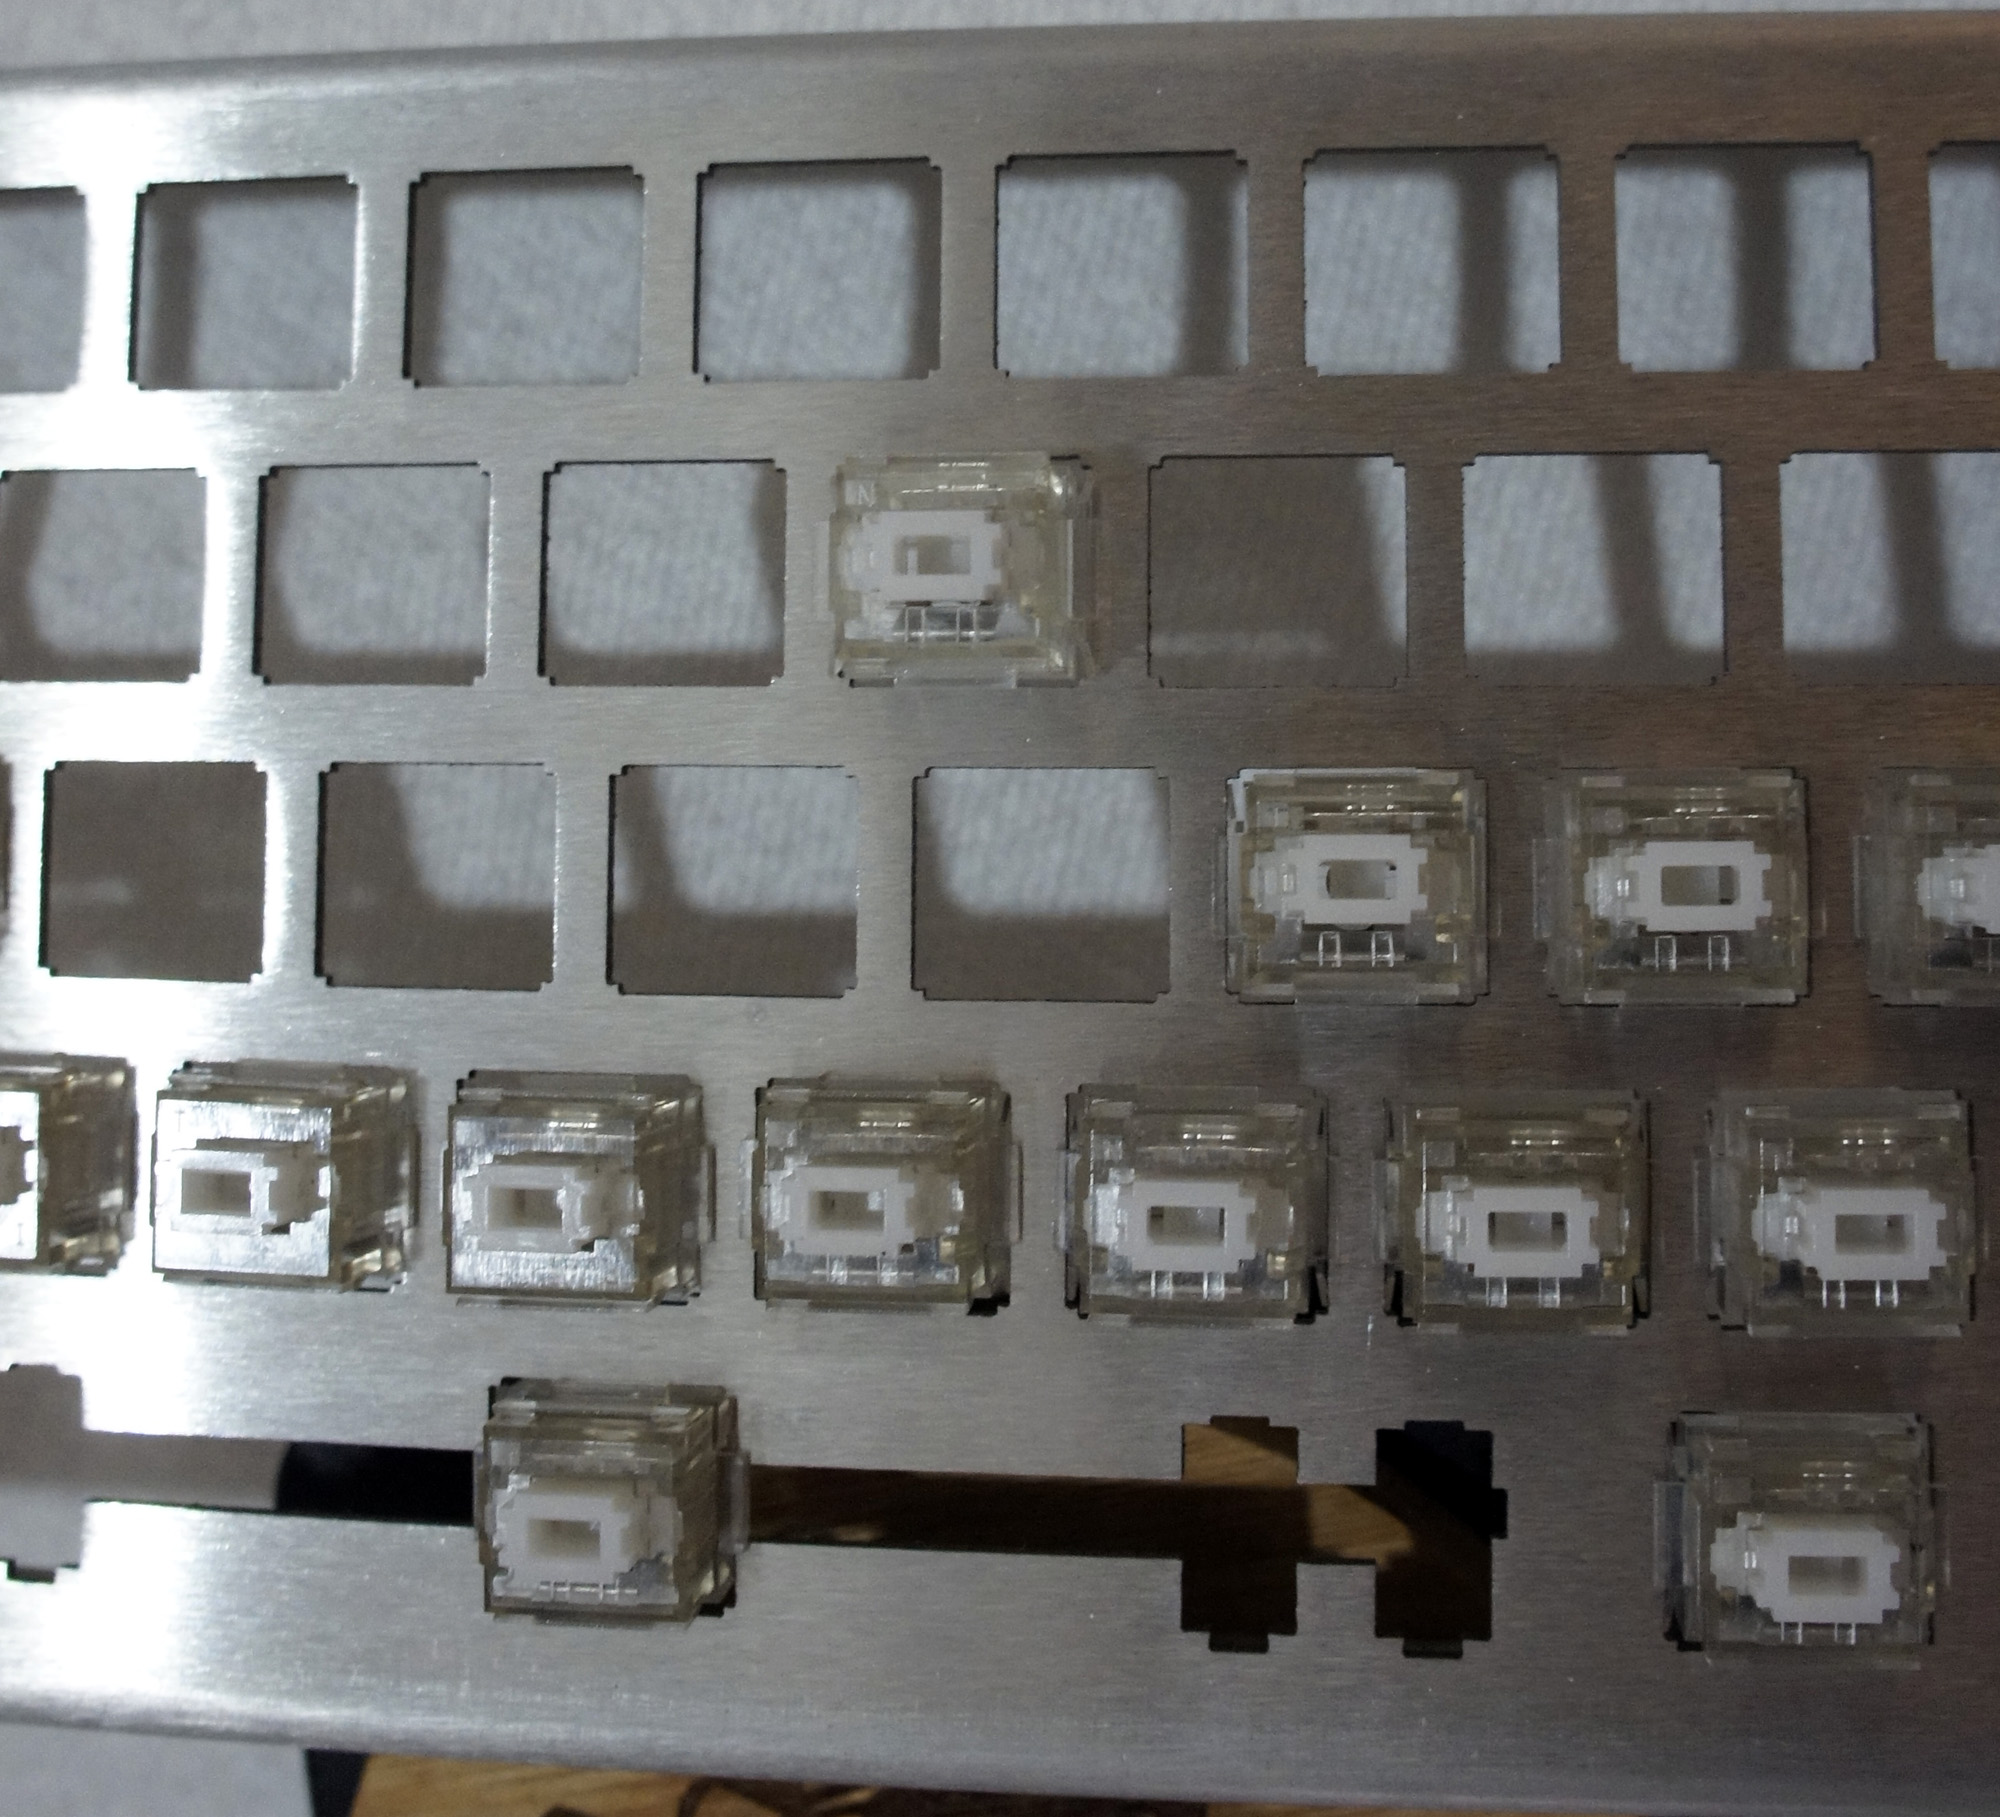
Soldering
The next step was soldering the switches to the board. This was probably the most daunting task to me, since I hadn’t soldered anything in approximately 10 years; the last time was in early high school, and I was hardly an expert back then.
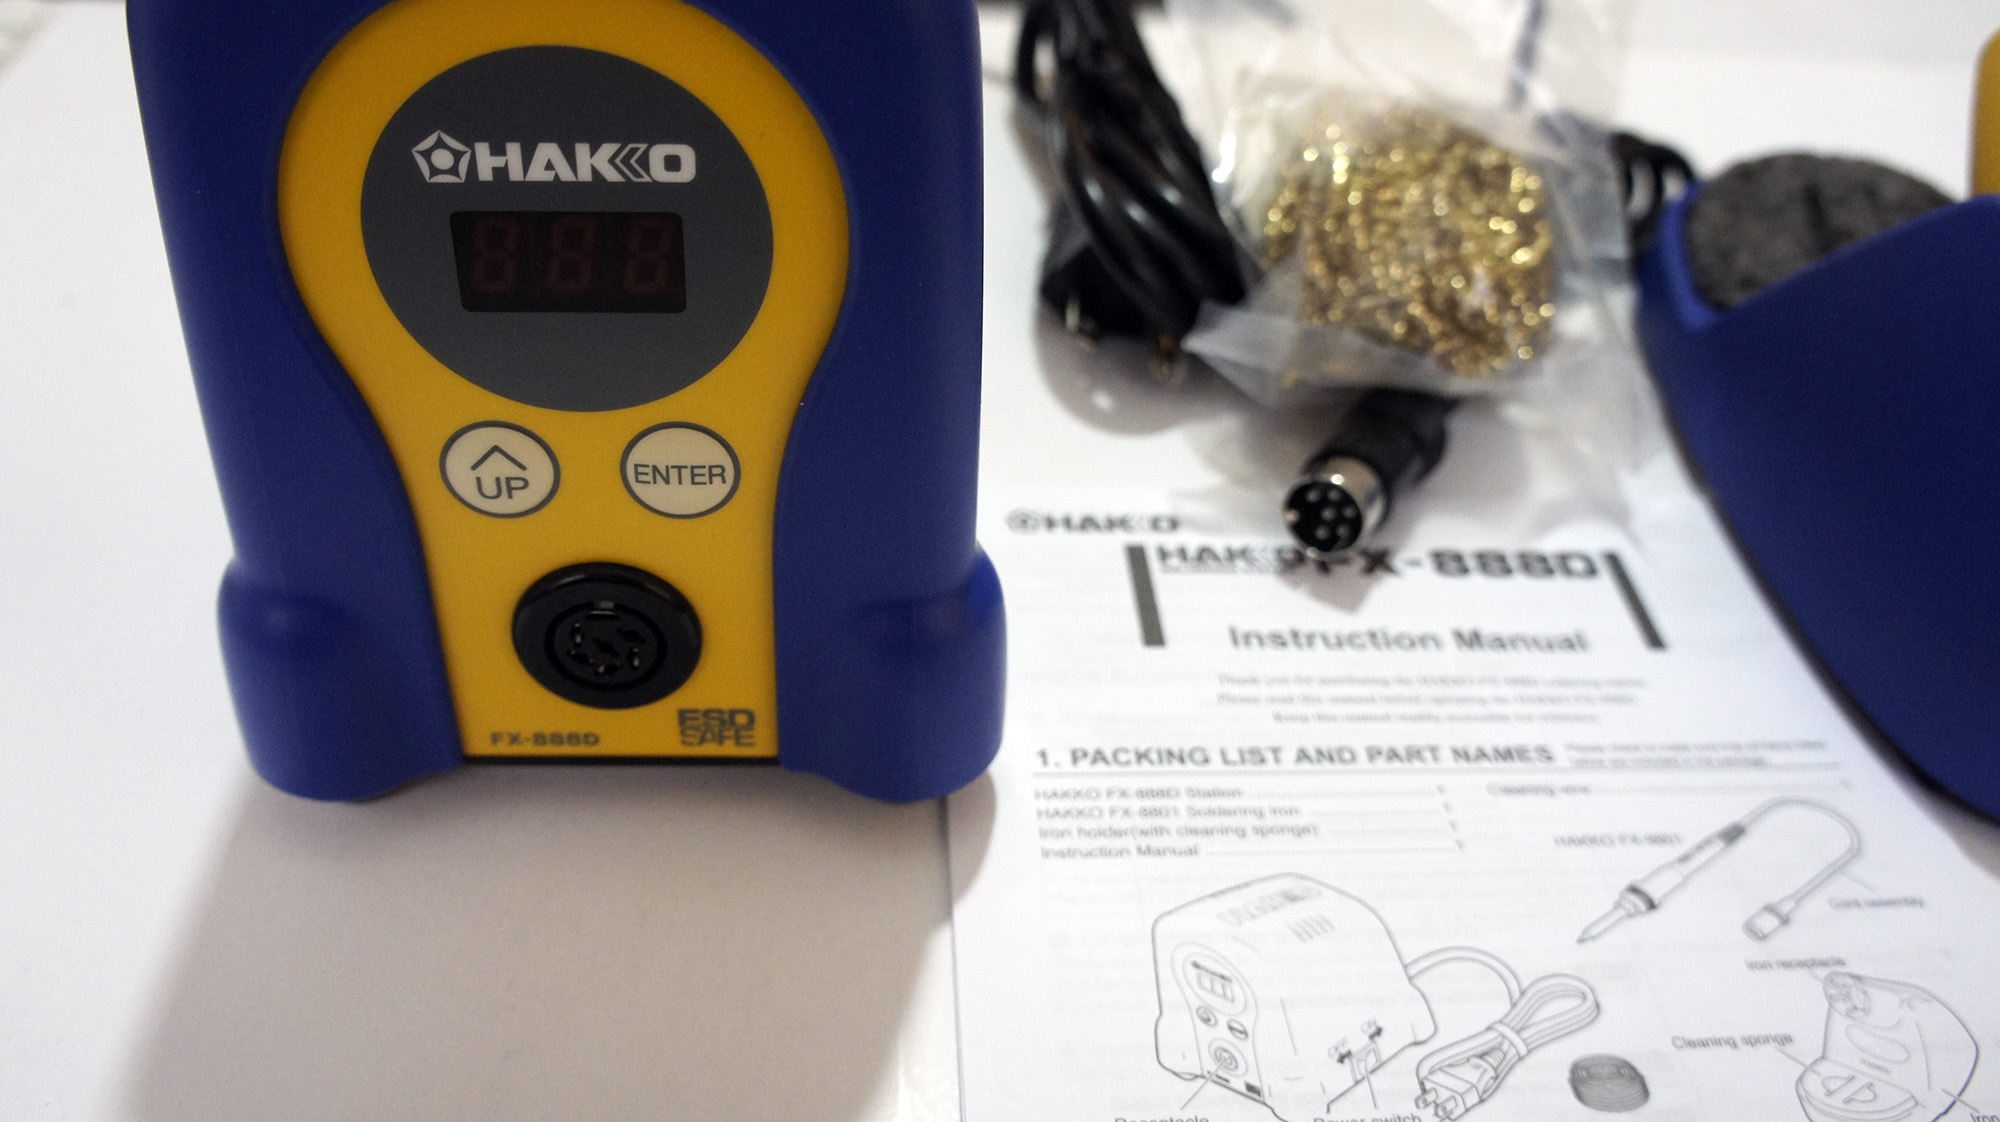
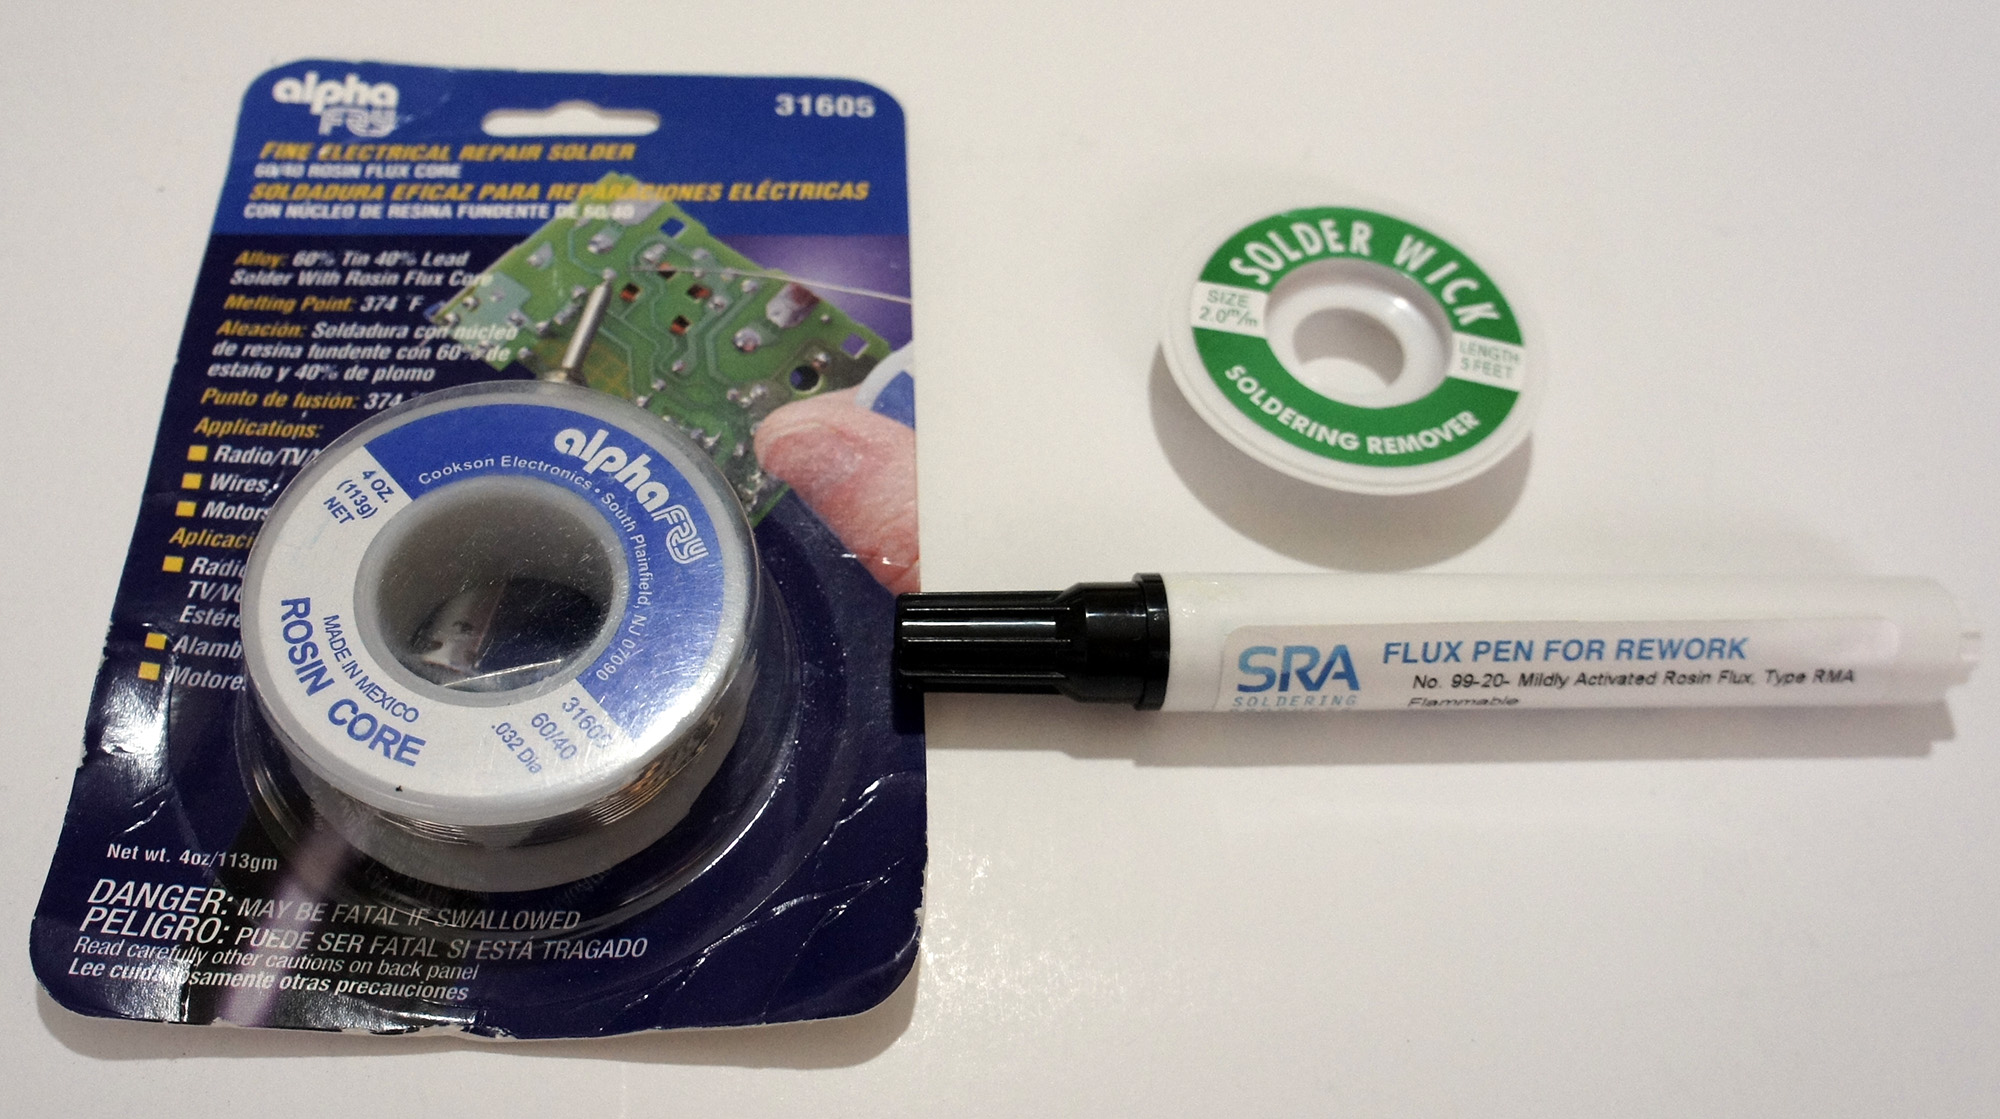
For my soldering kit, I picked up a Hakko FX-888D, since reviews for it are exceptional and a large portion of the internet seems to recommend it.
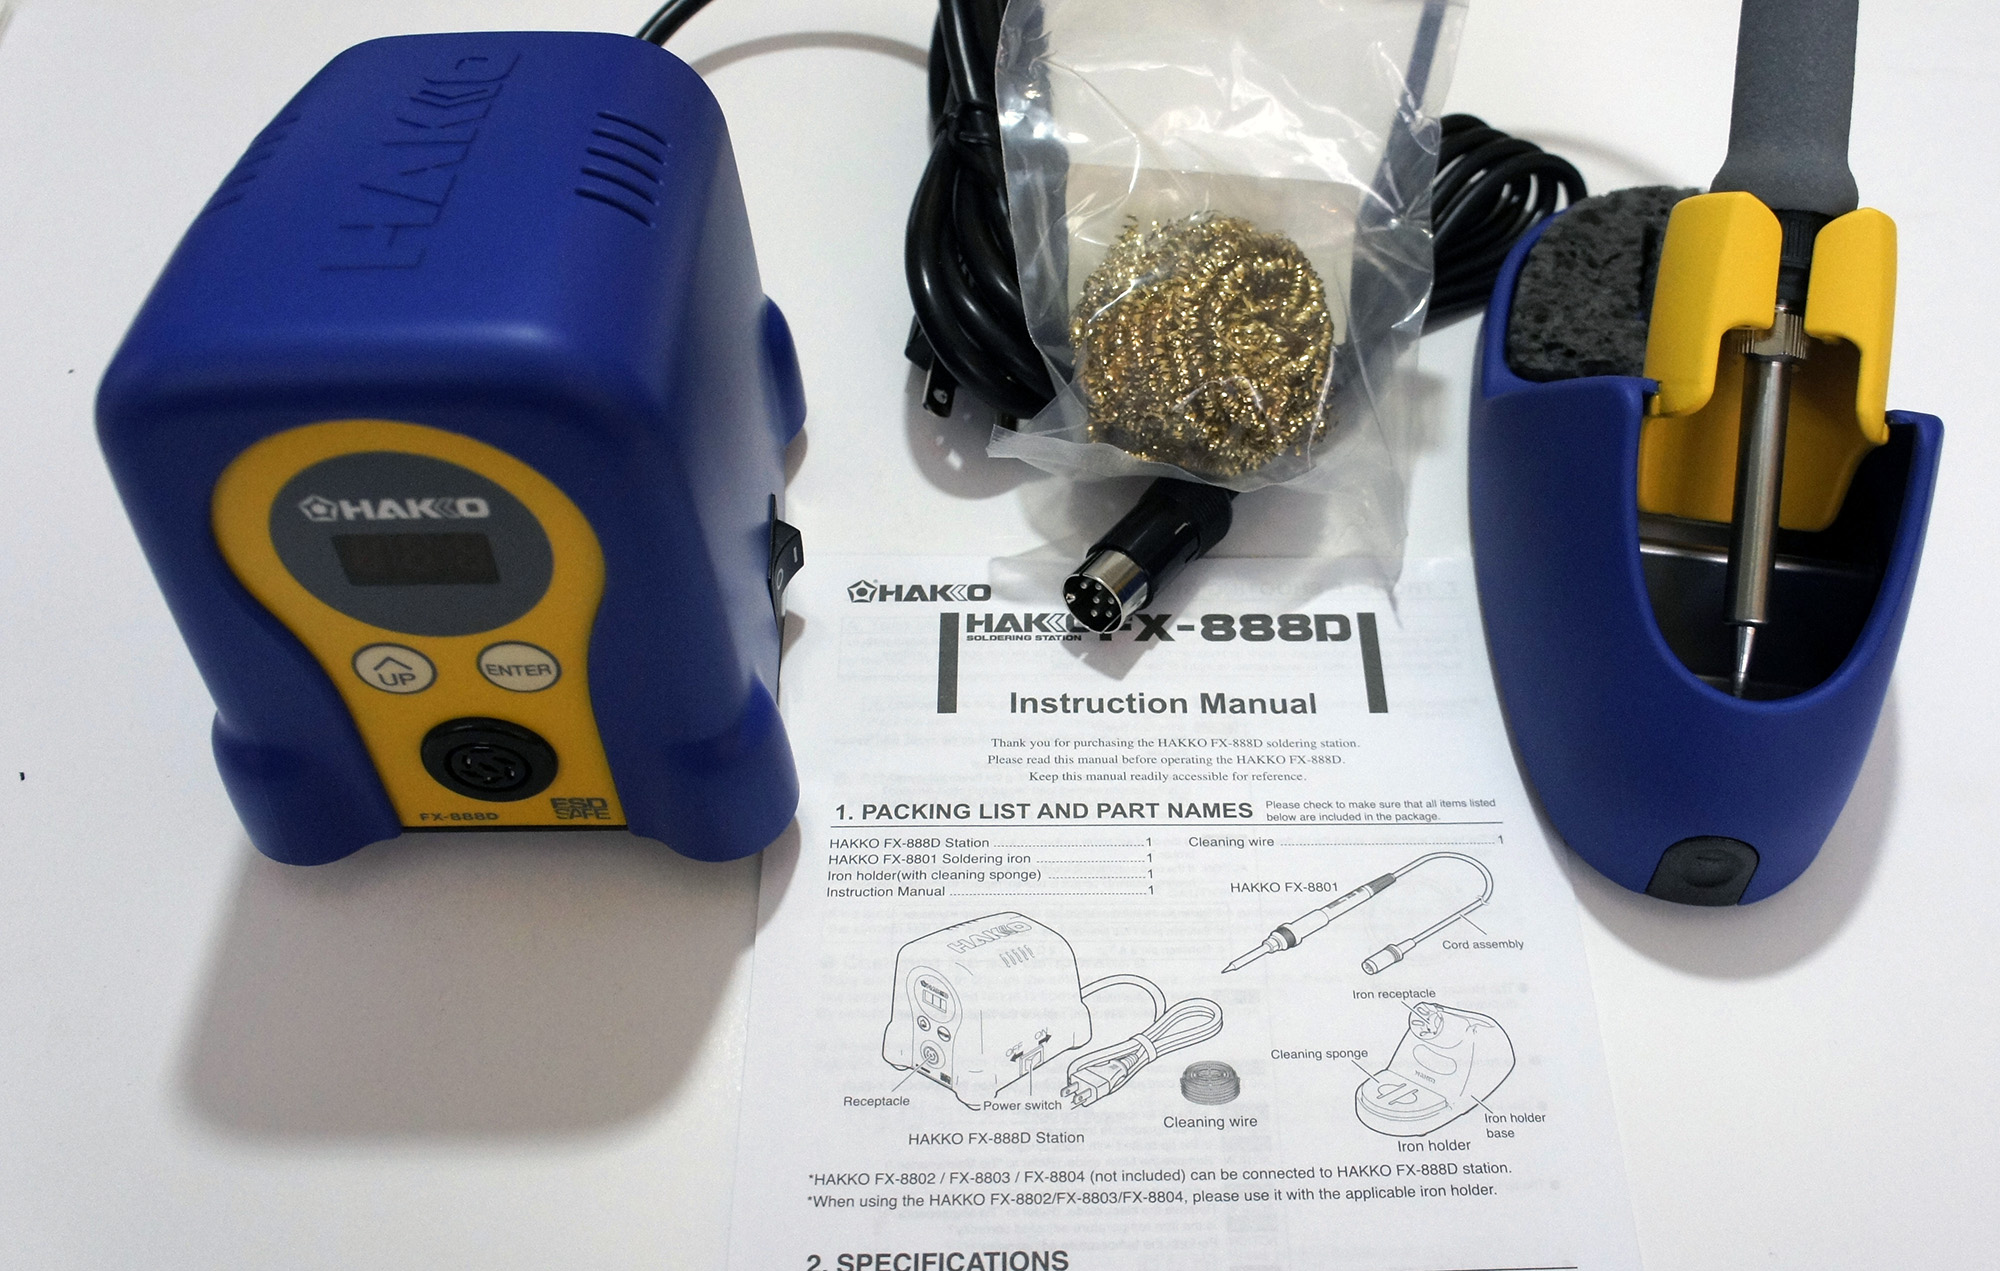

I also picked up some rosin-core solder, with the idea that it would be 60% lead and 40% tin, at the suggestion of my electrical engineer friend. However, despite the Amazon description, when it arrived it turned out to be 40% lead and 60% tin, but I figured I’d make do. I also picked up some solder wick and flux at my friend’s suggestion, since he assured me it’d make the process easier (it didn’t, I barely even used them).
Wanting to be safe, I asked the same electrical engineer friend if some paper towels on a glass table would make for a good soldering station. He reminded me that paper towels are quite flammable, and suggested that I at least consider a slightly less flammable dish towel as a workstation. I listened to his advice and went with that.
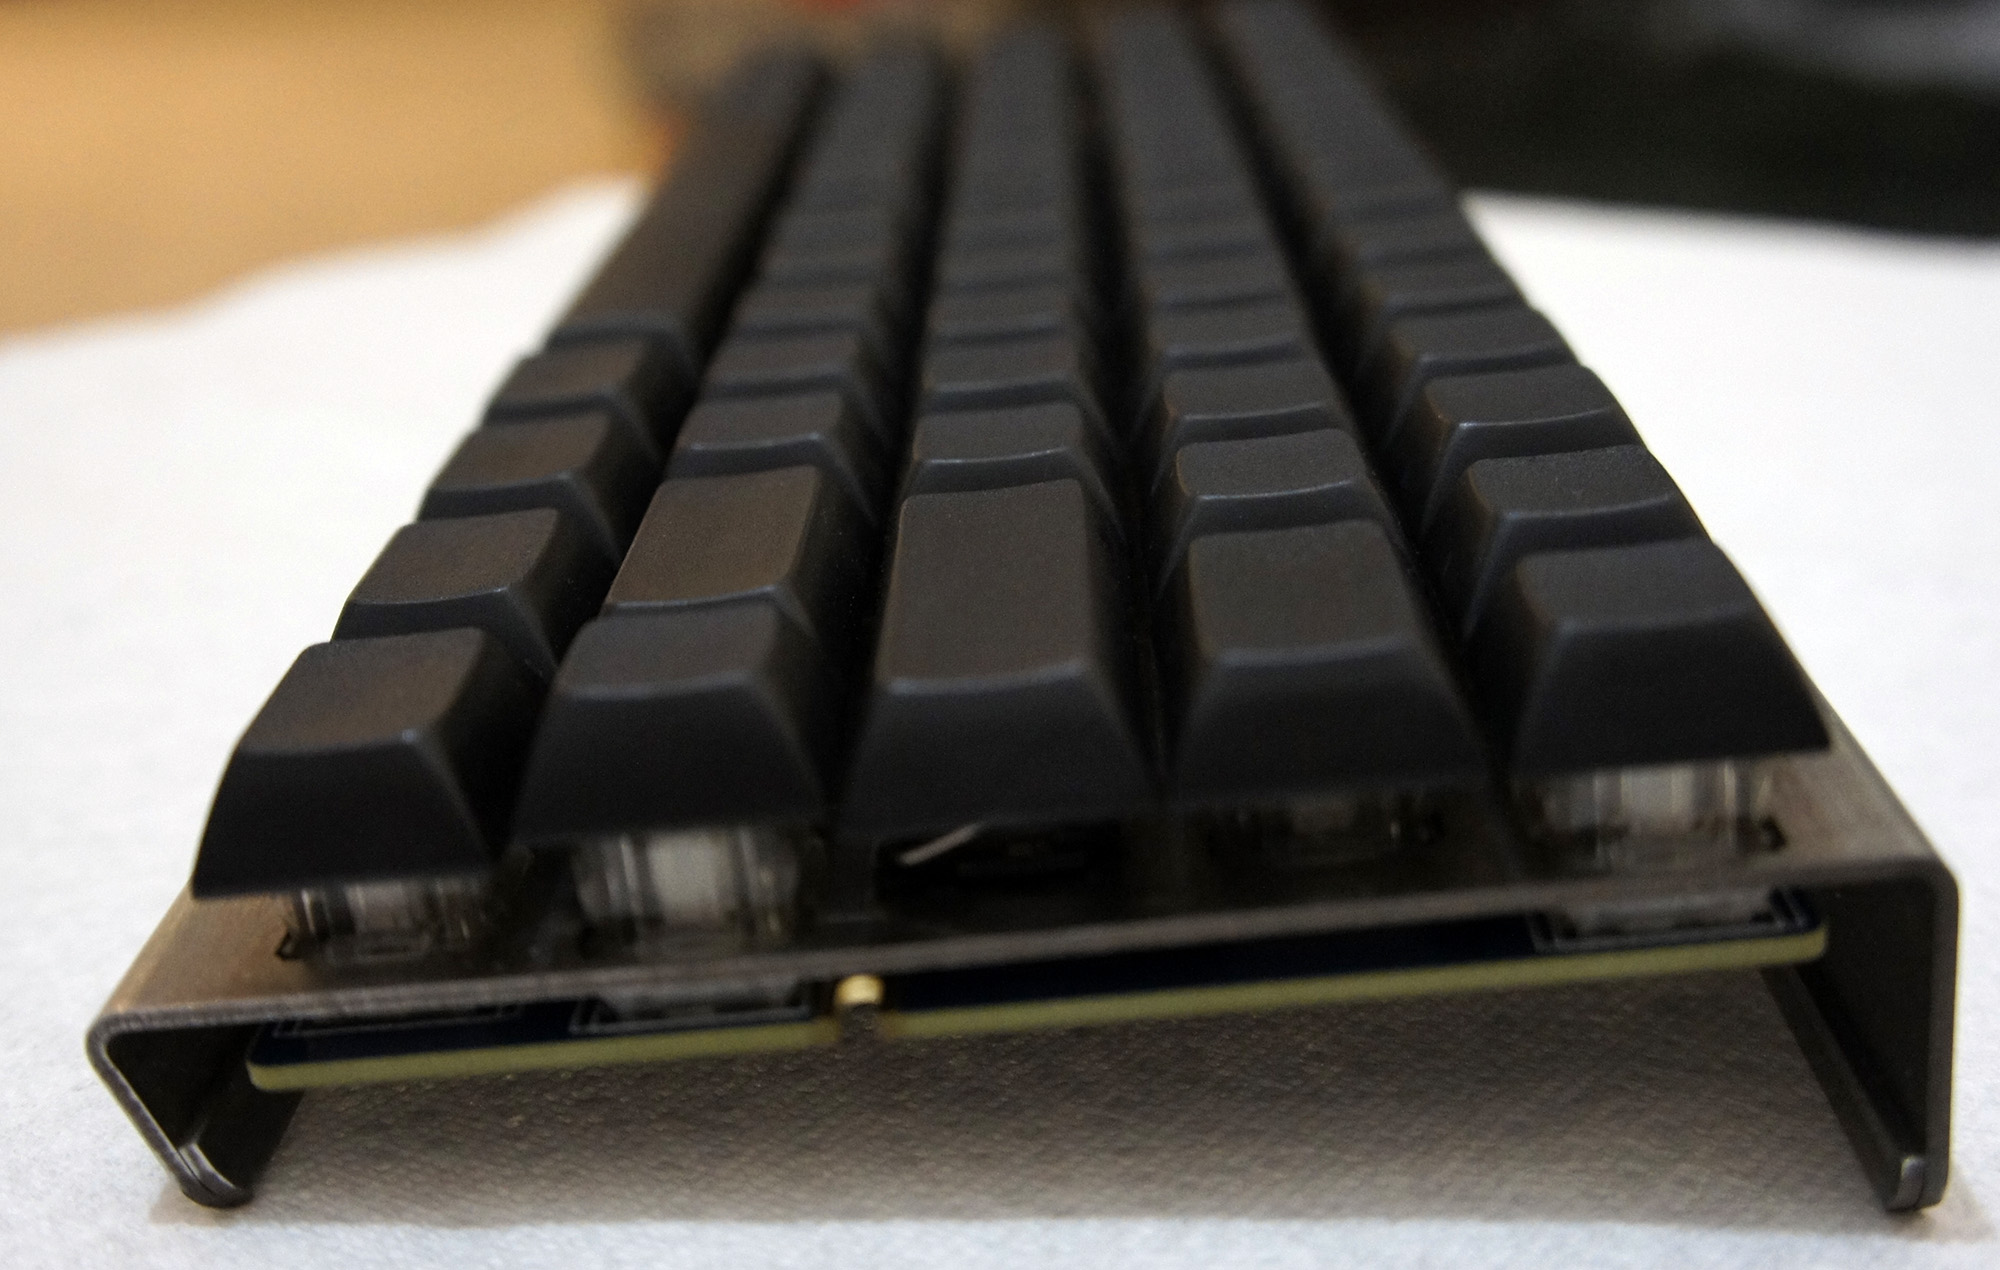
Soldering was a surprisingly easy process. The Hakko FX-888D is a great soldering iron; I just dialed in the temperature I wanted and I was ready to go. For the purpose of the keyboard, I opted to use 500°F as the temperature.
Despite my inexperience and lack of skill, the soldering process went fairly quickly and smoothly. All I had to do was touch the iron to the spot I wanted to solder, touch the solder wire to it, and let it melt right onto the connectors as I pulled away the iron.

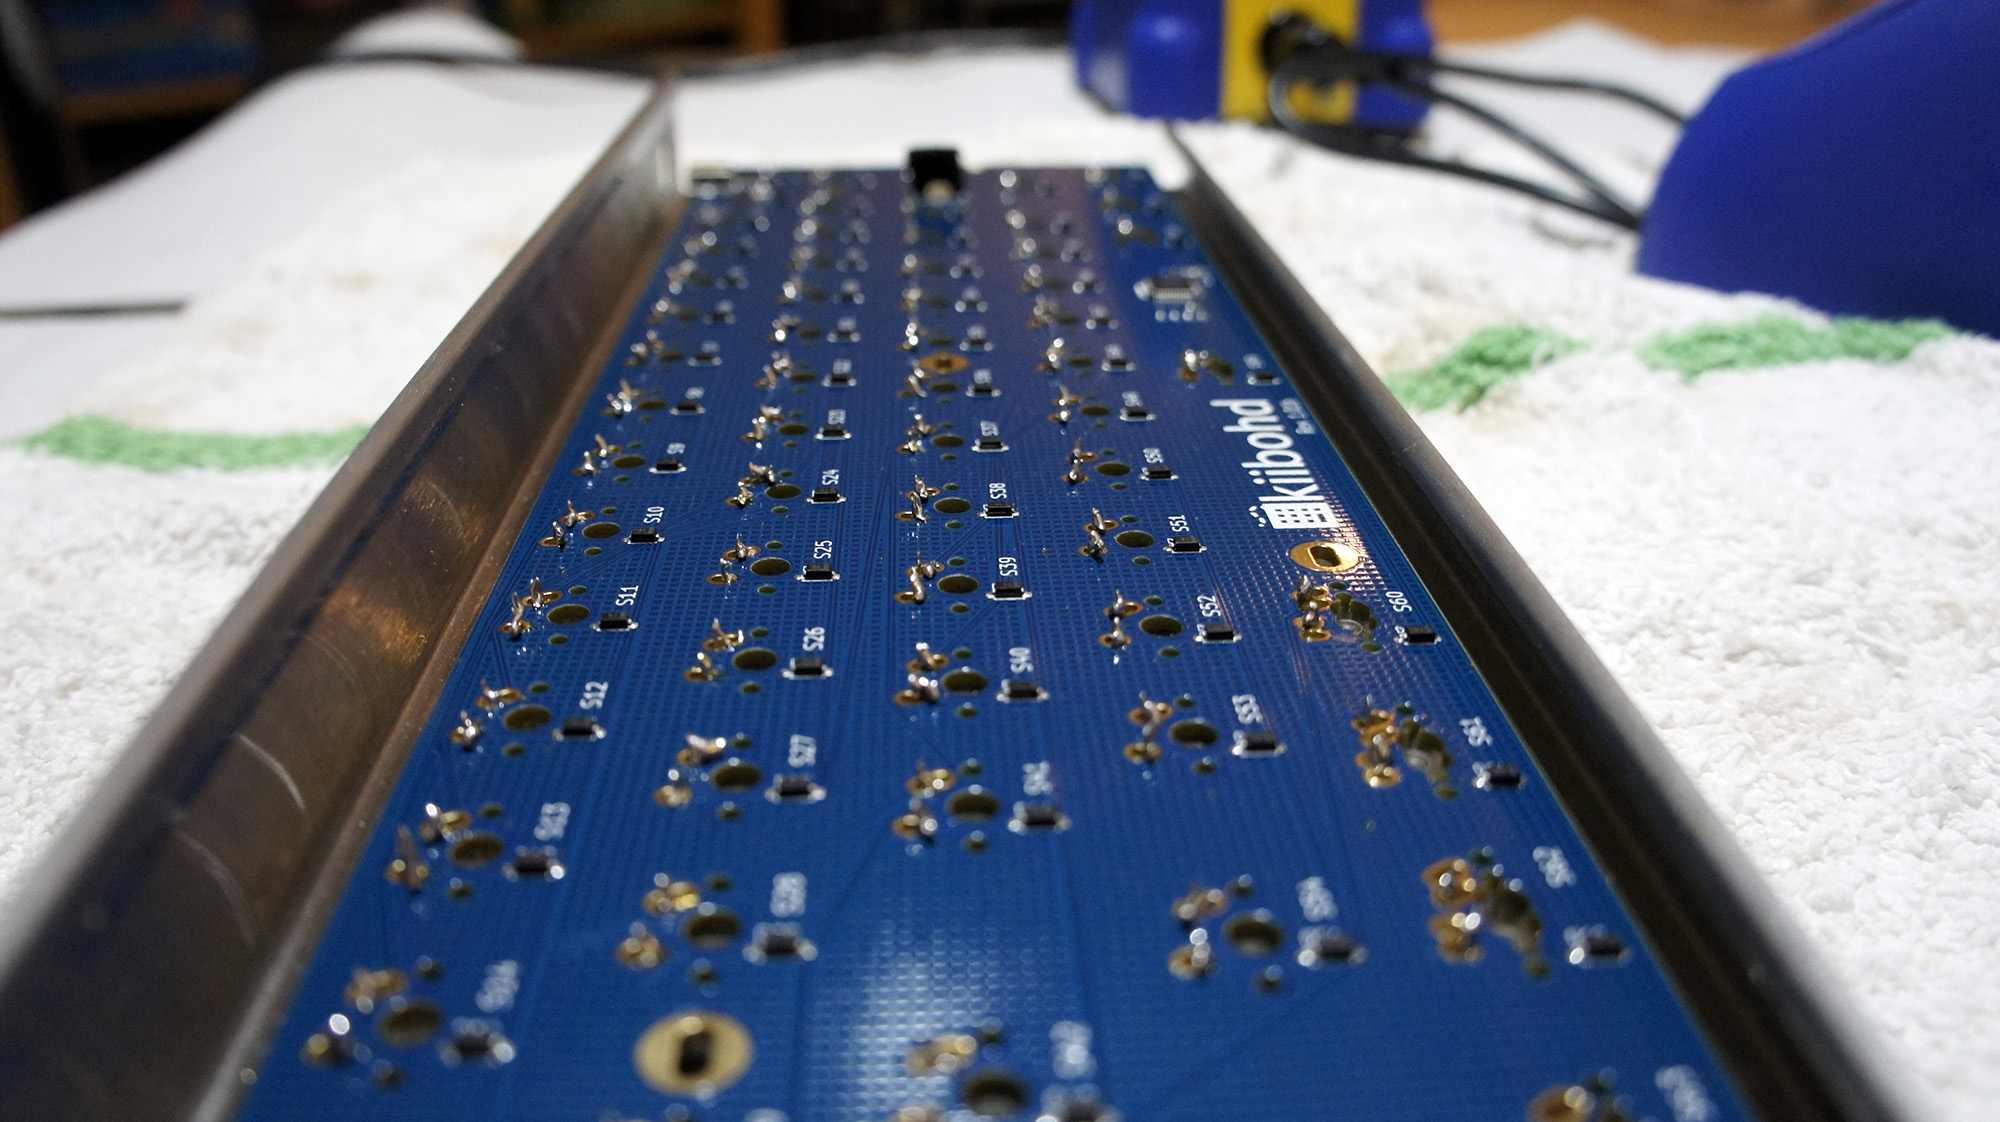
Once the soldering was done, I tested the keyboard to make sure all of the switches were reporting correctly. Each one worked perfectly, although my soldering job had much to be desired. Instead of nice, clean, smooth soldering, the back of the keyboard looks like a Terminator T1000 (the melty one) cried onto it. This made me regret choosing the open-backed chassis somewhat, since my soldering left the back of the keyboard sharp to the touch. I suppose I’ll just have to be careful when grabbing it.
Problems Arise
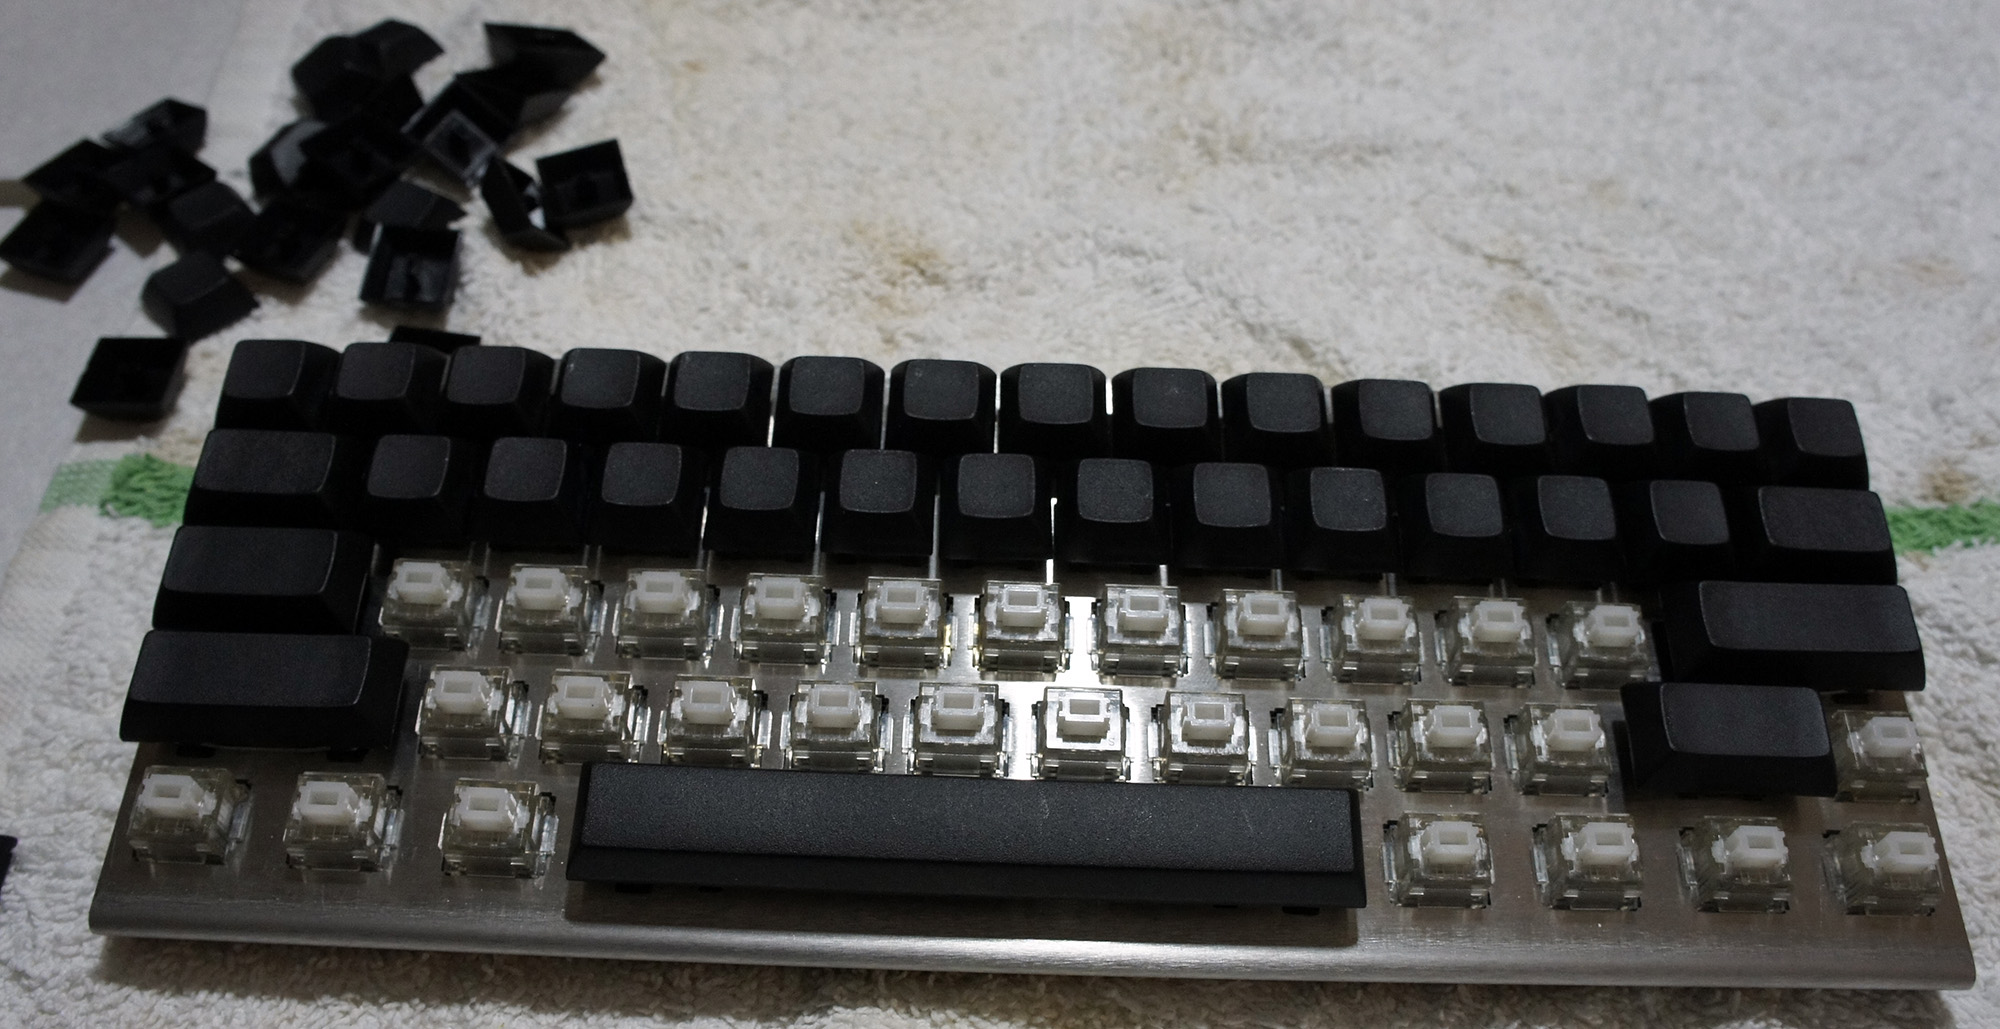
Next up was putting the keycaps onto the switches. Again taking the advice of the Massdrop discussion on the keyboard, I opted to start with the stabilized keys (spacebar, Enter key, etc).
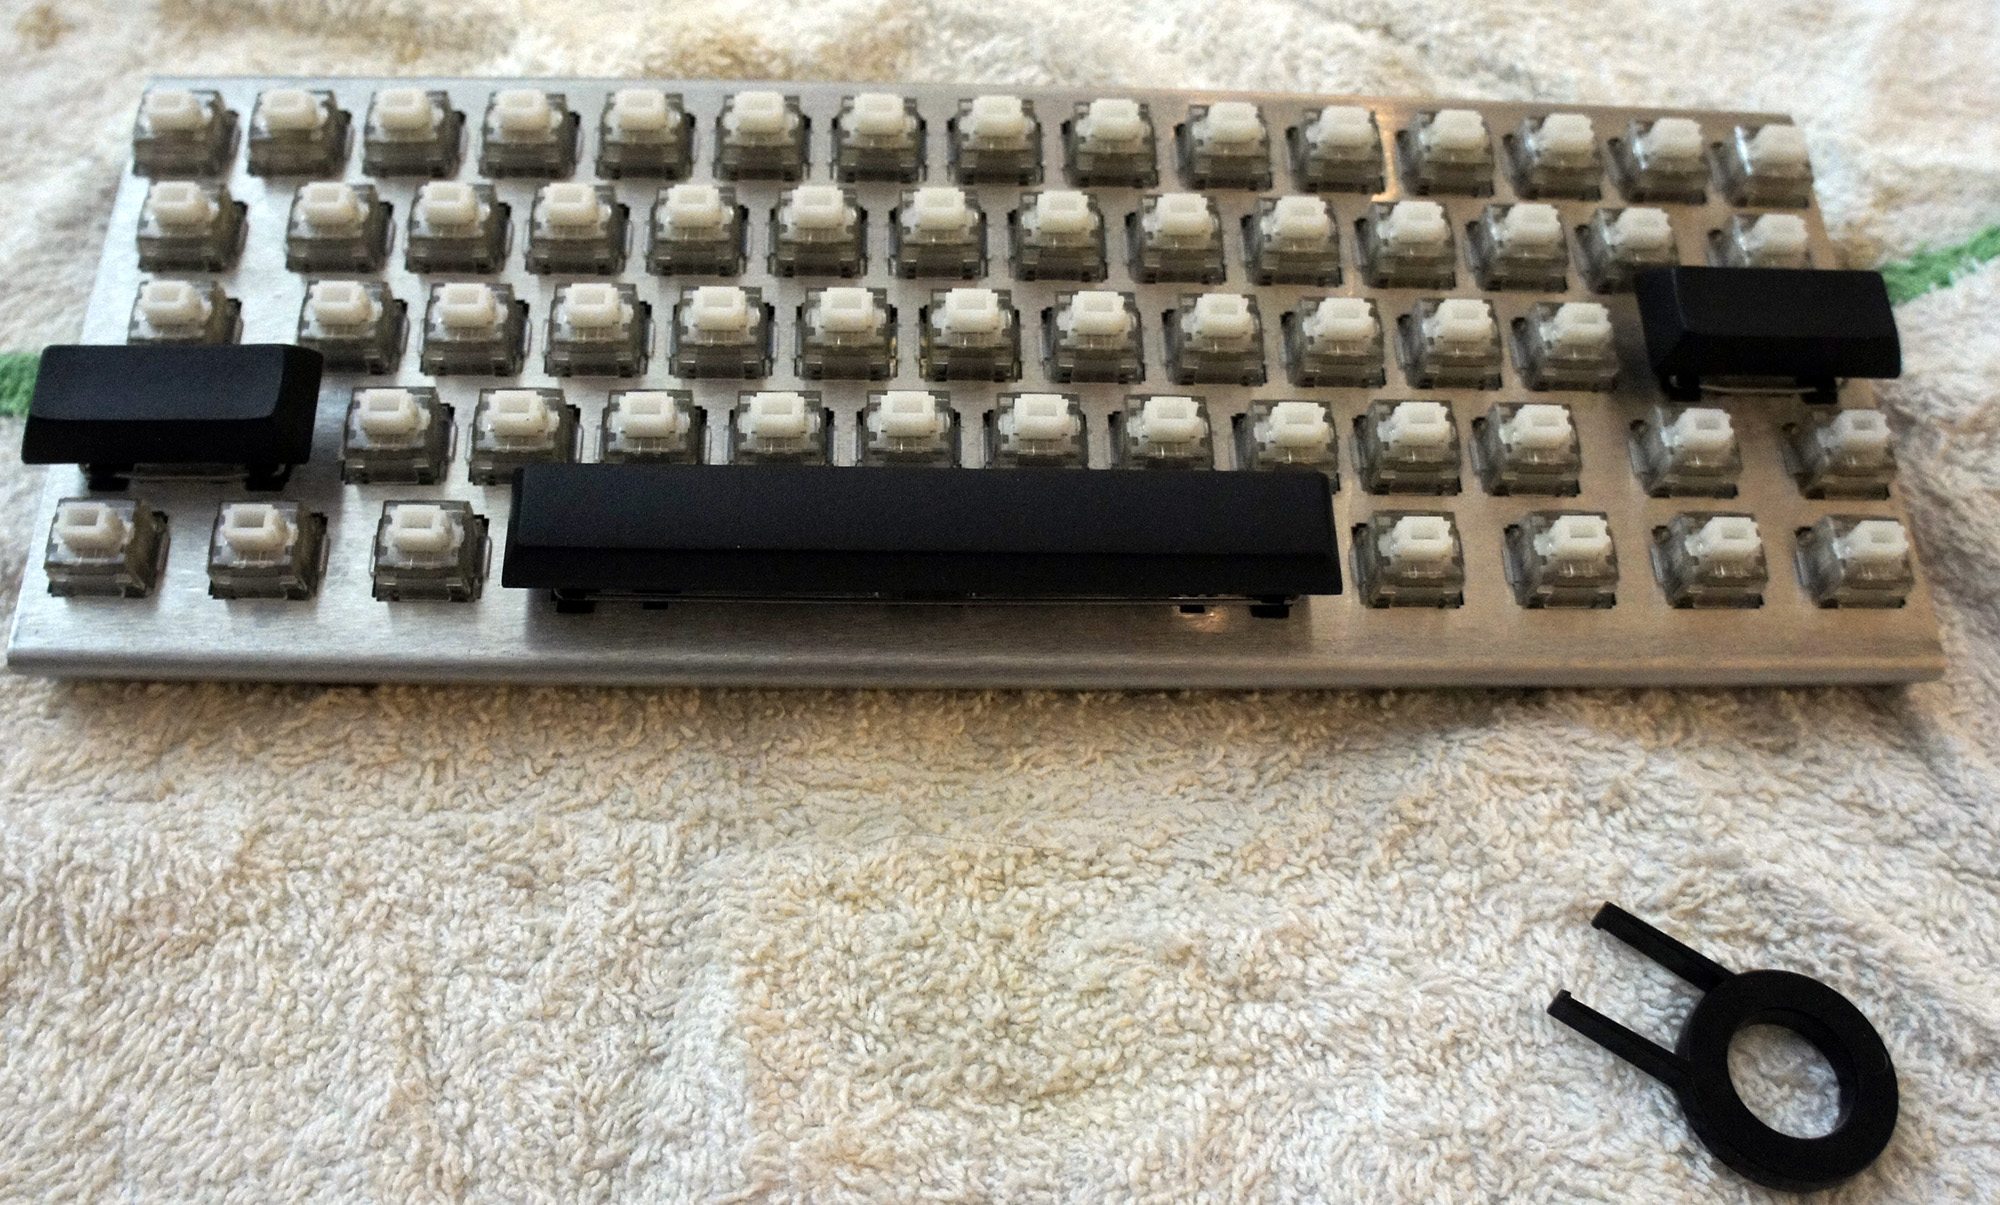
I noticed the stabilizers that attached to the keys felt fairly loose in their housing. Luckily someone online had the genius suggestion to cut tiny squares out of the plastic baggies the parts came in, and use them as a shim for the stabilizers.

This worked beautifully, and made the stabilizers sit tightly in their housing. Although something like super glue would probably work just as well, that’s a much more permanent solution, and the name of the game with the Infinity Keyboard is modularity.
However, while putting in the spacebar, I messed up a bit and got the stabilizing wire stuck under the stabilizers. I figured I would correct this mistake by pulling out the spacebar and fixing it.

Unfortunately for me, the Matias key stems are exceptionally tight, so it took an extraordinary amount of force the get the key out (My poor key-puller just gave up, and I had to use my fingers and a screwdriver to generate enough force to remove it).
However, once I got it out, I fixed the stabilizing wire and got back to work putting on the keycaps.
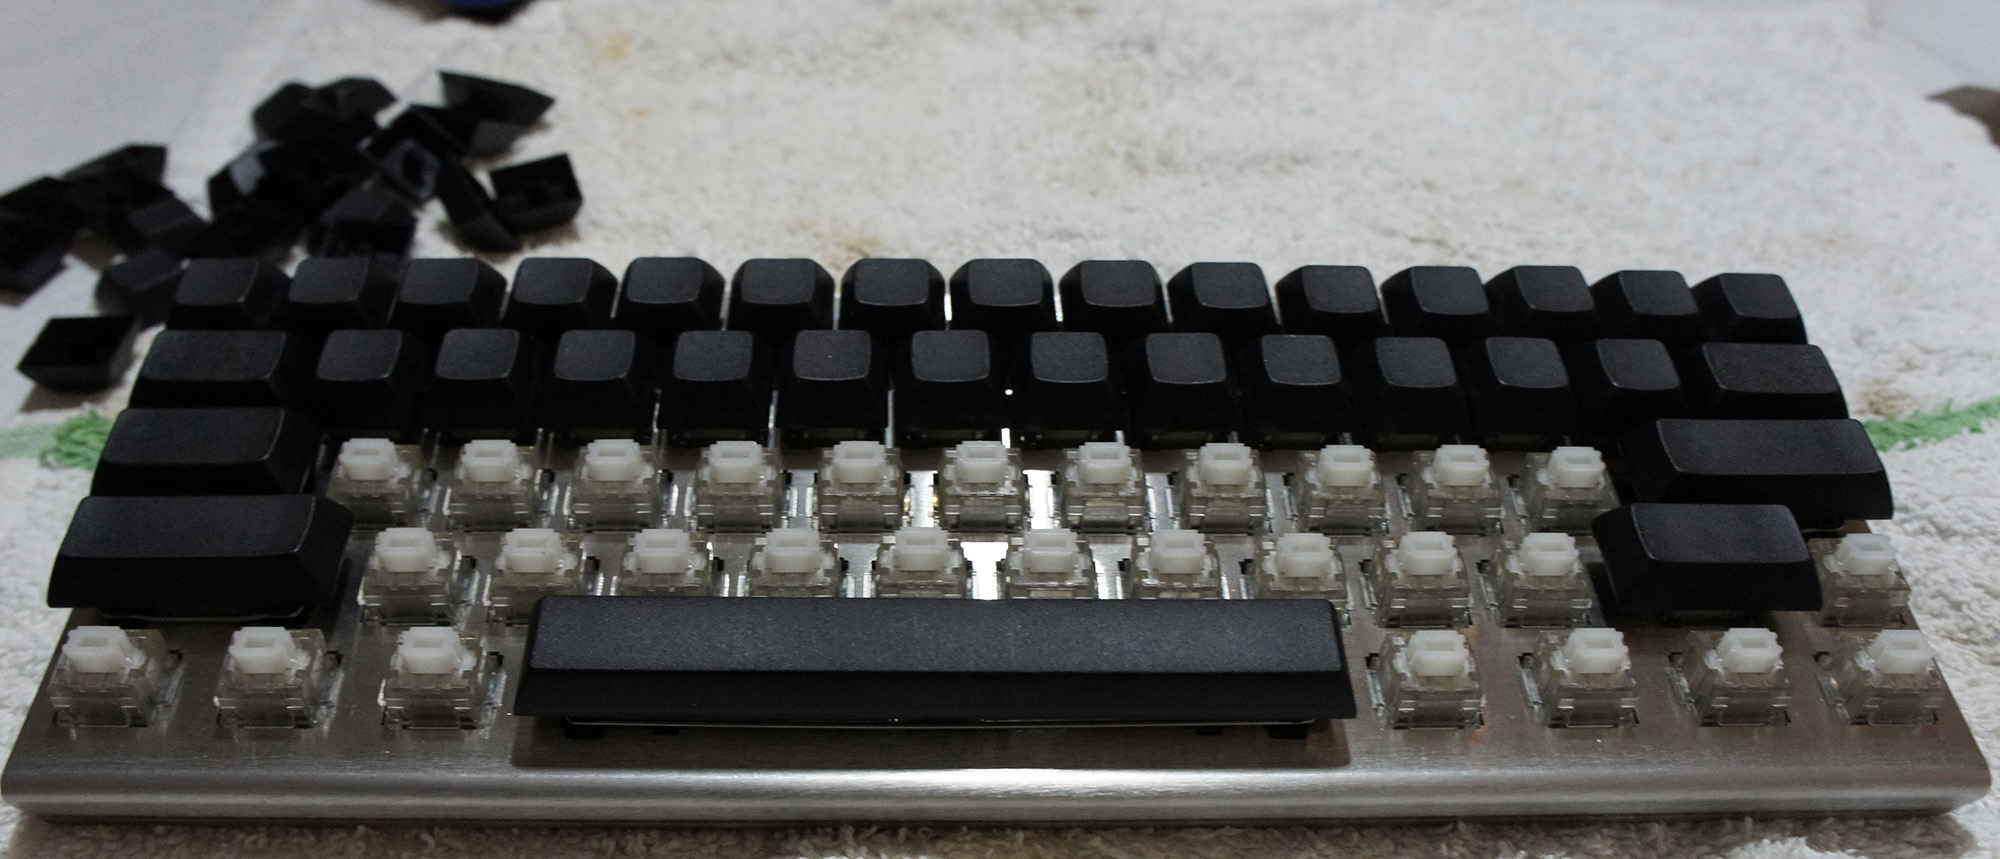
Once that was done, it meant I was done building my keyboard and it was ready to be used!
As you might expect by now, I had yet another unfortunate discovery when I began to type. All the keys worked well, except the spacebar would output anywhere between 1 to 10 spaces per keystroke.

At the suggestion of the Massdrop Infinity Keyboard discussion forum, it seemed like the best course of action would be to replace the key switch on the spacebar, as it had been speculated that maybe I damaged it when I removed the spacebar from it earlier.
Luckily for me, the keyboard kit included one extra key switch.
I figured the de-soldering process wouldn’t be much more difficult than the soldering process, but boy was I wrong.
The wick I had gotten barely soaked up any solder, and the solder was starting to get stuck in the holes in the logic board. As soon as I would melt it with my iron, it would solidify as soon as I started trying to push the switch out.
Eventually I pulled off enough solder to push the switch out, and replaced it with my backup switch. At this point I tested the keyboard with the new switch, and it worked flawlessly.
Now that I knew what I was doing, I was ready to put the spacebar onto the new switch and get typing.
However, nothing is that simple, and although I attached the spacebar without issue, the key tended to stick at the bottom of my keystrokes. This meant that I still ended up with unwanted spaces, although in some cases it meant I couldn’t hit the spacebar again when I wanted to.
At this point, I was out of extra key switches, and I knew that the force required when trying to remove the spacebar to try to diagnose the issue would cause the switch to break. I contacted Massdrop customer support to get some replacement switches and, hopefully, some advice.
They recommended trying to expand the spacers on the stabilizers, but that didn’t work. It also didn’t help that the spacebar appeared to be making contact with the keys directly above it and seemed somewhat out of alignment along the bottom.
I figured that maybe the spacebar was upside down, though the instructions never made mention of an ‘up’ and ‘down’ on the spacebar. Then again, the instructions were about as specific and helpful as a car-building manual comprised of useful steps along the lines of “get engine, put engine in car, apply wheels, finish car.”
Massdrop was kind enough to send me a free replacement key switch in preparation for the switch I was about to break. I also asked them send me a second backup switch in case I somehow managed to destroy the first backup, in case you are noticing a pattern here.
I removed the spacebar and switch using a soldering iron to loosen up the solder on the switch, pliers to pull the key switch out of the chassis, paperclips that were bent out of shape to pull on the spacebar, and my own tears of frustration. The tears were mostly a side effect, though I suppose they might have added some extra lubrication to the whole endeavor.
Once that was done, I put the new switch in the chassis, and plugged the keyboard in to test it and make sure everything worked properly.
After I was satisfied that the switch was fully functional, it was time to put in the spacebar.
I made sure the spacebar was flipped from the orientation it was in before (upside-down presumably). I attached the stabilizing wire to the stabilizers on the spacebar, and pushed it into place on the key switch.
To my dismay, the spacebar stuck at the bottom of the key press.
I immediately felt sheer terror at the nightmarish thought of having to remove the spacebar and key switch yet again.
In an act of desperation, I took a flathead screwdriver and pushed the one of the spacers out, certain it wouldn’t work.
To my amazement, the spacebar now moved freely.
Feeling like Thomas Edison probably felt when he pretended that he invented the lightbulb, I plugged the keyboard in to test each key.
My feeling of elation was quickly quashed as the “1” key didn’t seem to register key presses. The fear of having to replace a key switch was back almost as soon as it had gone. Feeling like I had eaten some bad Indian food, the sensation of fear in my gut returned as quickly as it had faded.
It looked like the soldering on the switch seemed ok, but given my complete ineptitude when it came to soldering, I figured I would melt it down a bit more to make absolutely certain it was making contact with the board.
A few seconds later, I plugged the keyboard back in, and finally everything worked properly.
I knew at the time that I should be feeling pride and joy for having completed my project successfully, but one singular thought consumed my mind: “never again”.
Conclusion
I got the Infinity Keyboard kit at a price of $157 after tax and shipping, with the intention to use it as a learning opportunity as well as benefit from having a rather unique 60% keyboard.
(A brief aside – keyboards tend to come in a few different sizes, most commonly: Standard, which includes all the typical keys, Tenkeyless [TKL], which excludes the number pad, and 60%, which excludes the number pad, arrow keys, and Home/Insert/Page Up/etc. keys.)
I certainly got my money’s worth as far as learning experience goes, though I was hoping the process would have been a bit more painless (emotionally and physically). I ended up with a fairly unique keyboard though, which I’m sure will impress all the people I know. It’s a known fact that nothing impresses people more than a keyboard.
At least the next time I build a keyboard (never), I’ll know what I’m doing. Also, as far as the key configuration goes, I have the option to compile my own firmware (as a software developer, this option disgusts me), use the default (as an enthusiast, this option disgusts me), or use the new Infinity configurator (as a lazy person, this option disgusts me). Oh well. I guess into the closet it goes.

Review: Logitech K830 Illuminated Living Room Wireless Keyboard
Normally, I consider myself a mechanical keyboard purist. I scoff in pity and disgust at those poor souls who still use rubber dome or scissor switch (eww, gross) keyboards.
Unfortunately for me, mechanical keyboards tend to come in two flavors – gaming and enthusiast (aka: super utilitarian). This is great for desk use, which is where I tend to spend the vast majority of my day. However, for living room use, attaching my favorite mechanical keyboard to my DOKO or media PC using a 1000 foot USB extension cable feels a bit excessive and inconvenient.
Also, despite my best attempts, I have yet to become ‘that guy’ who only uses command line interfaces to do everything, so I still find the mouse to be a necessary PC peripheral. This also poses a problem for the living room, since the couch cushions make for a poor mouse pad, and attempting to use my girlfriend as a mouse pad results in several lectures delivered at painful decibel levels that suggest women are not objects for men to use. I’ve heard similar arguments in other situations, but I suppose women are also not mouse pads.
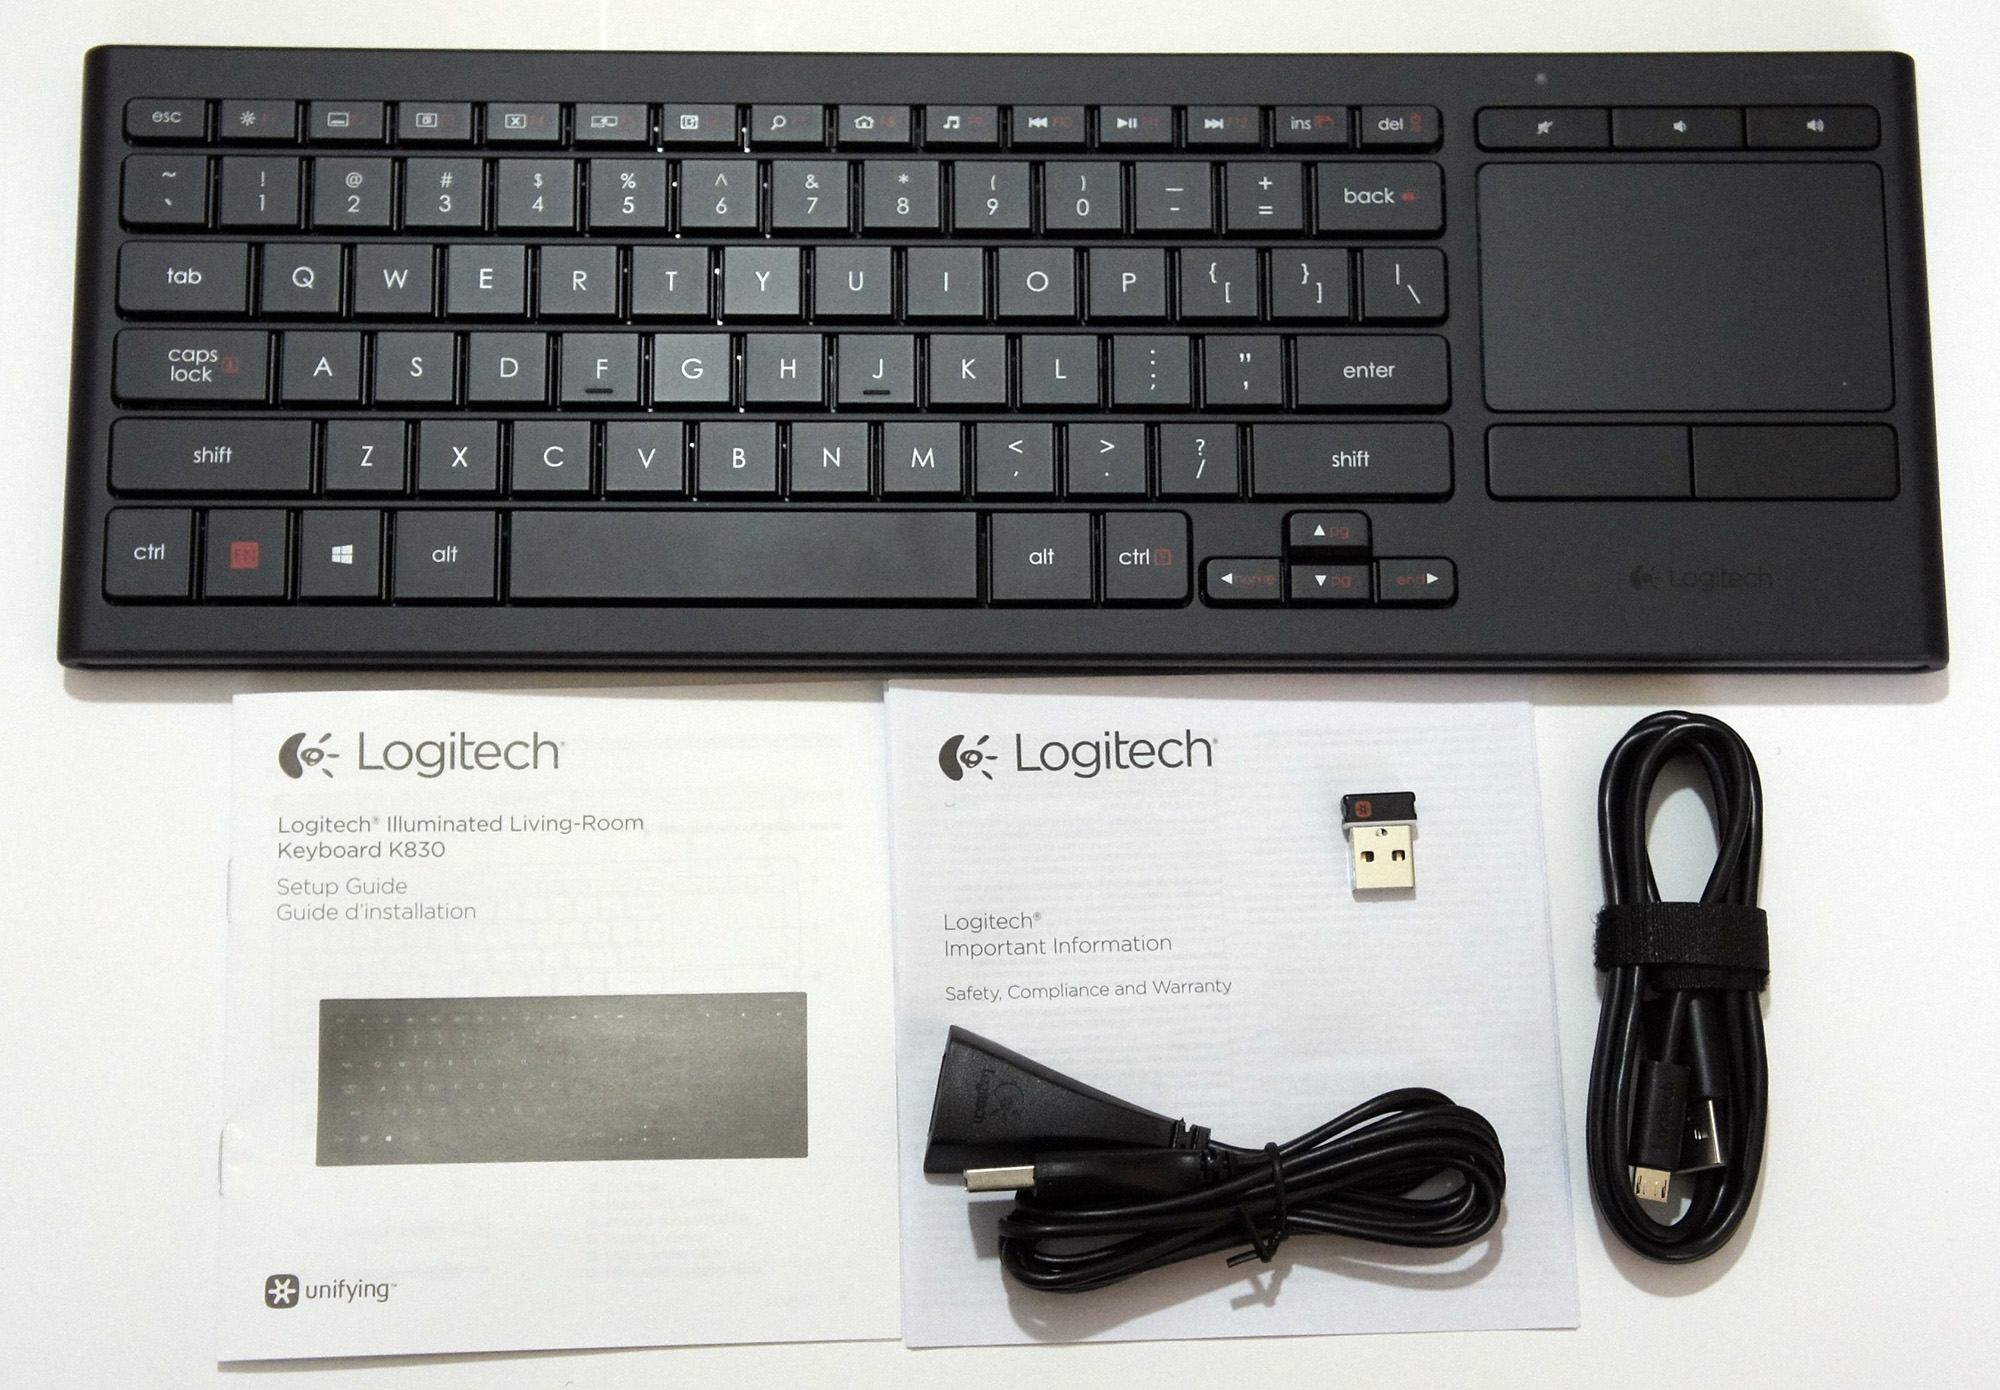
In any case, this brings me to the focus of this review, the Logitech K830 wireless living room keyboard. Despite not having mechanical key switches, I must admit it does its job very well.
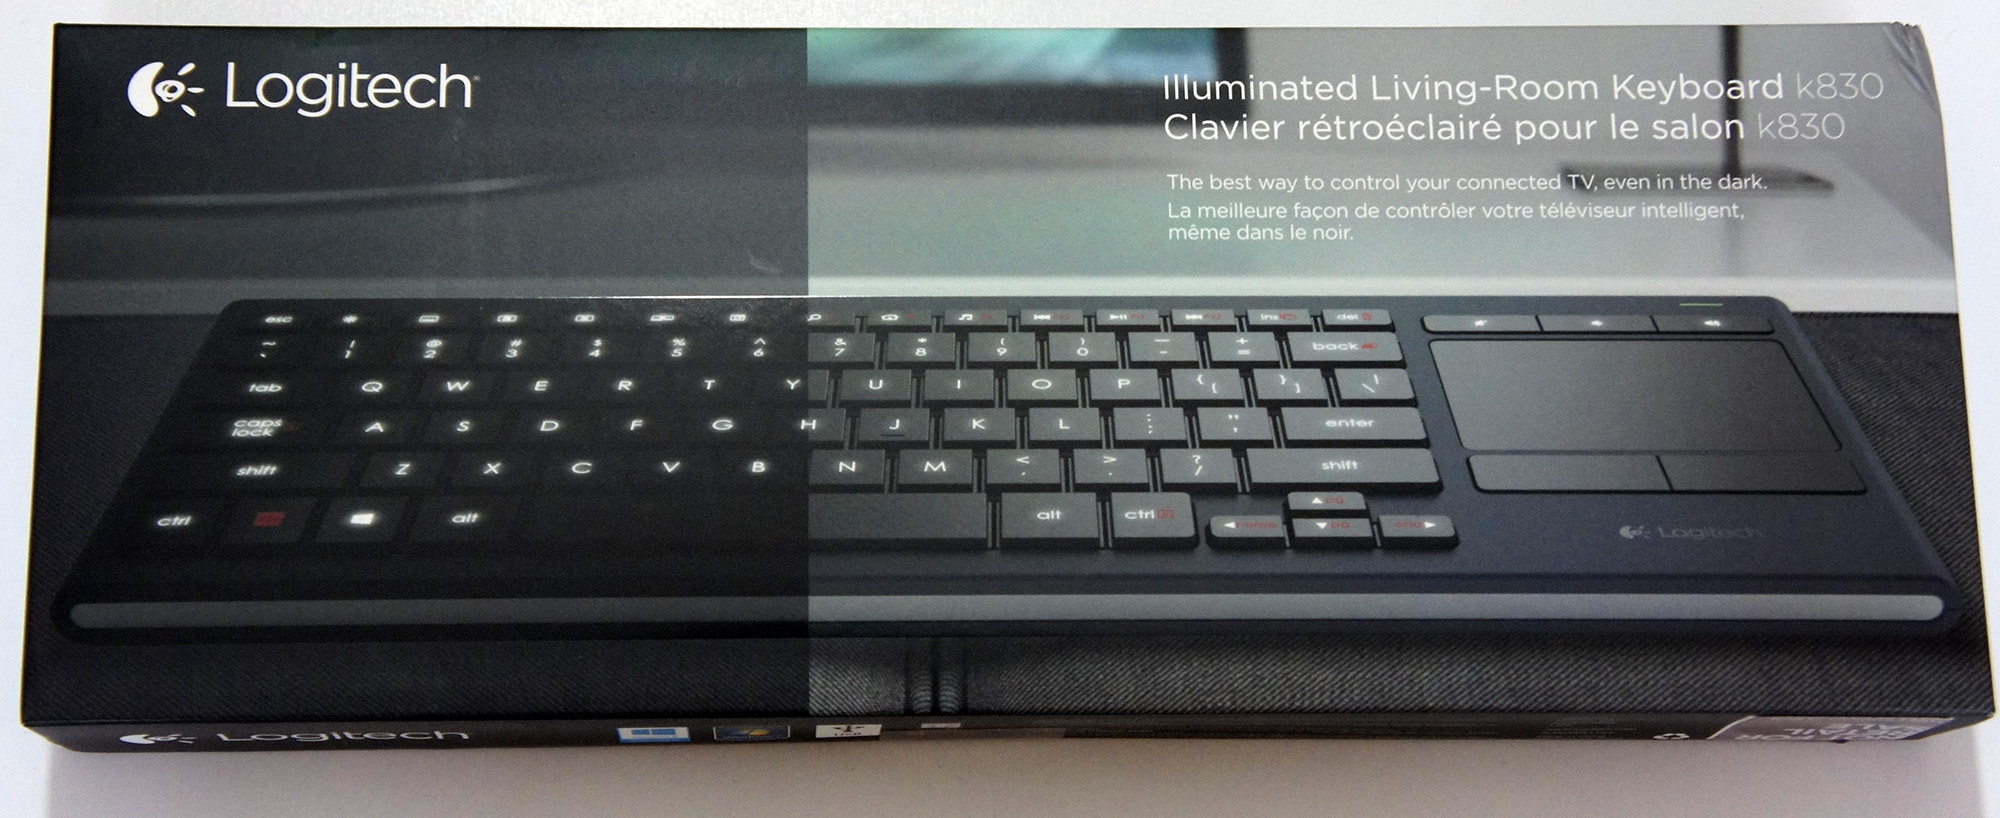
The K830 has a well laid out keyboard and an integrated touchpad to the right of the keyboard (sorry lefties, looks like we forgot about you again). Although it uses the chiclet-style keys found on laptops, it doesn’t feel terrible to type on. If that’s a deal breaker for you, let’s be honest here it’s designed to be a living room keyboard. You should be doing your serious typing at a serious desk like a serious typist would.
Specifications:
- Width – 367 mm (or 14.4 inches)
- Height – 125.3 mm (or 4.9 inches)
- Depth – 16.5 mm (or 0.65 inches)
- Touchpad size – 80 x 52 mm (or 3.1 x 2.0 inches)
- Weight – 495 g (or 17.5 oz)
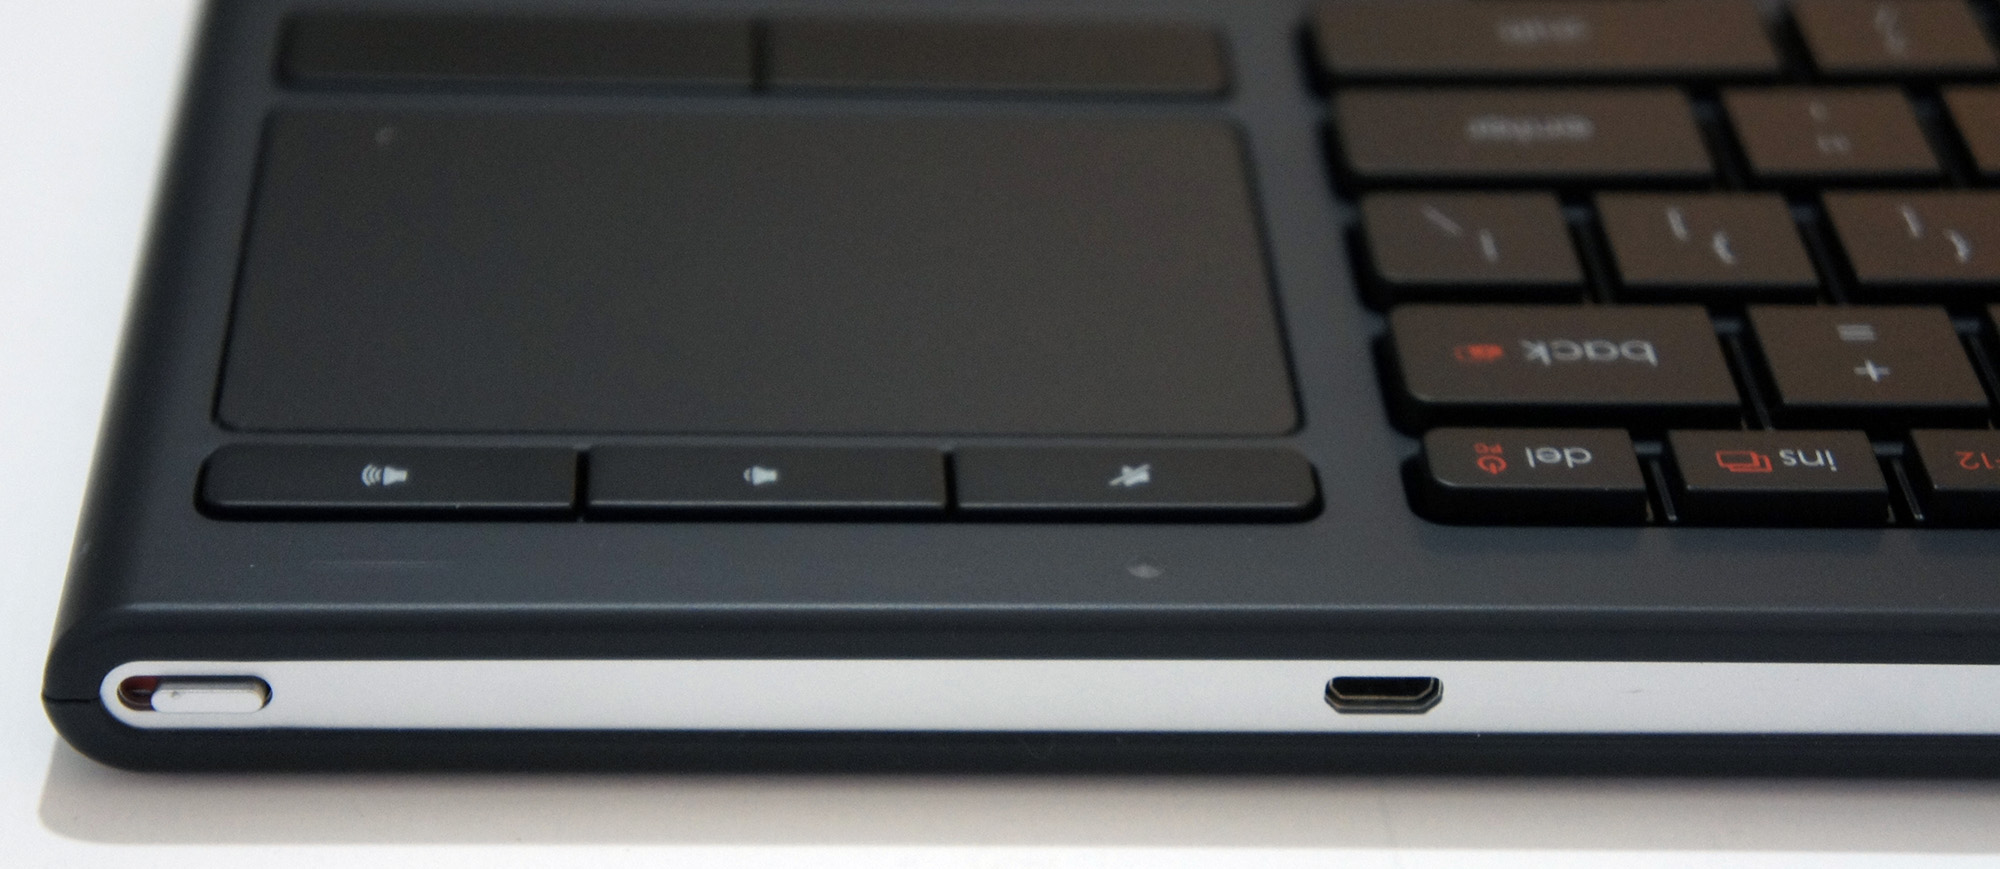
Setting up the K830 was very straightforward. The USB Bluetooth nub plugs into the computer, and the keyboard is ready to go. Logitech also includes a microUSB cable for charging the keyboard, and a USB extension cable that is supposed to be used to connect the Bluetooth dongle to the computer to extend its range, though it works just as well for extending the length of the microUSB cable.
The battery life, according to Logitech, is a full 10 days from just 3 hours of charging, based on a usage of 2 hours per day with the backlight at full brightness. In my experience with the K830, I’d say that sounds about right, though I did not use it religiously for 2 hours, 10 days in a row. In fact, most of the usage comprised of me turning on the keyboard, navigating to Netflix in the browser, starting a show/movie, and turning off the keyboard until I needed it again.
If I extrapolate based on Logitech’s math, using the keyboard for 10 minutes per day, as opposed to 120 minutes per day, means that I should get 120 days of battery life! For those of you who want to complain that their battery doesn’t last 120 days with 10 minutes of usage per day, please send all complaints to [email protected] (THANKS OBAMA).

The keyboard itself feels to be very high quality; nothing flimsy about it. It feels durable and solid, and not too plastic-y. The touchpad works as well as any decent laptop touchpad would, and includes two click buttons below it, as well as a right-click button positioned on the top left of the keyboard.

Tap-click was enabled by default on the touchpad, but it can be changed with a function-key combination. Since there’s no dedicated software suite for the keyboard, all the options are configurable using key combinations, and are explained in the manual.

There’s not much else to say about such a simple, yet useful, keyboard. It works as intended, and does so while retaining a high quality feel and solid battery life. Currently retailing around $92 it’s a bit pricey compared to some cheap off-brand wireless keyboard + mouse combination, but it really sets itself apart from the competition in terms of quality, battery life, and features (which include an internal rechargeable battery and the integrated touchpad).
Overall, I’d recommend the Logitech K830 to anyone looking for a wireless living room keyboard (which is why my dad now has one). However, to those of you thinking “that’d be a great keyboard/touchpad combo for my desktop/laptop”, get a nice mechanical keyboard and stop embarrassing yourselves.

The First Not Operator Giveaway!Θ UPDATED
Update 2: One of our winners didn't claim their prize, so we did a redraw and gave someone else the opportunity to claim it! Update 1 has been edited to reflect the new winner, be sure to get back to us within 48 hours to claim your prize.
Update 1: Congratulations to our two winners, Harrison G and Dean Y! Be sure to check your email's spam folders if you didn't receive an email from us, as you have 48 hours to claim your prize, otherwise we'll redraw another winner or two.
To the rest of you, thanks for entering, and stay tuned as we'll have other giveaways in the future.
Welcome to the first Not Operator Giveaway!Θ
We're giving away a Roccat Kone Pure laser gaming mouse as well as a Tt eSports (Thermaltake) Poseidon mechanical gaming keyboard (with Cherry MX Brown key switches).

The specications for the Roccat Kone Pure are:
- Pro-Aim Laser Sensor R3 with up to 8200dpi
- 1000Hz polling rate
- 1ms response time
- 12000fps, 10.8megapixel
- 30G acceleration
- 3.8m/s (150ips)
- 16-bit data channel
- 1-5mm Lift off distance
- Tracking & Distance Control Unit
- 72MHz Turbo Core V2 32-bit Arm based MCU
- 576kB onboard memory
- Zero angle snapping/prediction
- 1.8m braided USB cable
Dimensions – Max. width 7cm x approx. 12cm max. length
Weight – Approx. 90g (excl. cable)
In the package – ROCCAT™ Kone Pure - Core Performance Gaming Mouse, Quick-Installation Guide
The Roccat Kone Pure has an MSRP of $69.99
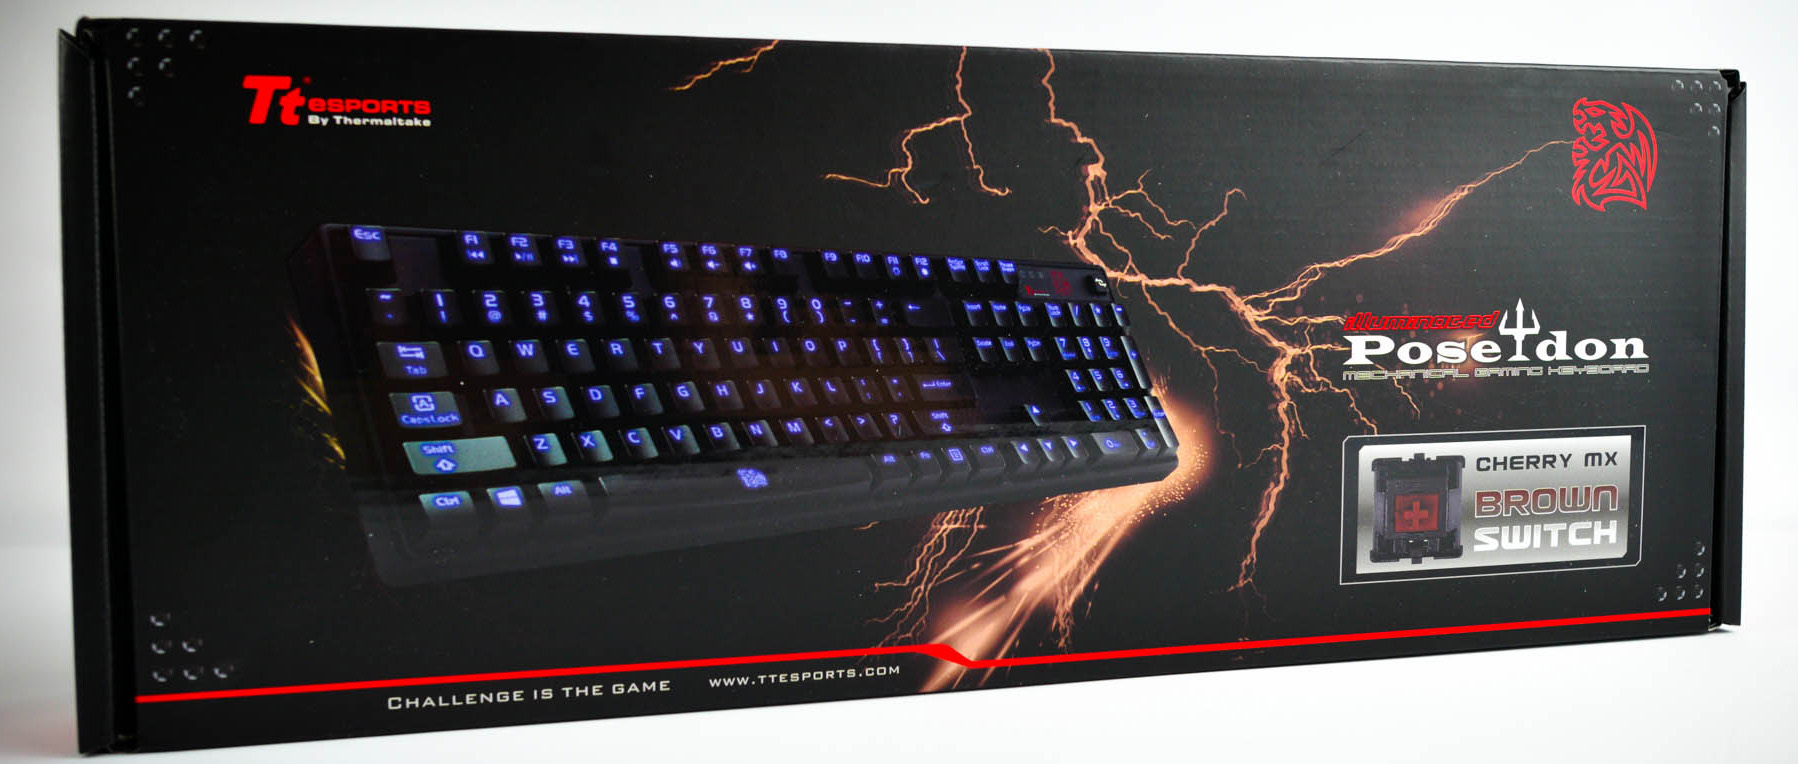
The the Tt eSports Poseidon mechanical gaming keyboard features Cherry MX Brown key switches, a fully back-lit keyboard, offering 4 levels of adjustable brightness, media keys, and a Windows Key lock option. It has an MSRP of $99.99
To enter our giveaway just follow us on Twitter @notoperating, tweet about our giveaway, and like us on Facebook. In addition, feel free to subscribe to our Youtube channel for an extra chance to win.
The giveaway will run from 1/25/2014 at 12:00 AM PST until 2/1/2014 at 12:00 AM PST, at which point we'll choose two winners, one of which will receive the mouse, and the other the keyboard.
Unfortunately the giveaway is only available to readers located in the contiguous United States. Good luck to you all!
!Θ