1080p
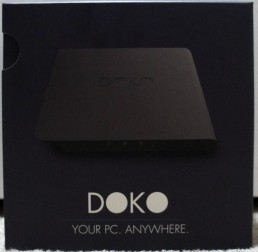
Review: NZXT DOKO
When I was planning for this year’s CES (2015), NZXT told me they were setting up meetings, but only had one new product they’d be showing. They wouldn’t tell me what it was or what it did, only that I’d see it when I visited their suite.
I arrived at NZXT’s suite and saw they had a television hooked up to a small black box, which had a keyboard, mouse, and gamepad attached to it. They simply told me “this is the DOKO”, to which I replied “err… what is a DOKO?”
The NZXT DOKO is a device designed for streaming a PC to a television, and is aimed at replacing the living room media PC.

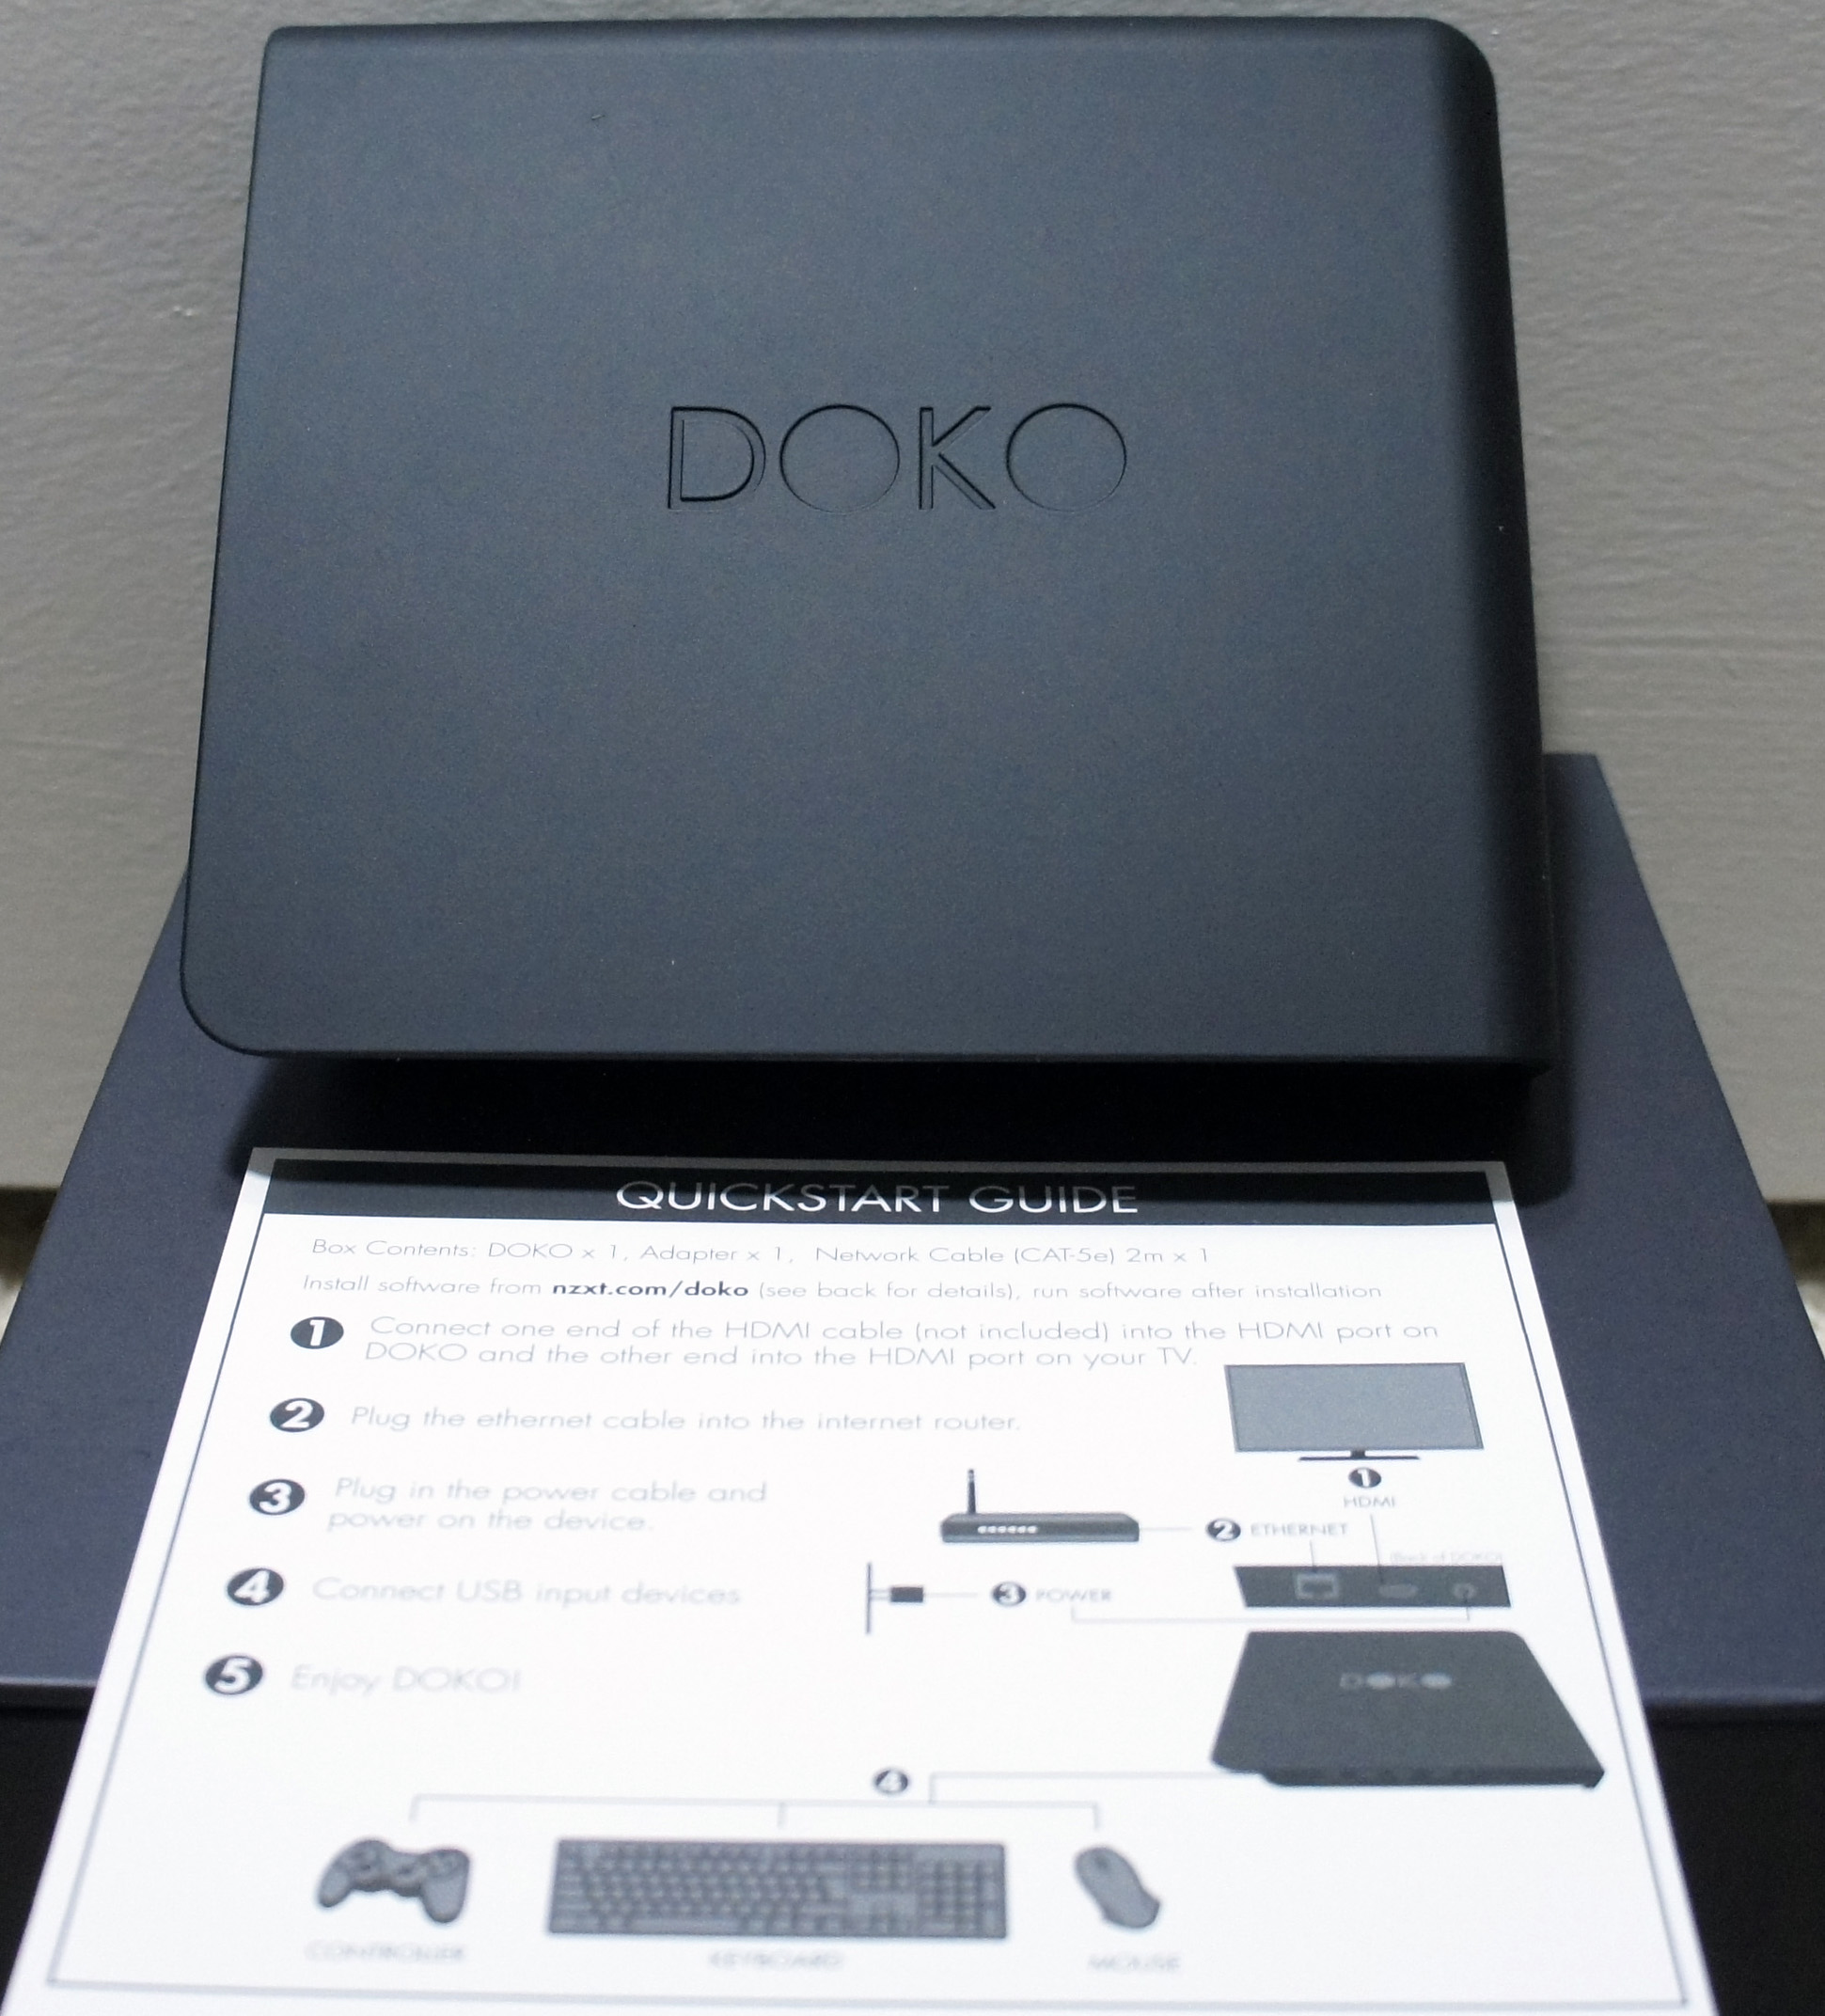
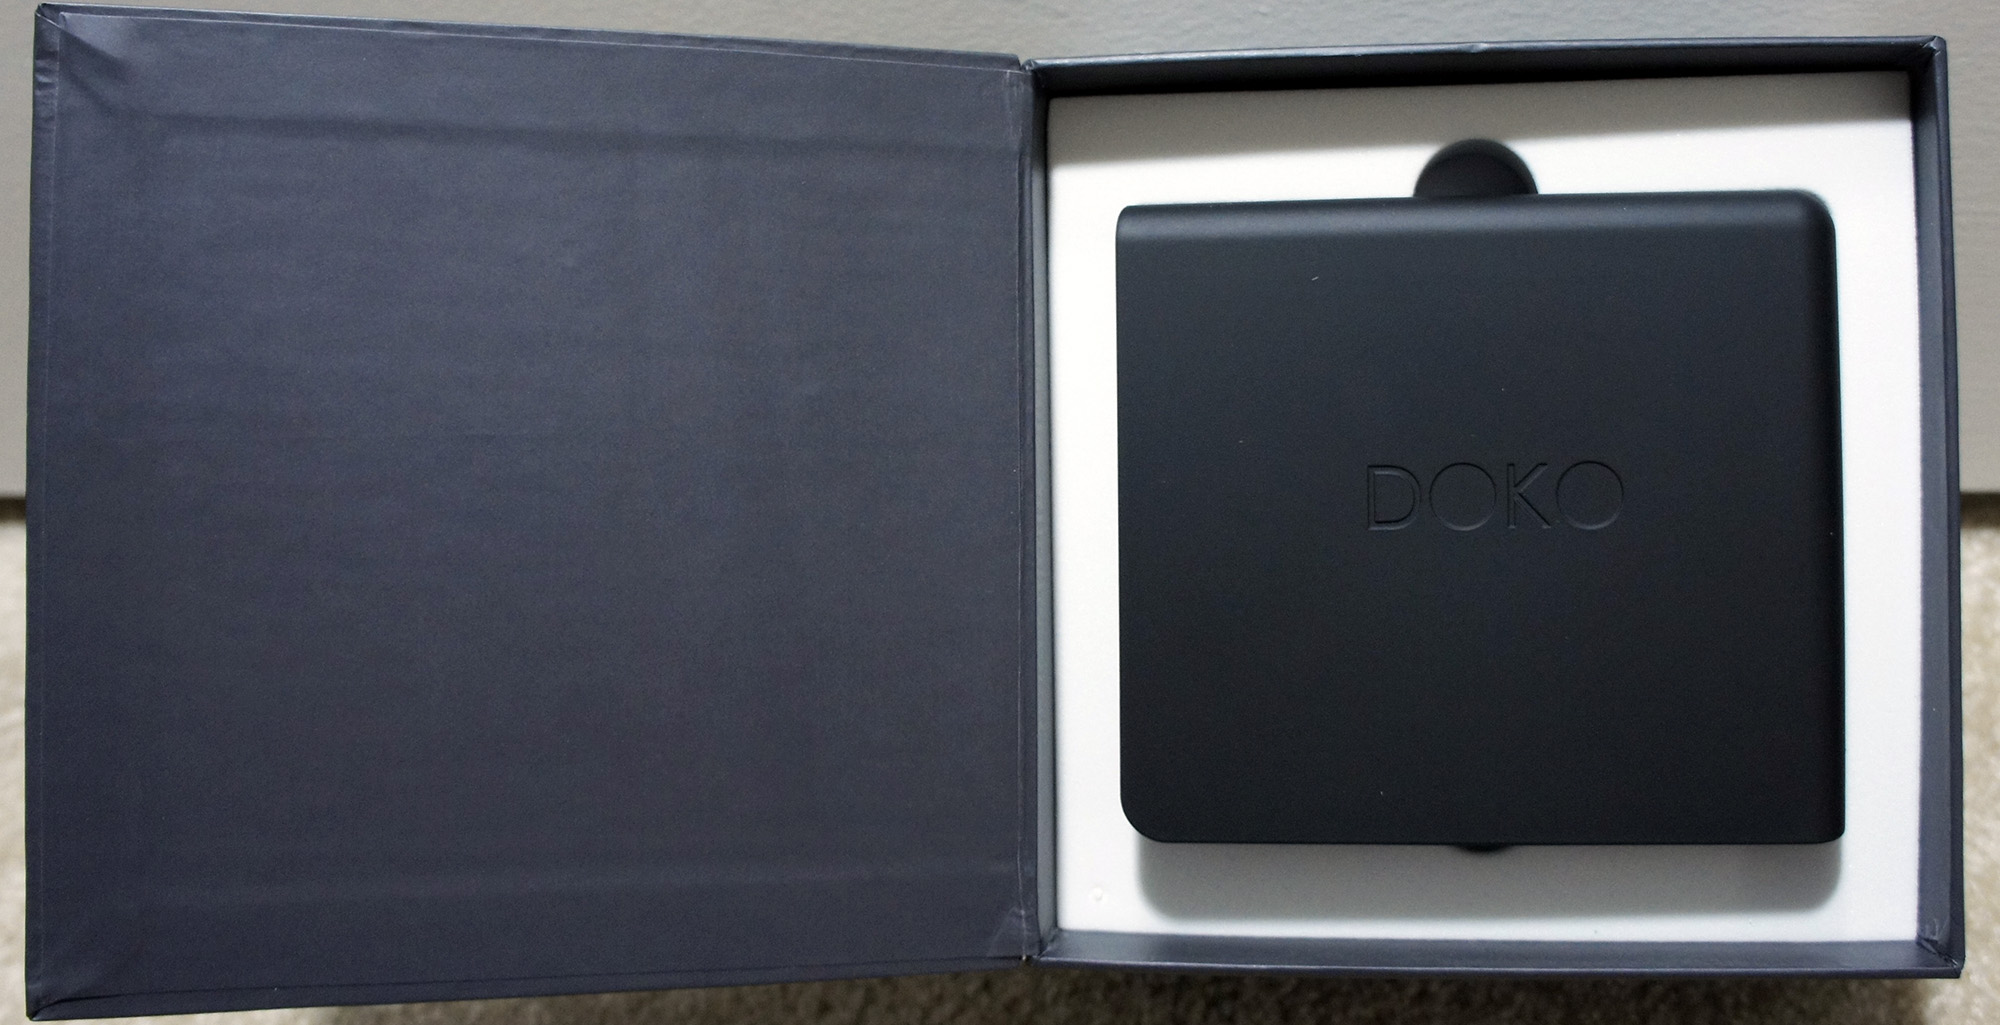
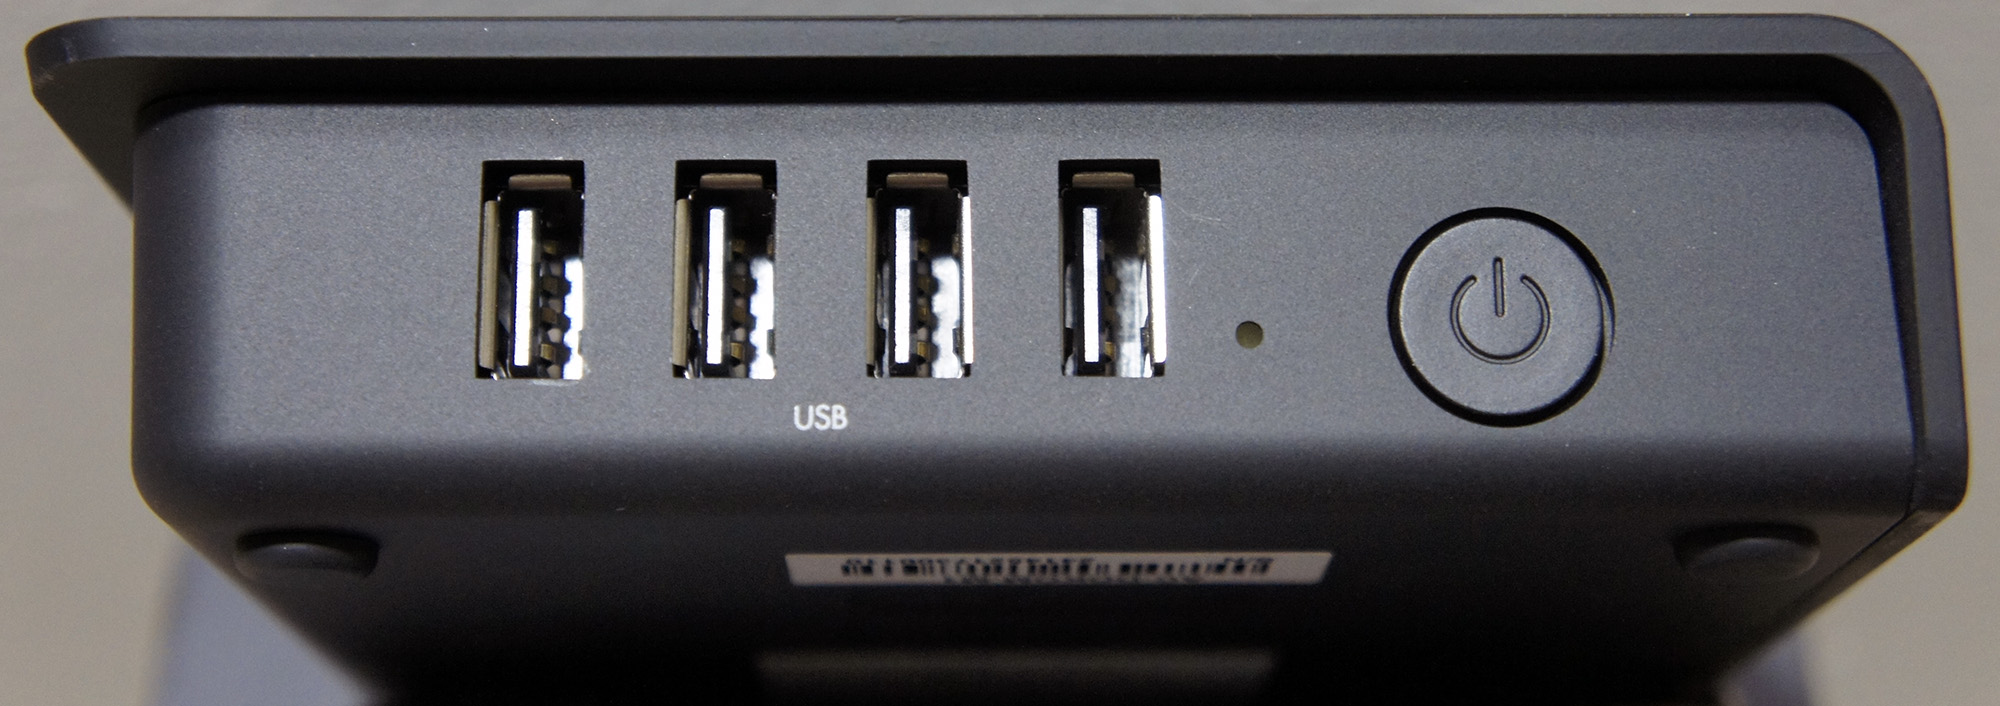
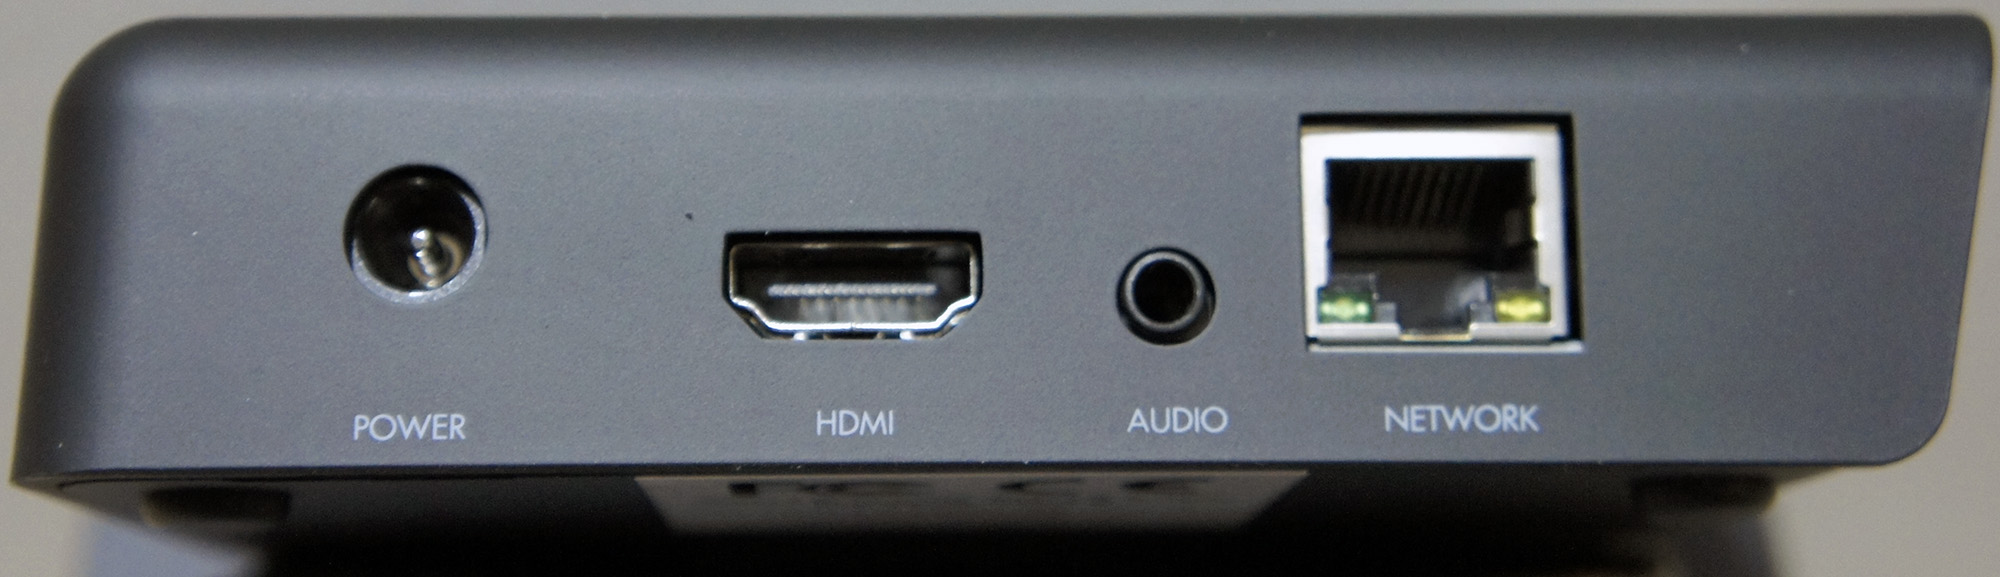
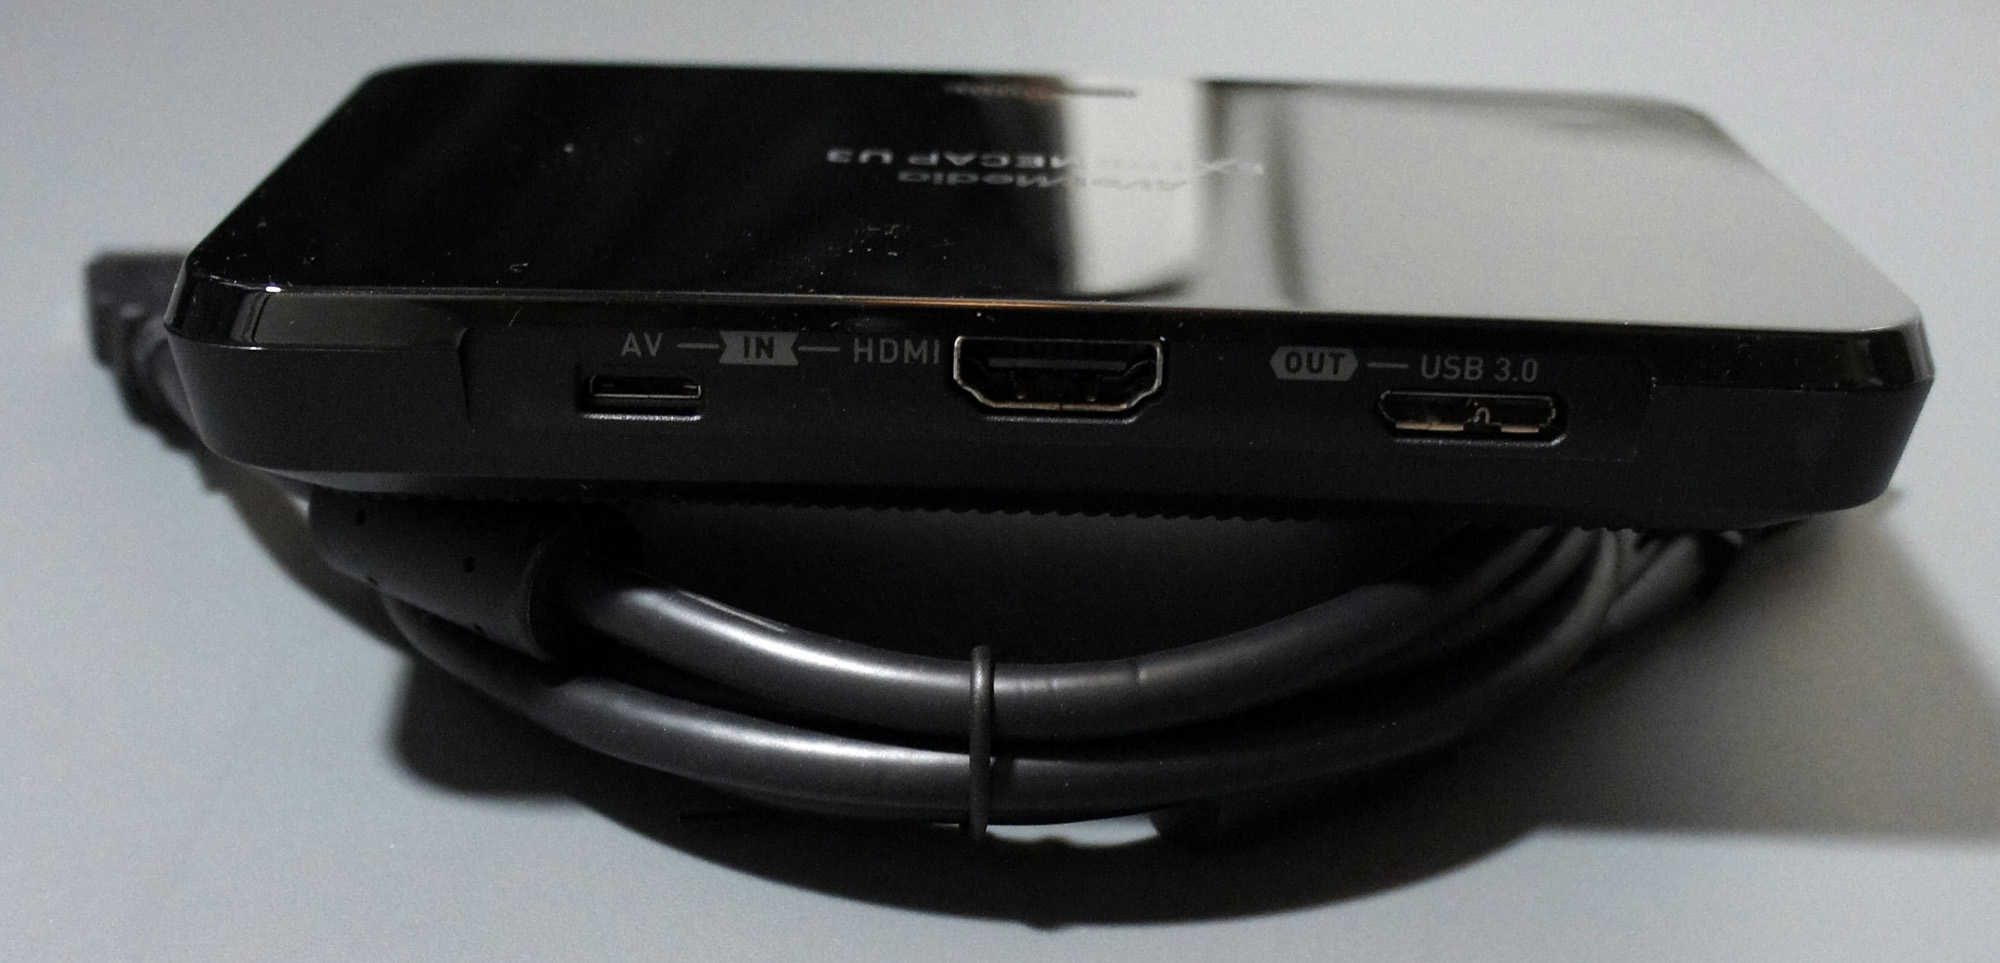
A small black box with a power button, HDMI out, 3.5mm audio out, Ethernet out, and 4x USB 2.0 in, the DOKO is a pretty sleek device. The specifications are below:
- Model Number – AC-DOKOM-M1
- Dimensions – W: 108mm H: 29mm D:121mm
- Weight – 0.32kg
- Included Accessories – Ethernet Cable, Power Cable
- CPU – Wonder Media 8750
- Memory –256MB DDR3
- Boot Storage – 8MB SPII Flash
- Network Connectivity – Gigabit Ethernet
- Video Output – HDMI 1.3 or higher
- Audio Output – Headphone Port
- Video Signal – 1080p @ 30FPS
- Power – 12V 2.5A DC Adapter
- Accessory Connection – 4x USB 2.0, USBOIP
- Materials – Rubberized Coating, ABS Plastic, PCB
- Color – Black
- UPC – 815671012241
- Warranty – 2 Years
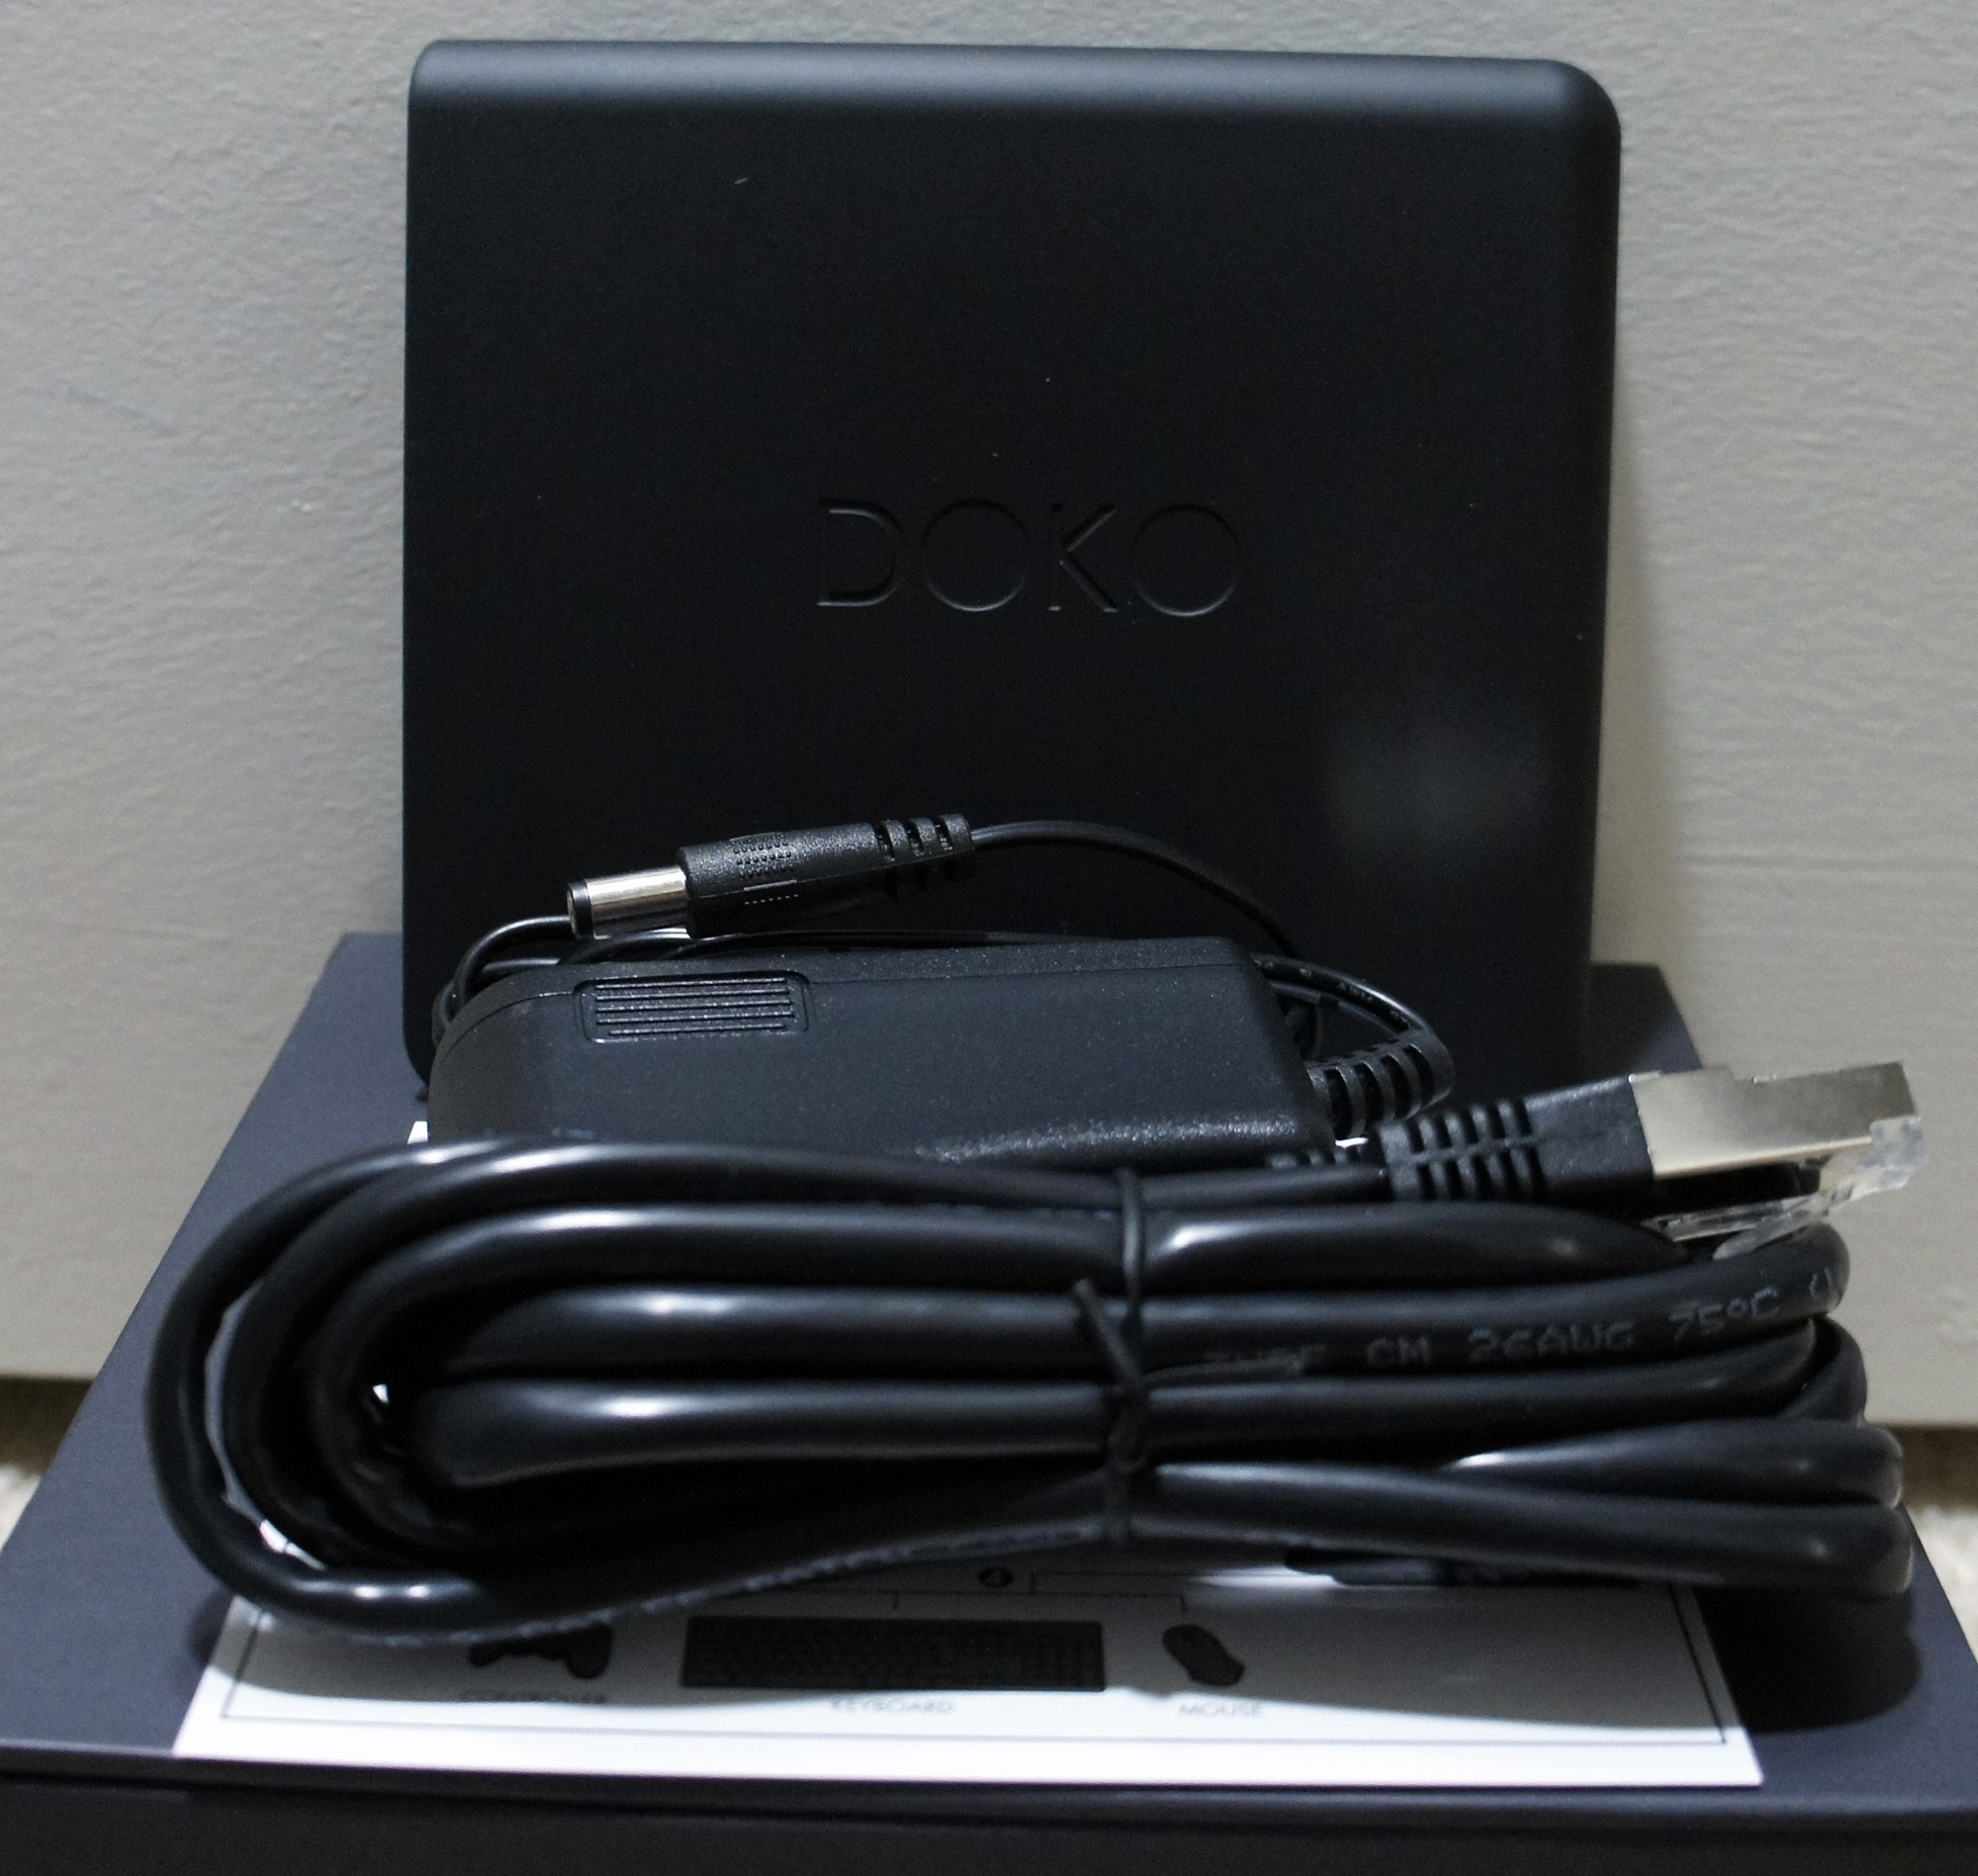
The way the device works is fairly straightforward – the DOKO is plugged into a TV via HDMI, into the router via Ethernet (NZXT opted to not include a Wi-Fi option to avoid potential latency/bandwidth issues, and presumably lessen costs), and a keyboard/mouse/gamepad/USB-powered car battery/etc. via USB.
Once the DOKO is set up, the next step is to install the DOKO software on any PC you wish to use with your DOKO. The software is available on NZXT’s website, and has a fairly straightforward installation. From then on, the software runs in the background (similarly to a PLEX server) and makes it so the PC is available for DOKO streaming. The software also allows you to set up a password required in order to connect the DOKO to your PC, which is handy for preventing roommates or family members from accessing your PC during inopportune occasions.
With the software running on the PC, and the DOKO booted up, all there is to do is select the desired PC and remote in. The host PC will automatically detect any USB device plugged into the DOKO. At that point, you can do anything you normally would on your PC through the DOKO.
Unfortunately, the DOKO is limited to only 30 frames per second, though it does so at 1080p. This is fine for most tasks it was designed for, including watching movies (except for the Hobbit movies, Peter Jackson disapproves of the DOKO’s disappointing framerate). When it comes to gaming, gameplay is surprisingly smooth and doesn’t really have any noticeable latency. However, gamers might object to the framerate, since after all, 30 FPS is only for people on last-gen consoles, playability be damned! To them I say, go back to your room and play the games there, or get the new Nvidia Shield for twice the price of the DOKO.

The NZXT DOKO is a great product. At $99, it certainly allows you to do a lot more than you’d be able to do with a media PC that costs even twice as much (assuming you have a solid PC at home already). The device is small, a breeze to set up, and easy to use. Personally, I’ve been using it in conjunction with Logitech’s K830 wireless keyboard, which makes the DOKO extremely convenient for couch use.
Overall, I’d recommend the DOKO to anyone looking to get a living room PC of any sort, as long as they have a solid PC elsewhere in the household that they can stream from.
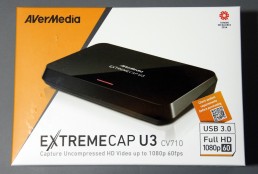
Review: AVerMedia CV710 ExtremeCap U3 Capture Card
When Michael presented the idea to me of creating videos for the gaming section of Not Operator, I thought it would be a good idea. I told him it would be easy to stream and capture PC games, but our only option for Xbox One would be using Twitch.tv, and we wouldn’t have any way to capture Wii U gameplay. He suggested we get ourselves a game capture card for review.
Having never looked into the world of capture cards before, I didn’t really know what I was looking for, and I didn’t know any of the major brands that create capture cards other than Hauppauge (which is known for their TV Tuner cards anyways).
I began researching products, looking up reviews, and checking forums to see what the most commonly recommended capture cards were. What I found was that many existing capture cards have been on the market for a few years already; very few came out within the last year. The side effect of this is that many capture cards have a variety of limitations, such as not being able to capture 1080p video at higher than 30 frames per second, the inability to capture sound, or requiring some weird mess of cables to get working. This includes capture cards up into the $300 range.
Soon after, I discovered that many people suggested some Japanese brand capture cards that would have to be imported to the US, and still wouldn’t even capture audio. I thought this was a strange thing. Considering how popular game streaming and Let’s Play videos are on Youtube, I would’ve expected a variety of well-known companies to have entered the capture card market.
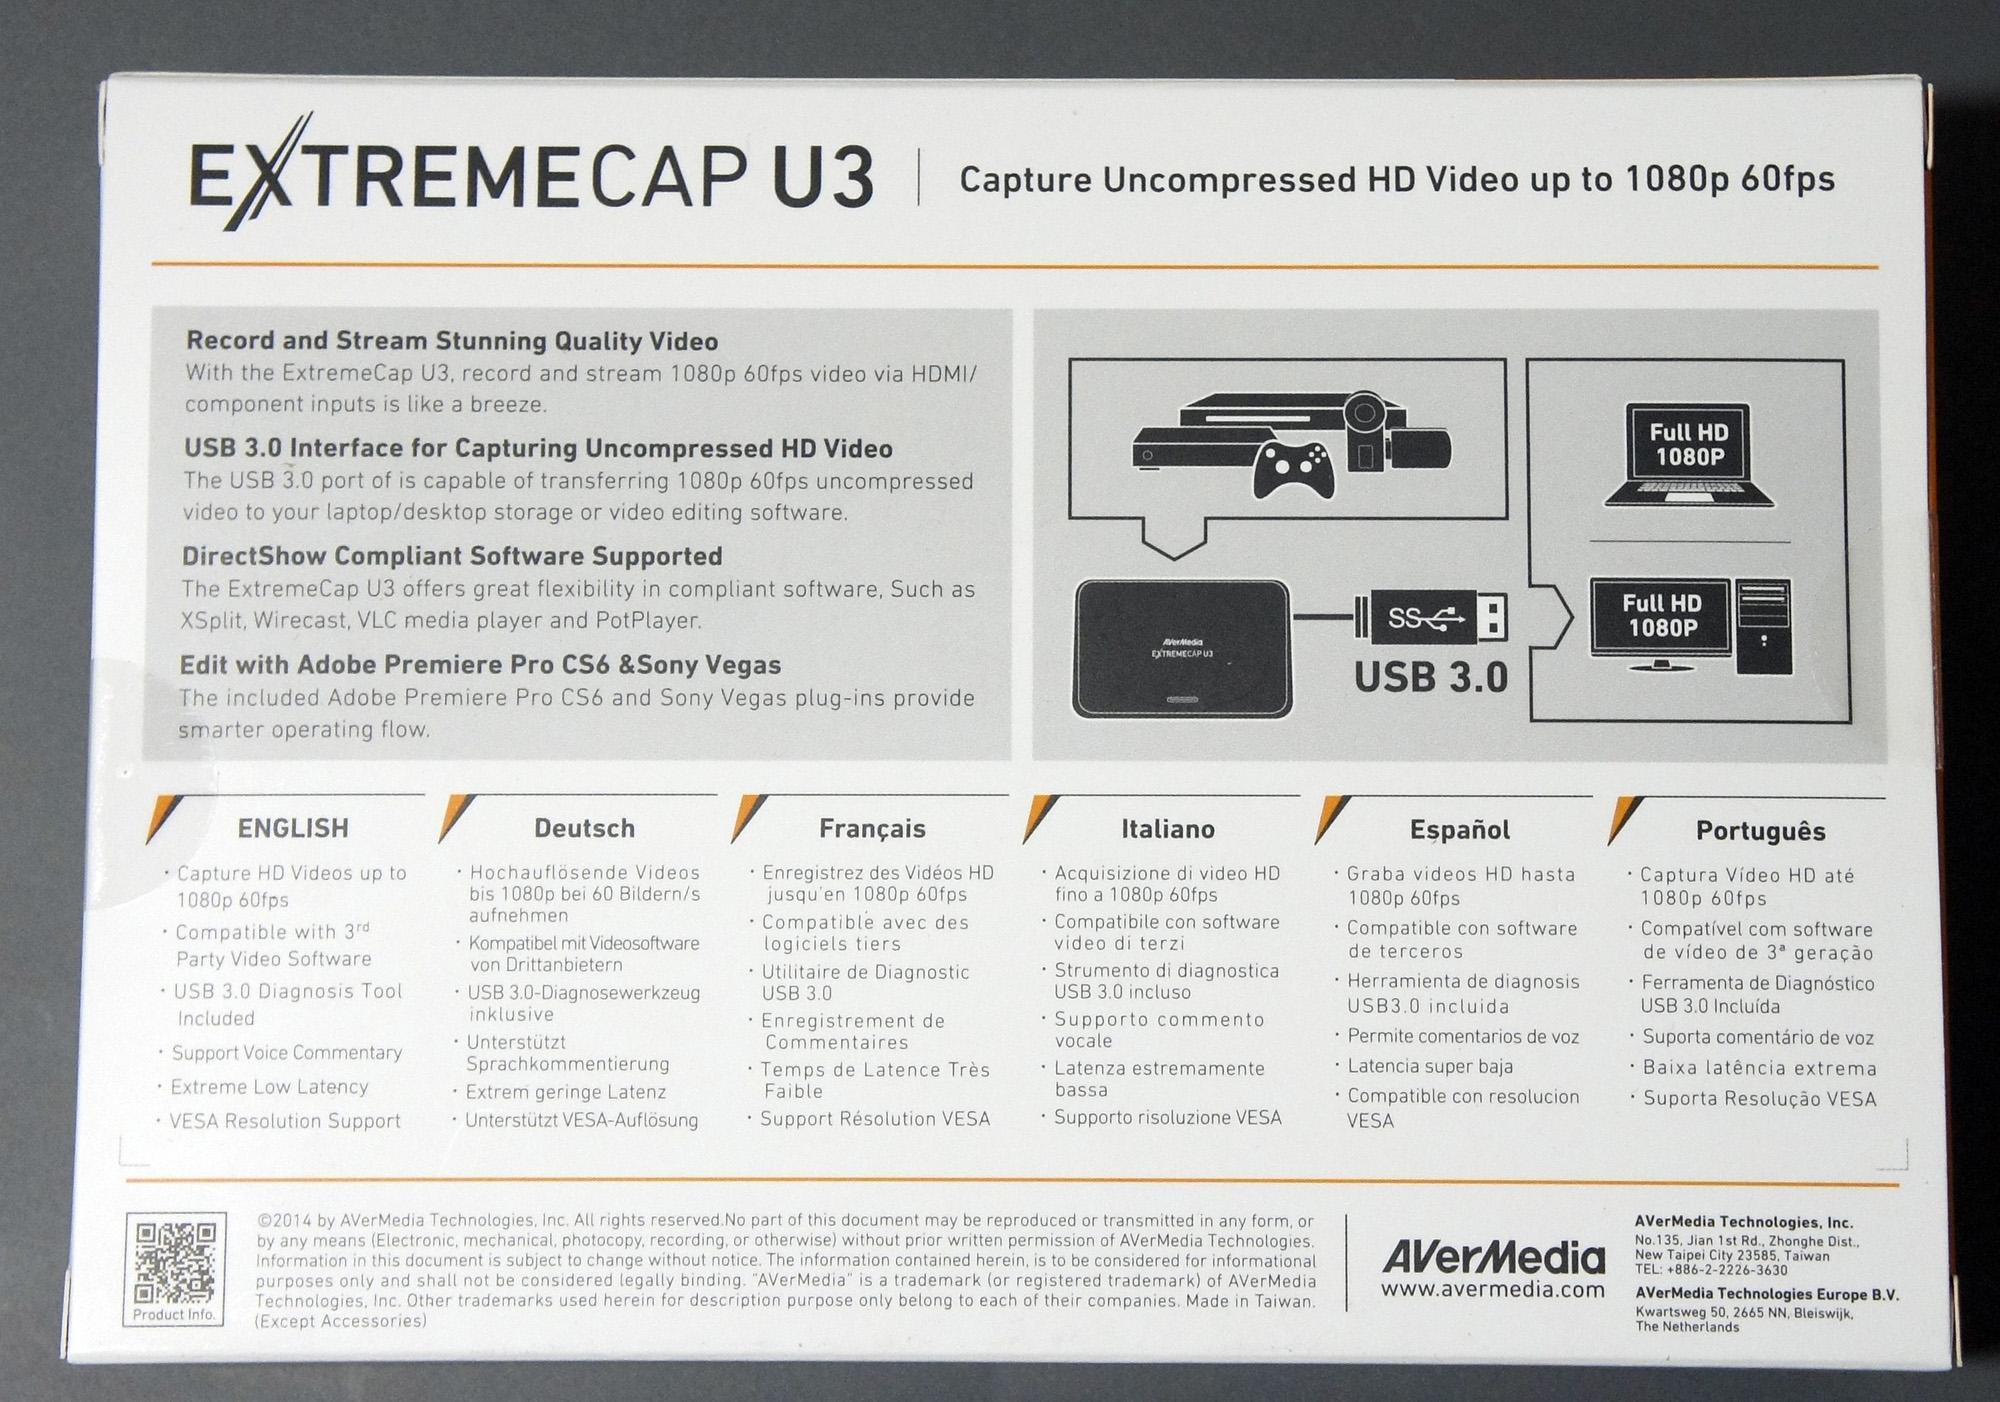
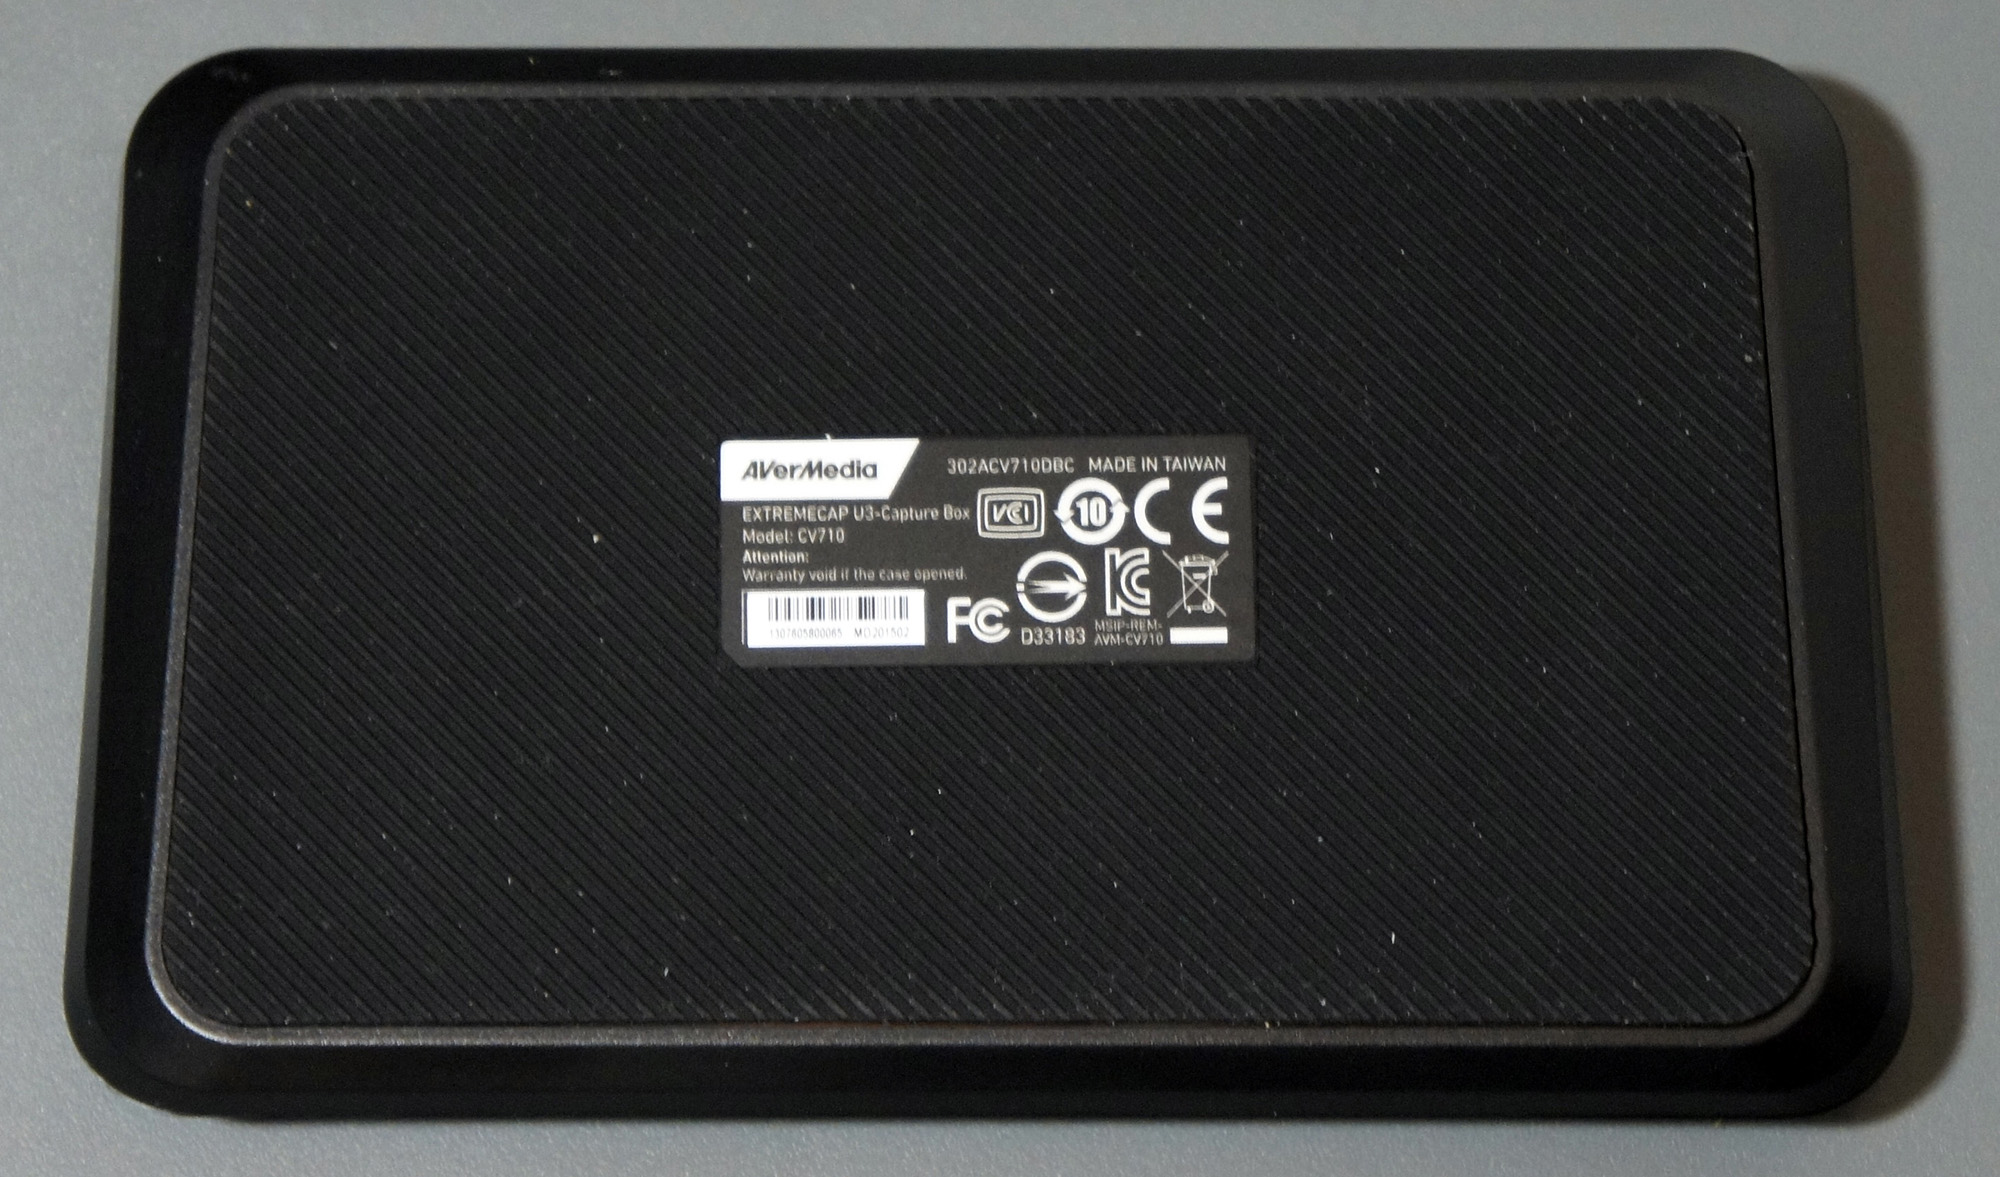
In any case, after researching for a while longer, I settled on the AVerMedia CV710 ExtremeCap U3 capture card. The ExtremeCap U3 released in late September 2013, and promised features such as 1080p game capture at 60 frames per second, and audio capture (including the ability to capture audio from a microphone attached to the PC), all in a tiny form factor that is ridiculously easy to set up and use as it relies only on a USB 3.0 connection to the PC. AVerMedia was gracious enough to send one for us to review.
Here are the specs for the CV710 ExtremeCap U3:
Specifications –
- Input:
- HDMI
- Component
- Recording Format:
- MP4 (H.264, AAC)
- Chroma Subsampling:
- YUV 4:2:2
Applications –
- Bundled Software:
- AVerMedia RECentral
- USB 3.0 Diagnosis Tool
- 3rd Party Plug-ins:
- Adobe Premiere Pro CS6
- Sony Vegas Pro
- Compatible Software:
- DirectShow compliant software: e.g., XSplit, OBS, AmaRecTV, Potplayer
System Requirements for PC –
- For FHD 1080p 60 FPS recording (H.264):
- Desktop:
- CPU – Intel® Core™ i5-3400(Ivy Bridge) or above
- Graphics Card – NVIDIA GT630 or above
- RAM – 4 GB
- Laptop:
- CPU – Intel® Core™ i7-3537U 2.0 GHz(Ivy Bridge) or above
- Graphics Card – NVIDIA GT 735 M or above
- RAM – 4 GB
- For HD 720p 60 FPS recording (H.264):
- Intel® Core™ i3-3200 series with Ivy bridge platform and 4 GB RAM
- Intel chipset with native USB 3.0 host controller (Can be used together with these certified chipsets: Renesas, Fresco, VIA, ASMedia)
- Power requirement: USB 3.0 power
- Graphics Card: DirectX 10 compatible
- Windows 8.1 / 8 / 7 (32 / 64 bit)
- Desktop:
System Requirements for Mac –
- OS: Mac OS X v10.9 or later
- CPU: i5 quad-core or above for FHD 1080p 60 FPS recording (H.264)
- Power requirement: USB 3.0 power
- RAM: 4 GB or more
- HDD: At least 500 MB of free space
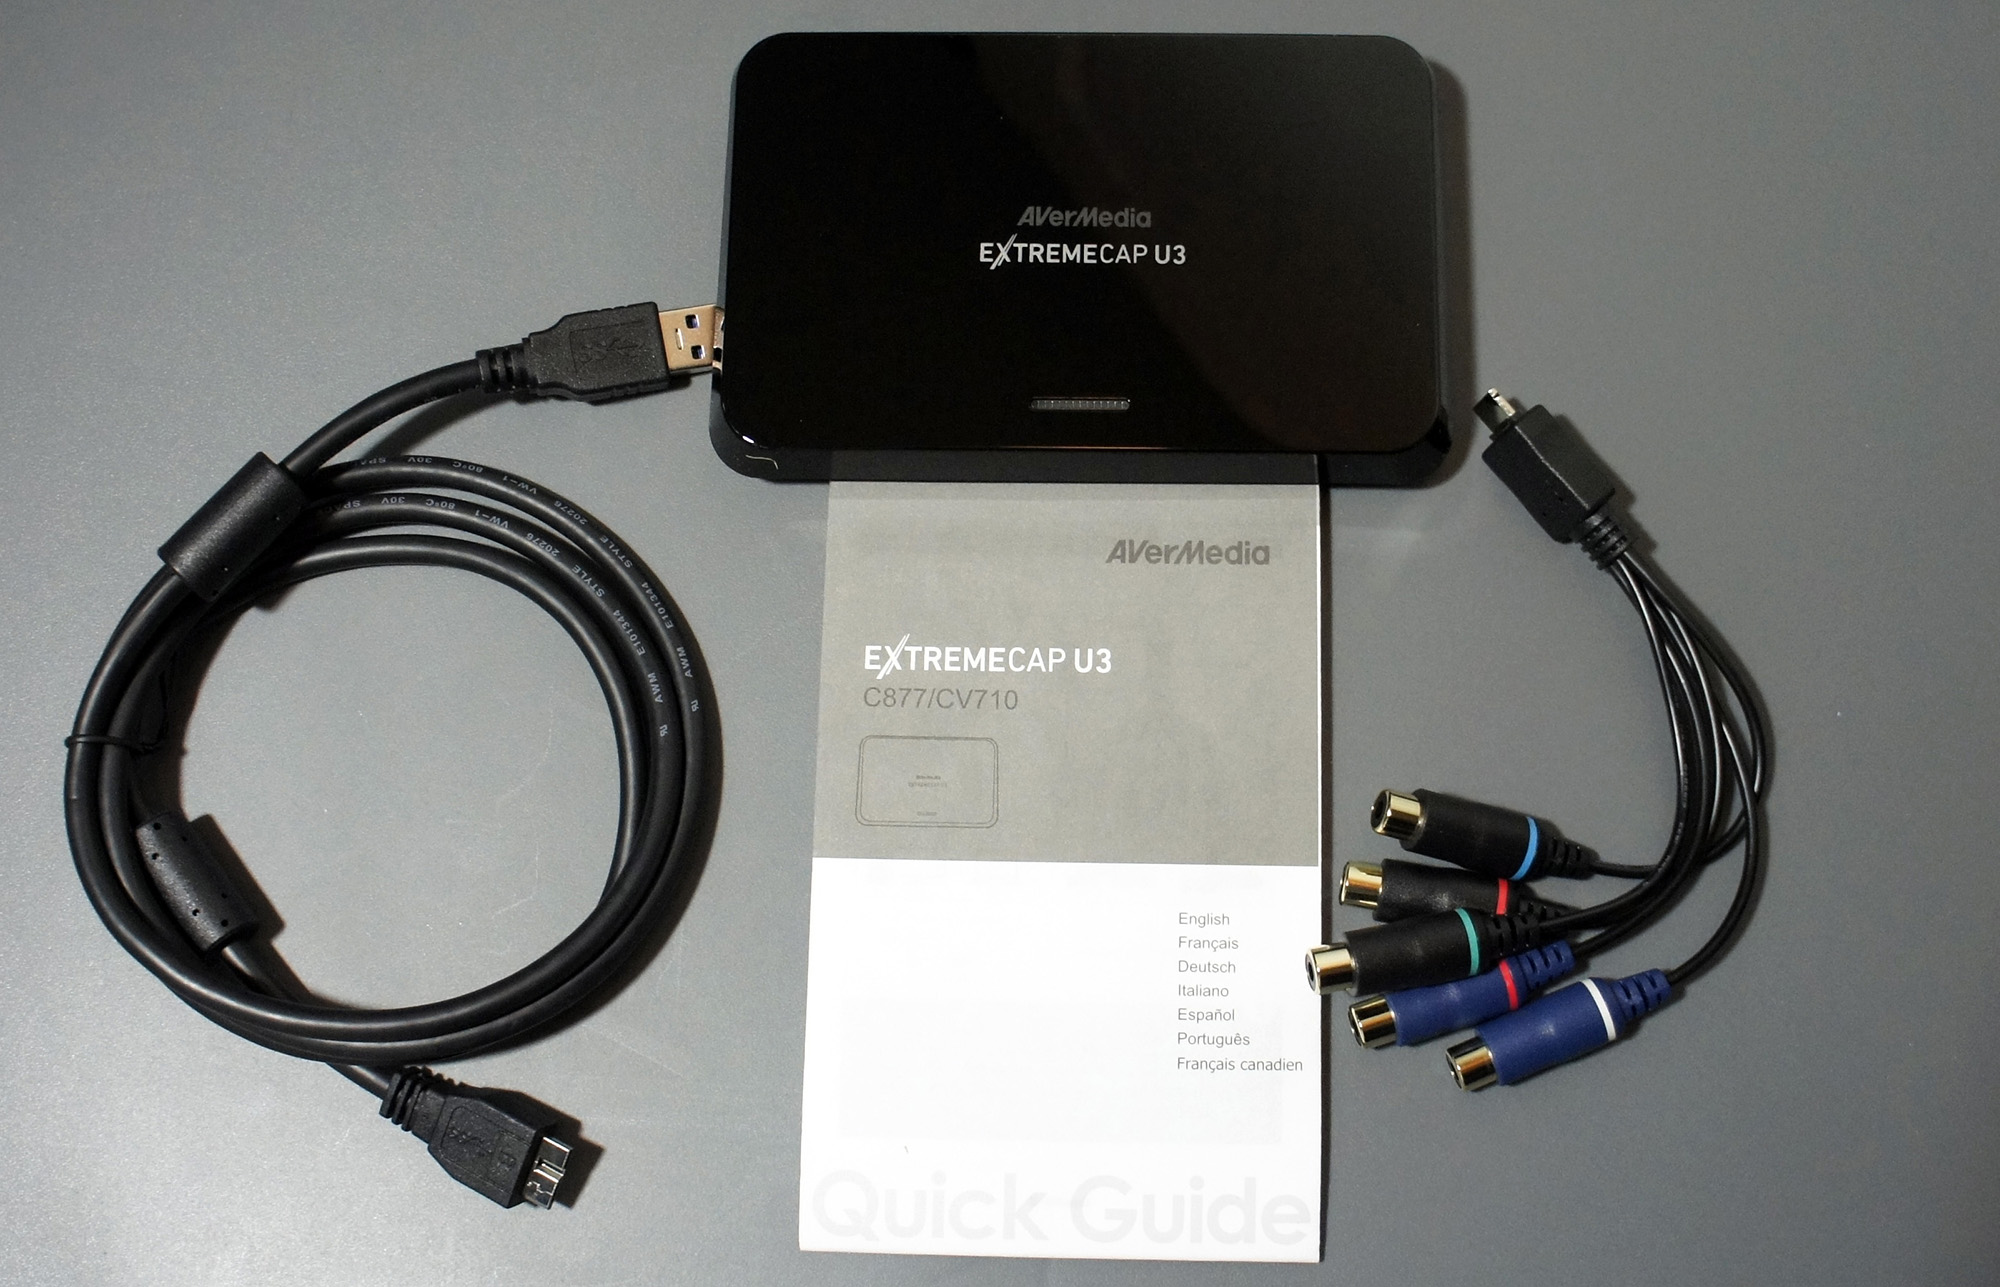
In the package –
- ExtremeCap U3 (Weight: 182g)
- Quick Installation Guide
- USB 3.0 cable
- Component Video / Stereo Audio Dongle Cable

The ExtremeCap U3 was incredibly easy to set up. First, I plugged the device into a USB 3.0 port on the computer. Next, I installed the latest software and drivers for Windows (since the PC used was running Windows 8.1). Interestingly enough, all the downloads on AVerMedia’s AP & Driver page have a counter for how many times each file has been downloaded. Considering the driver and software package we needed has been downloaded approximately 2000 times, it seems like we’re in a fairly small group of people that have an ExtremeCap U3.
Once that was done, we opted to run the bundled USB 3.0 Diagnosis Tool which checks to make sure that the USB 3.0 chipset on the computer is compatible with the ExtremeCap U3. Our system is running on the Intel X79 chipset, which lacks native USB 3.0 support, but the Fresco FL1009 powered USB 3.0 ports on our Gigabyte X79-UD7 were deemed fully compatible with the ExtremeCap U3.
We plugged our Wii U into the ExtremeCap U3 using an HDMI cable, and fired up the AVerMedia RECentral software. The menu that greeted us was fairly straightforward, giving us the option to choose whether we wanted to capture video or stream; and in both cases we could opt to use the Wizard to walk us through setting up our options. Alternatively, we could choose the 1-Click setting option which would automatically choose the recommended settings, or pick the Advanced setting option to be able to manually set everything up.
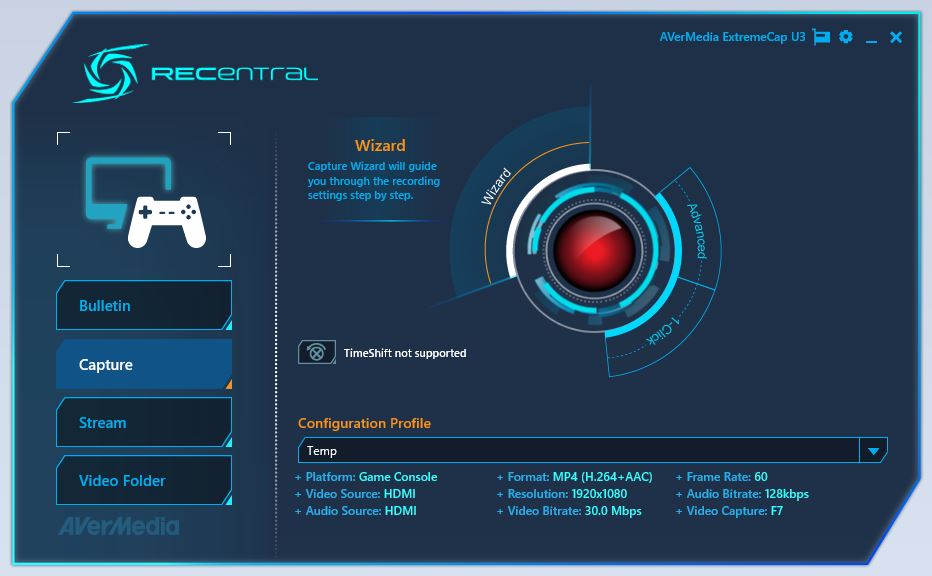
We went through the Wizard and used the 1-Click option, both of which worked flawlessly, but we preferred to choose our own settings manually to be able to tweak them, so we ended up using the Advanced settings option for our recording.
In the Advanced menu, we could tweak a variety of settings. The most notable options were the video format, resolution, framerate, and bitrate. We also could opt to record audio from a microphone connected to the PC and save it in the same file or as a separate mp3, which we found to be exceptionally useful for our video.
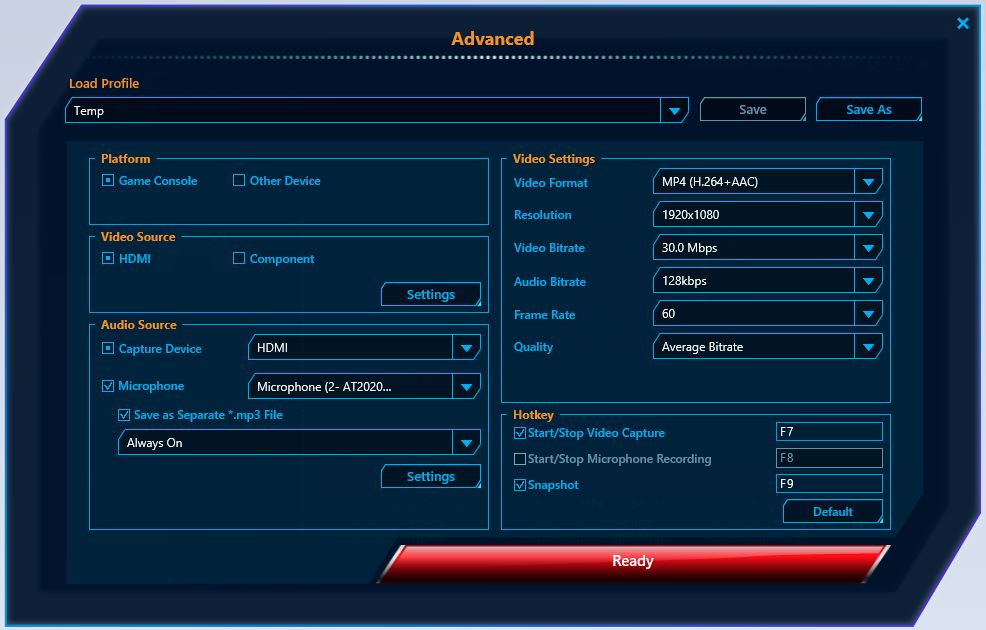
Once the settings were chosen, we were ready to go. We hit the ‘Ready’ button on the menu, and got to playing. Recording was a simple operation, it was just started/stopped with the press of a single button or desired key combination.
We found the recording quality to be exceptionally good. We opted to capture 1080p video with a 60 FPS framerate, an audio bitrate of 128 Kbps (since we were recording in stereo, that ends up being a bitrate of 256 Kbps), and a video bitrate of 30 Mbps. Our video bitrate was probably a fair bit higher than what’s necessary to record even at that resolution and framerate, but since our setup includes a 4x4TB RAID 10 array (8TB effective size), we weren’t too concerned about being frugal with our hard drive space.
While recording our first episode of Digital Ops (where we played the Battlefield Hardline Beta), we started out recording using the Xbox One’s Twitch.tv application, and then switched to the ExtremeCap U3. The difference in quality was staggering, as can be seen in the screenshots below.
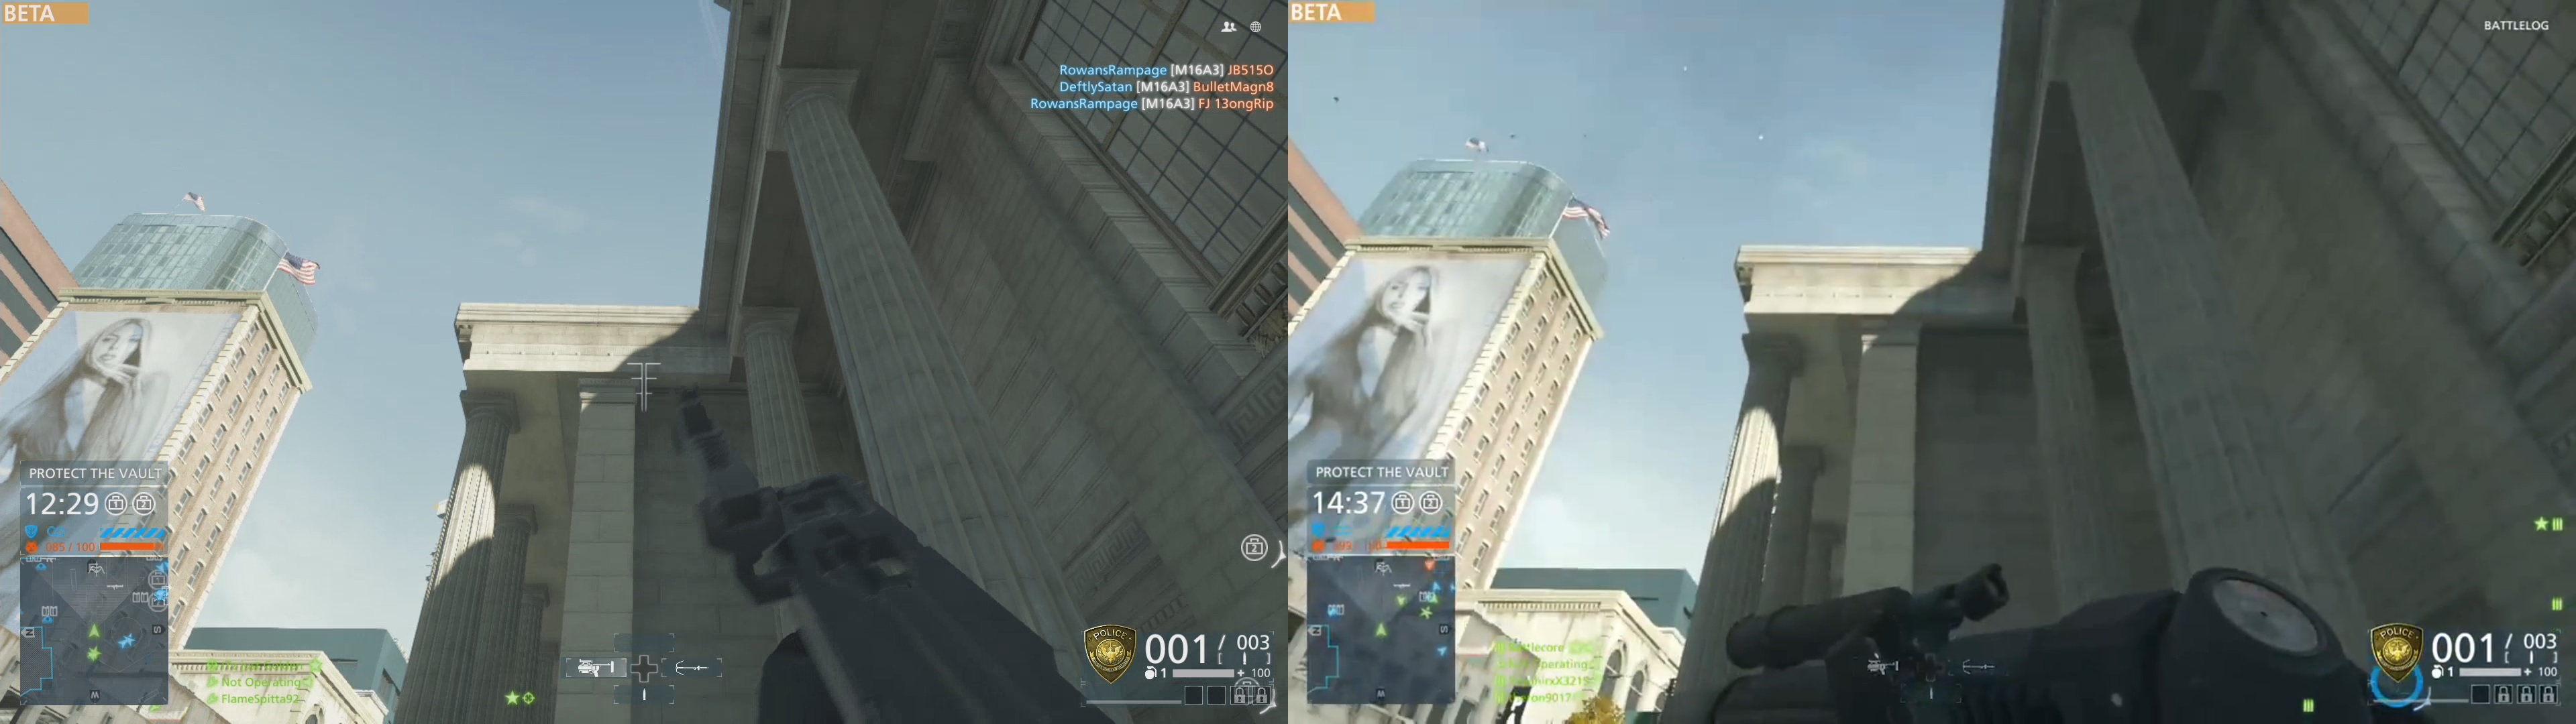
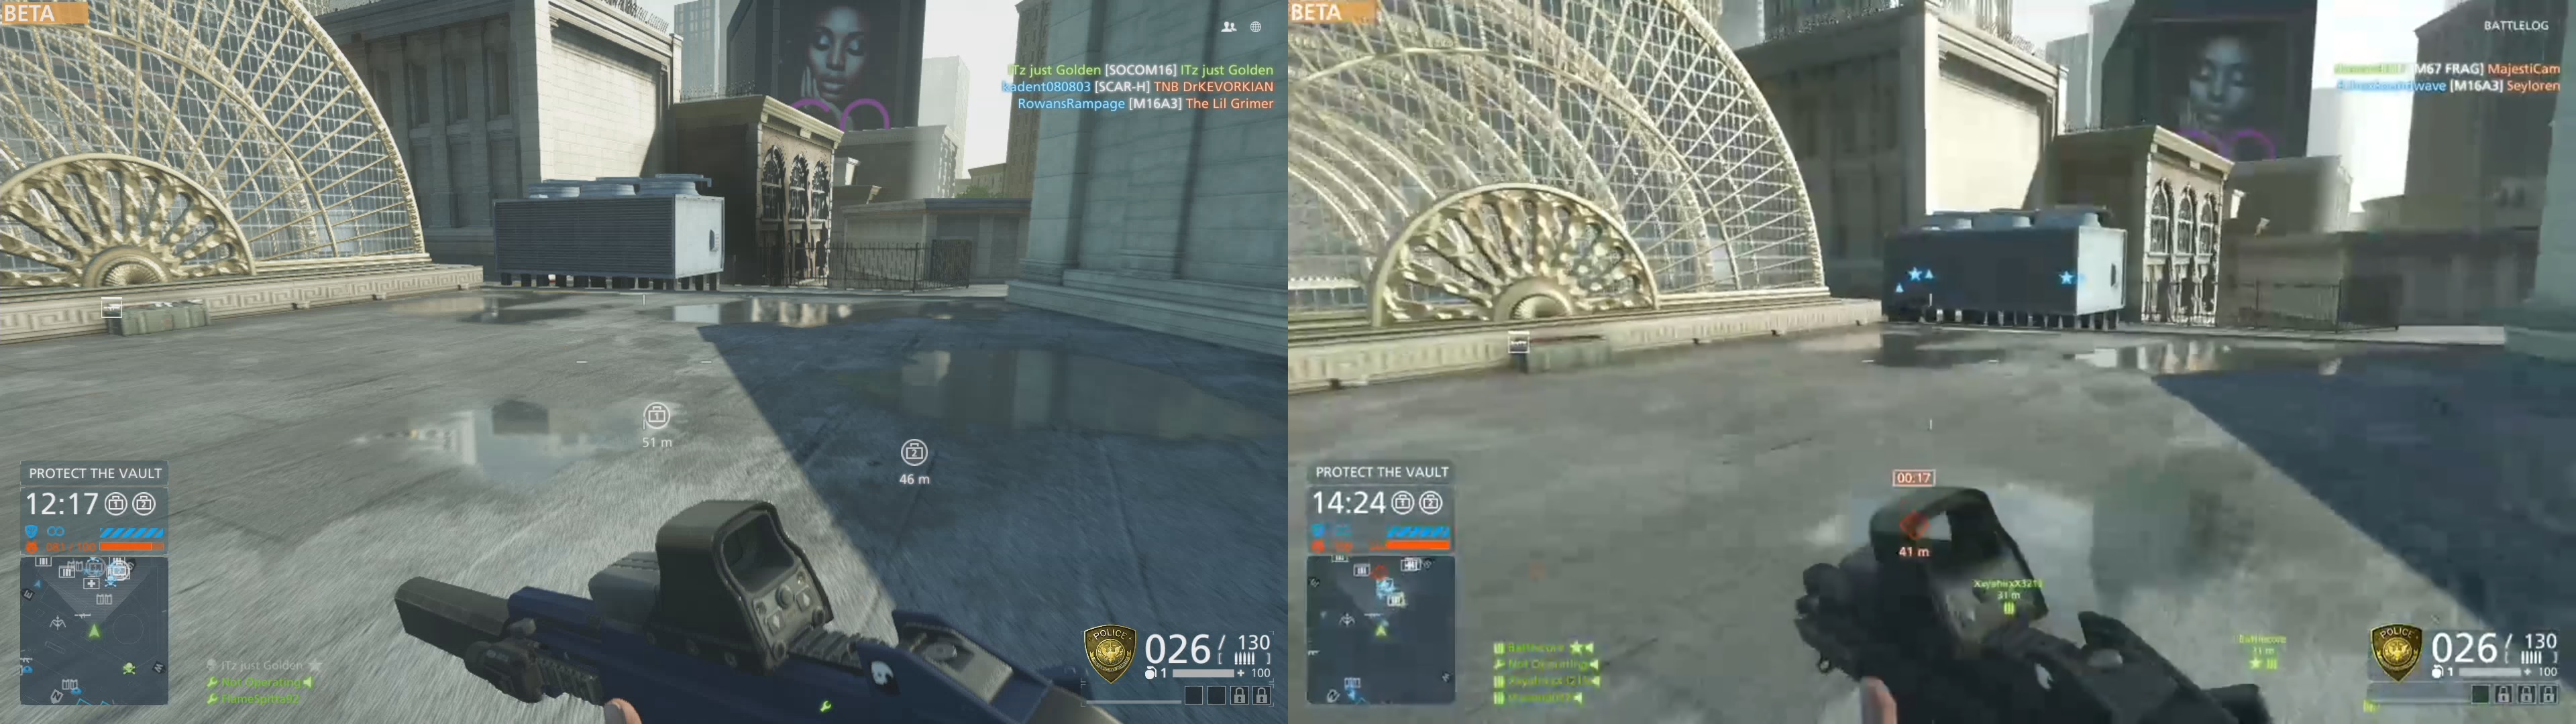
To see how video recorded with the ExtremeCap U3 looks, check out Episode 1 of Digital Ops here. We recommend viewing it using Google Chrome, as Youtube allows for 1080p video to be played at 60 FPS when accessed using Chrome.
Overall, we came away extremely impressed with the AVerMedia CV710 ExtremeCap U3 capture card. The build quality feels great, it’s small and fairly portable, it’s extremely easy to set up and use, and the software is fantastic. At a retail price point that is currently hovering around $170, it’s not the cheapest card on the market, but it certainly cannot be beaten on features or ease of use. We’d have no hesitation in recommending the ExtremeCap U3 to anyone looking to buy a capture card.